24
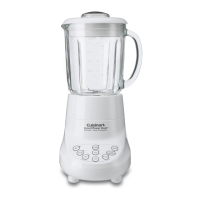
B. Jar Assembly
t 3FNPWFUIFMJEUVSO UIFHMBTT KBS "VQTJEFEPXO
and place it on a at surface.
t 1MBDFUIFSVCCFSTFBM#PWFSUIFSPVOEPQFOJOHPO
the bottom of the glass jar.
t 5VSOUIFCMBEFBTTFNCMZ$VQTJEFEPXOBOEQMBDF
the blade end into the opening of the jar. BE VERY
CAREFUL WHEN HANDLING THE BLADE ASSEMBLY
AS IT IS VERY SHARP.
t 1MBDFUIFMPDLJOHDPMMBS%PWFSUIFCMBEFBTTFNCMZ
and screw it on rmly by turning in a clockwise
direction.
N.B. The locking collar has safety interlock switches that
prevent the appliance from running if the jar assembly is
not tted properly.
t 8IFOBMMUIFQBSUTBSFBTTFNCMFEUVSOUIFKBSSJHIU
side up.
t 1MBDFUIFMJEPOUIFKBS
t *OTFSUUIFNFBTVSJOHDBQJOUPUIFPQFOJOHJOUIFMJE
and turn it clockwise to lock it in place.
N.B. The lid must always be in place on the appliance
when it is running.
t $BSFGVMMZ QMBDF UIF KBS PO UIF NPUPS IPVTJOH
Improper positioning could result in damage to the
safety interlock switches.
Note: the jar can be tted onto the motor housing in
4 dierent positions. The handle may face left or right,
depending on your preferences.
t 1MVHUIFBQQMJBODFJO:PVSCMFOEFSJTOPXSFBEZGPS
use.
C. Dismantling the jar
t 5VSOPòUIFBQQMJBODFBOEVOQMVHGSPNUIFNBJOT
t -JGUUIFKBSGSPNUIFNPUPSIPVTJOHUPSFNPWFDBSFGVM
not to unscrew the jar from the locking collar while it
is on the motor housing).
t 5VSOUIFNFBTVSJOHDBQJOBOBOUJDMPDLXJTFEJSFDUJPO
and remove from the lid.
t 3FNPWFUIFMJE
t 5PDMFBOUIFKBSUVSOJUVQTJEFEPXOBOEQMBDFPOB
at surface. Unscrew the locking collar by turning in
an anticlockwise direction.
t $BSFGVMMZSFNPWFUIFCMBEF#&7&3:$"3&'6-8)&/
HANDLING THE BLADE ASSEMBLY AS IT IS VERY
SHARP.
t 3FNPWFUIFSVCCFSTFBM
N.B. Careful not to lose this part as it is necessary for
proper operation of the appliance and its watertightness.
D
C
B
A