14
Stage 3
Laminating
Laminating
Corners and bandaging
Laya200mmsquarepieceofmatontheroofdeckand‘wetout’onboth
sides with resin (see hardener addition chart) using a 70mm application
roller. Place the mat onto the face of the adjoining trims with the bottom
edge on the radius of the trim. Fold around the corner and fold over the
top of the trim down on to the deck. It will be easier to dress and feather if
the mat is cut vertically from the top corner of the trim upwards. Using the
70mm roller, 50mm laminating brush and small consolidating roller, feather the corners into place. Any joint in the trims should be bandaged
using the same mix of resin. If any boards are not completely engaged these joins should be bandaged, even a small gap may cause resin to
leak through the boards which will lead to porosity in the laminate.
If any nails holding the trims are not going to be covered with laminate on the deck or corners they should be laminated with a small piece of mat.
The deck of the roof can be laminated before the corners and bandages have cured.
Bandaging for all other details can be completed as outlined in the GRP Edge Trim section.
Laying the main laminate
Unroll 1m of previously cut mat along the lowest part of the roof and align so it
can be unrolled across the roof without running off-line. Carefully roll the mat back.
Togetaratioof3:1one-thirdCureItRoongResin(withhardeneradded)shouldbeappliedontheboardandtwothirdsresinandhardener
on the mat dip the 140mm application roller into the bucket of resin. Lift the roller out of the bucket and without letting the excess run off,
drop3rollersfullontotheboardandcoat1squaremetre.Thiswillensurethatthereisaratioofone-thirdresinontheboard.
UnrollthematontotheCureItRoongResincoatedboard.Instripsof140mm(1rollerwidth)wetoutthematbydropping1rollerfullinthe
middleofeach140mmrun,pushtherollerawaytotheendofthe1metrerun,thenpullbackoverthefull1metre(gure4.)
Continueacrossthe1m²(approximately6runs)andthenrolltherolleroverthewholeareaagaintoensuregoodevencoverage.
Wetoutthenext1m²ofboardinthesameway,rememberingtouseonethirdoftheCureItRoongResinontheboardandtwo
thirdsofresinonthemat.Rolloutthematoverthenext1m²ofwetoutboardandcontinuetorollouttheCureItRoongResinas
previously described.
Note:
• Never attempt to lay a roof in wet weather or when wet
weather is forecast.
• If it starts to rain while you are laying a roof, the roof must be
coveredandmustnotgetwet,alwayskeepalargevisqueen
sheetonsitetocovertheroof.Thevisqueenwillnotbondto
the curing laminate
• If rain is forecast while laying boards, the boards can be
temporarily sealed with a coating of resin. Always ensure that
as much of the roof is covered as possible, ensure that edges,
or areas of possible water ingress are covered.
• If decking has become damp, do not attempt to lay laminate
on top.
• Always ensure that the surface you are laying onto is completely
dry and free from debris before you start. A wet surface can lead
to delamination
Note: Avoid spillages by masking off the roof properly,
anesprayiscausedwhenusingtheconsolidatorroller,
wind can carry this a considerable distance. It is important
to ensure that this is considered before the resin is used
on the roof. When resin has cured, there is no easy way
of removing it from car paintwork without damaging the
paintwork. (see spillages in the troubleshooting section.)
YOU MUST FOLLOW THESE INSTRUCTIONS TO
GAIN THE CORRECT RATIO OF RESIN TO GLASS.
Any other protrusions such as pipes, skylights or other
potential weakspots should also be laminated around/over
at this point.
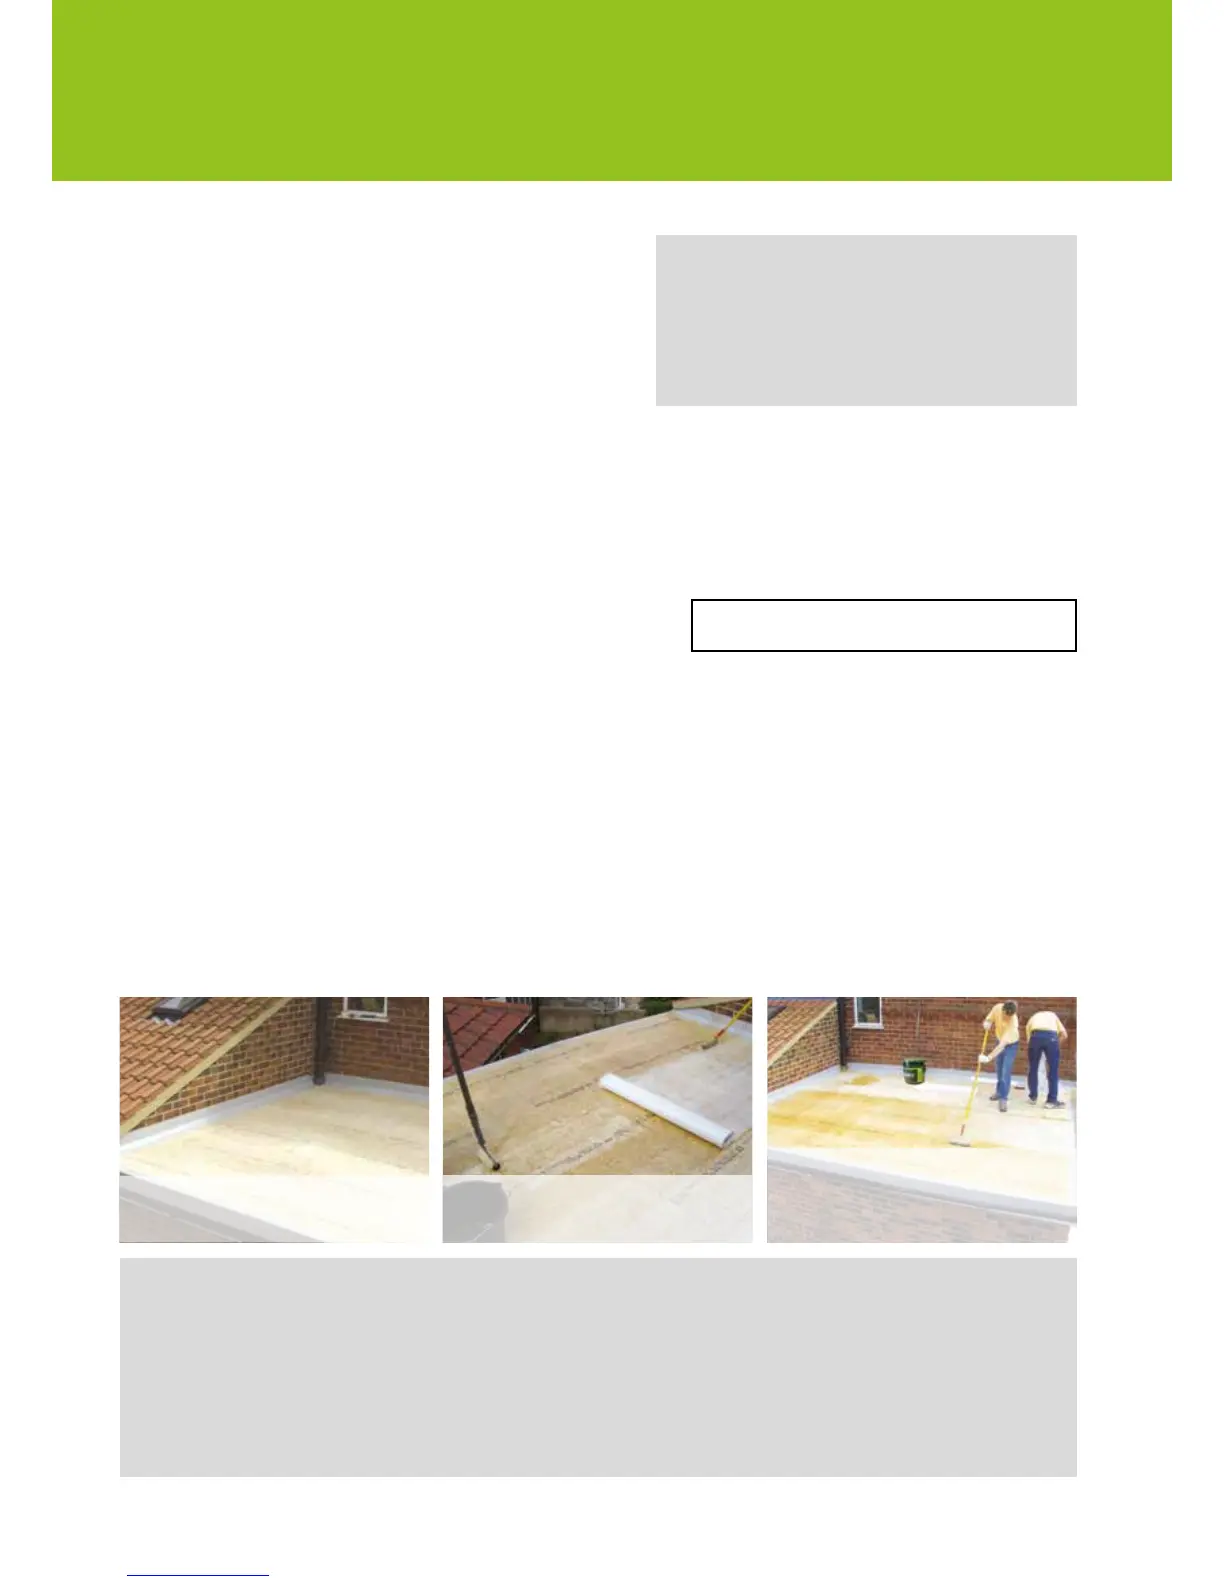
Any joints between trim lengths are bandaged over.
A polyester roller is used to apply the resin to the
Reinforcement Mat.
CureItRoongResinisappliedtothedeckbeforethe
Reinforcement Mat is laid on the roof.
After the Reinforcement Mat has ‘wet out’, the consolidator
roller is used to expel air from the laminate and ensure the
Reinforcement Mat has been saturated by the resin. No
white patches should be visible.
As the Reinforcement Mat absorbs the resin, the laminate
becomes transparent.
 Loading...