13
Stage 2/3
Edge trims/laminating
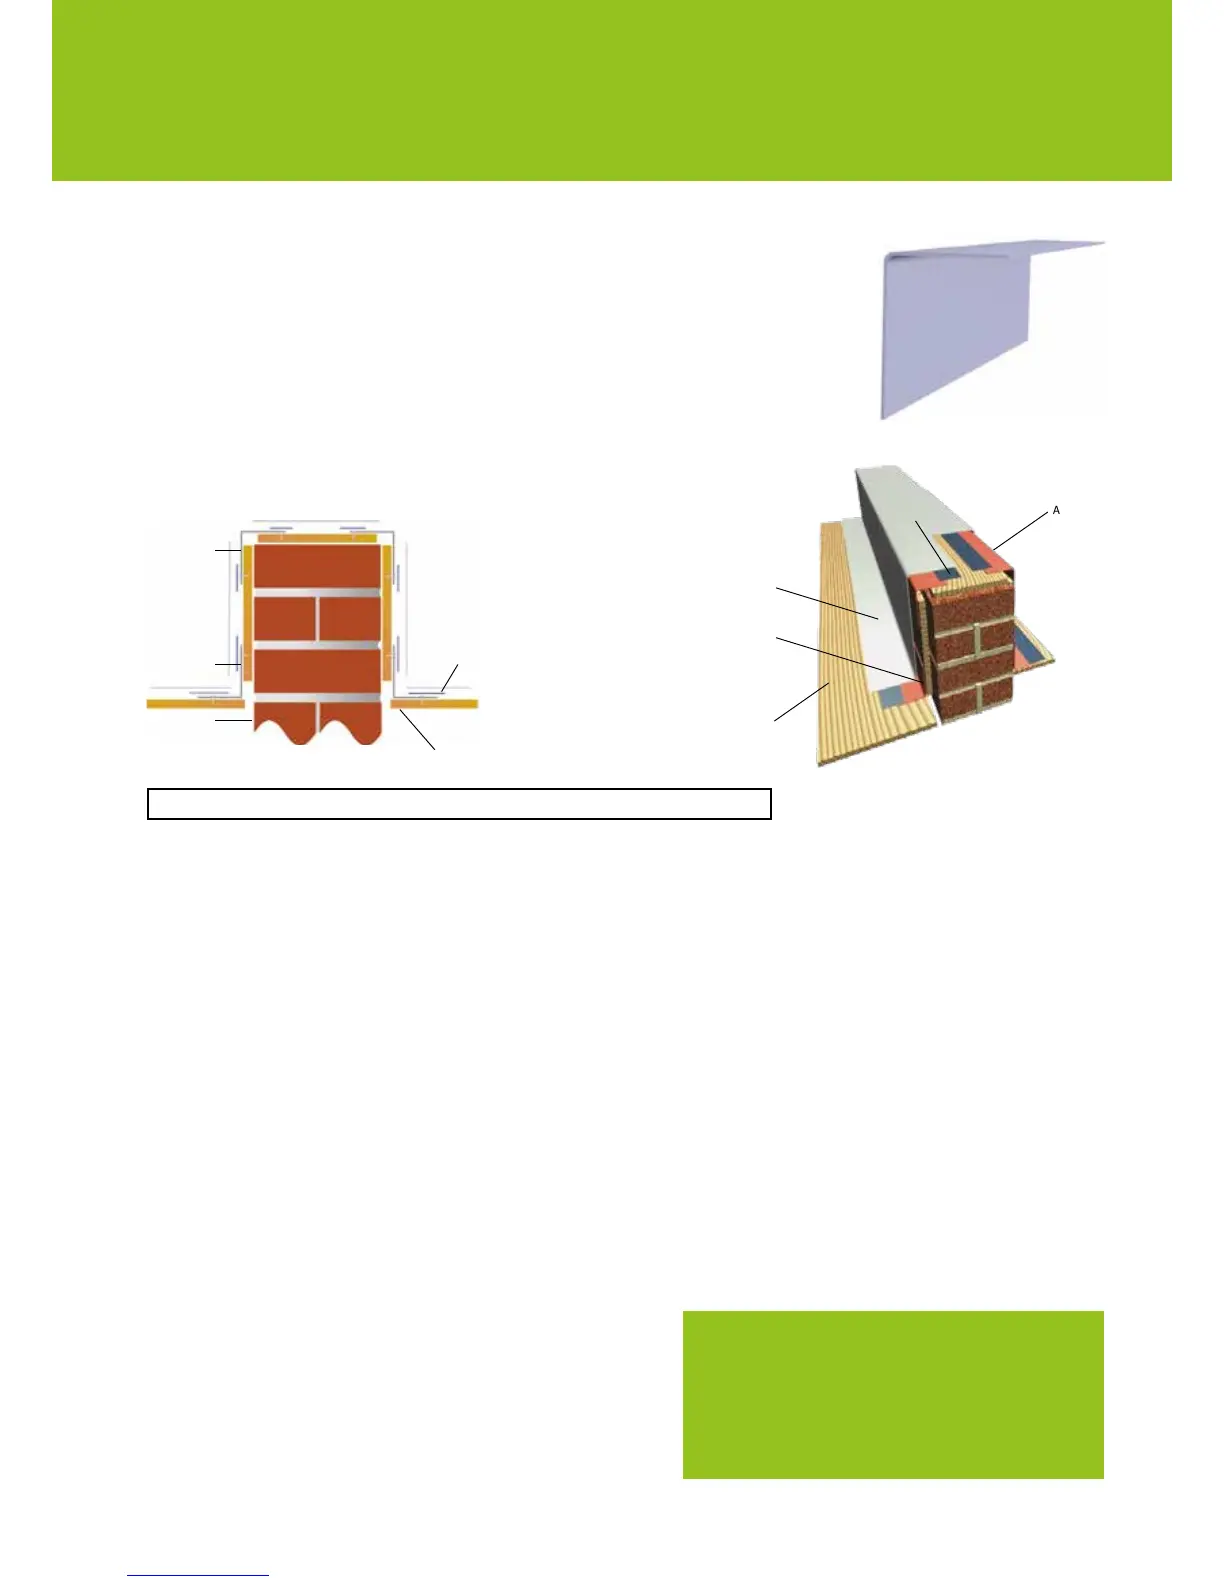
AT195 Internal and External
The AT195 Internal and External trims are used wherever the laminate needs to cover an area
which needs to continue at another laminated surface. The AT195 Ext is supplied with a high-
adhesionnishonitsinnerfasciaandshouldbeusedforcappingapplications.TheAT195Int
trimissuppliedwithahighadhesionnishonitsouterfasciaandshouldbeusedforinternal
corners, step applications or in gulleys
*
. The trim should be nailed at both edges if possible.
Always bandage over the join between where the nails penetrate the trim and the decking
before applying the laminate.
TRIM DETAILS: AT195 Ext: External angle trim. AT195 Int: Internal angle trim.
Cure It Reinforcement Mat
Beforethereinforcementmatislaidout,thedeckmustbecleananddryandallthetrimsxedinplace.Themathasacutedgeanda
feathered edge. Always overlap the feathered edge on top of the cut edge.
The mat is usually best laid parallel to the drip trim. Start by rolling the mat out, overlapping the trim by at least 50mm but not over the edge
of the trim. Leave the ends long at this stage. Roll out each 1m wide strip overlapping each time by at least 50mm right across the roof. The
ends can be cut off with a Stanley knife into the corner of the trim to leave a straight and neat edge.
Decideonthebestplacetonishlaminatingtherooffrom.Rollthematuptothefurthestpointfromtheladder.Leavetherollsontheroof
where they have been laid out to avoid any mix up if there is a deviation in size or angle from one length of mat to another.
Corners and joints
Cut200mmsquaresofmatforeachcornerand200mmstripsofbandageforeachtrimjoint.
Laminating the roof
Cure It Roong Resin
CureItRoongResinissuppliedintinsof20kg(foreaseofmixing,simplyusethemeasurementsontheCureItMixingBucket).
The Cure It Mixing Buckets are graduated in kilos which will allow easy calculation of the amount of hardener needed depending on the
ambient temperature. Hardener must be added to all resin and topcoat in order for it to cure.
Remove the lid from the can using a long screwdriver to bend back all of the lugs on the lid. It is very important to stir the resin in the can
before use, ensuring the additives that have separated get thoroughly mixed in.
Itisgoodpracticetomixasmallquantityofresin(1or2kilos)tostart
with to laminate the corners and bandage the trims. This will give the best
indicationofthecuringtimeoftheresinandconrmifthecorrectamount
of hardener has been added to the mix. Always use a hardener dispenser,
it is best to aim for a curing time of between 20 to 30 minutes. Refer
to the Cure It Mixing Bucket for guidance on adding hardener or refer
to the hardener addition chart on page 17.
*
A D260 should always be used for areas with parapet walls or abutting walls to allow for expansion.
D260/D300 Application Diagrams
Techniques:IfalaminateofGRPrequiresaperfectnish,
i.e. it is somewhere likely to be frequently overlooked
such as a balcony, join lines between reinforcement mat
rolls can be avoided by feathering the reinforcement mat
This is achieved by roughly ripping a small strip off the
cut end of the reinforcement mat. When this is laid on top
of another feathered roll, the join will be seamless.
Brick
AT195 Int
AT195 Ext
Decking
GRP layer and
bandage
AT195 ext
Cure It laminate
AT195 int
Decking
Bandage
SEE THE TRIM APPLICATION SECTION ON PAGES 26 FOR FURTHER GUIDANCE