Do you have a question about the curt 18109 and is the answer not in the manual?
Connect the two platform halves using two holes, M10x20 carriage bolts, and M10 locknuts, tightening to 80%.
Place the 2" shank under the platform and then the support bridge under the shank. Secure with M10x80 carriage bolt and M10 locknut.
Attach the flat brace to the top middle of the platform and secure it with the M10x80 carriage bolt and M10 locknut.
Using the bottom two holes, connect the platform halves and connecting plates with M10x20 carriage bolts and M10 locknuts.
Fully align all bolts and locknuts. Ensure the shank is correctly positioned for the next step.
Insert the 2" shank into the foldable connection bar. Align holes, insert M16x80 bolt, secure with locknut, and insert pin.
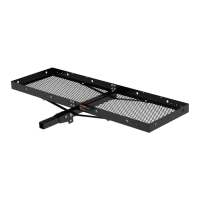
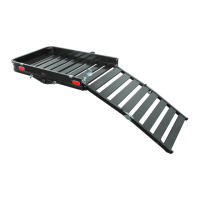
This document outlines the installation and assembly instructions for a folding, hitch-mounted cargo carrier. The cargo carrier is designed to provide additional storage space for vehicles, particularly for items that may not fit inside the vehicle or that are messy or odorous. It attaches to a vehicle's receiver tube, allowing for convenient transport of luggage, camping gear, tools, and other cargo. The folding design is a key feature, enabling the carrier to be stored compactly when not in use or to be folded up against the vehicle when empty, reducing its footprint and improving maneuverability.
The primary function of this device is to expand a vehicle's cargo capacity. It is particularly useful for road trips, outdoor adventures, or any situation where extra storage is needed. The open design of the carrier allows for the transport of items of various shapes and sizes, provided they are properly secured. Its hitch-mounted nature means it doesn't interfere with roof clearance or require specialized roof rack systems, making it a versatile option for many vehicle types equipped with a receiver hitch.
Key usage features of this cargo carrier include its folding capability, which enhances convenience and practicality. When not in use, the carrier can be folded up, minimizing its extension from the vehicle and making parking or maneuvering in tight spaces easier. This also helps in reducing drag and improving fuel efficiency when the carrier is empty. The carrier is designed to be robust, capable of carrying a significant amount of weight, making it suitable for heavy-duty use. However, users must always adhere to the specified weight limits of both the carrier and the vehicle's receiver tube to ensure safe operation. The open platform design facilitates easy loading and unloading of cargo. Users are advised to distribute weight evenly across the platform to maintain stability and prevent damage. Proper securing of all items with appropriate straps or netting is crucial to prevent shifting or loss during transit.
Maintenance features for this cargo carrier are relatively straightforward. The device is constructed from durable materials designed to withstand various weather conditions and the rigors of road travel. Regular inspection of all bolts, nuts, and connecting plates is recommended to ensure they remain tight and secure. Over time, vibrations and road conditions can cause fasteners to loosen, so periodic checks are essential for safety and longevity. If any components appear damaged or excessively worn, they should be replaced immediately. Cleaning the carrier periodically, especially after exposure to dirt, mud, or road salt, will help preserve its finish and prevent corrosion. While specific maintenance instructions for lubrication or specialized care are not detailed, keeping the moving parts clean and free of debris will contribute to smooth operation of the folding mechanism. Storing the carrier in a dry place when not in use can also help extend its lifespan by protecting it from prolonged exposure to elements that could cause rust or material degradation. Users should also be mindful of the warnings provided, such as avoiding carrying flammable items or materials that produce hot gases directly below the carrier, as this could pose a fire hazard. Adhering to these simple maintenance and usage guidelines will ensure the cargo carrier remains a reliable and safe accessory for years to come.
| Brand | CURT |
|---|---|
| Part Number | 18109 |
| Material | Steel |
| Color | Black |
| Finish | Powder Coated |
| Hitch Size | 2 inches |
| Hitch Class | Class III |