CURTMFG.COM
•
NEED ASSISTANCE?
•
87 7. 2 8 7. 8 6 3 4
•
18112-INS-RB
•
PAGE 6
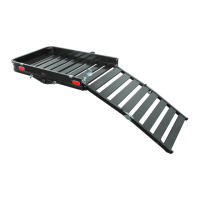
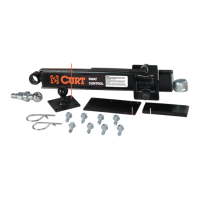
Step 4
Install the shank assembly (#10) on
the bottom bracket (#1) by aligning the
two upper holes in the shank assembly
with both holes in the bottom bracket.
Insert an M16 hex head bolt (#11)
through the hole in the shank assembly
and bottom bracket nearest to the cargo
area. Secure with an M16 lock nut (#12),
tightening until shank assembly still
pivots freely.
Insert pin (#13) into the other upper hole
on the shank assembly and bottom bracket
and secure with a clip (#14).
Insert the shank assembly into the vehicle's
receiver tube, aligning the hole in the shank
assembly with the hole in the receiver.
Insert the M16 spring washer (#16) and M16
flat washer (#17) onto the M16 anti-rattle hitch
pin (#15). Insert the M16 hitch pin through the
receiver tube and the shank assembly hole.
Tighten until there is no longer any rattle.
Insert a clip through the M16 hitch pin.