4. Place console into position on console weldment.
NOTE: Do not pinch cables while lowering the console.
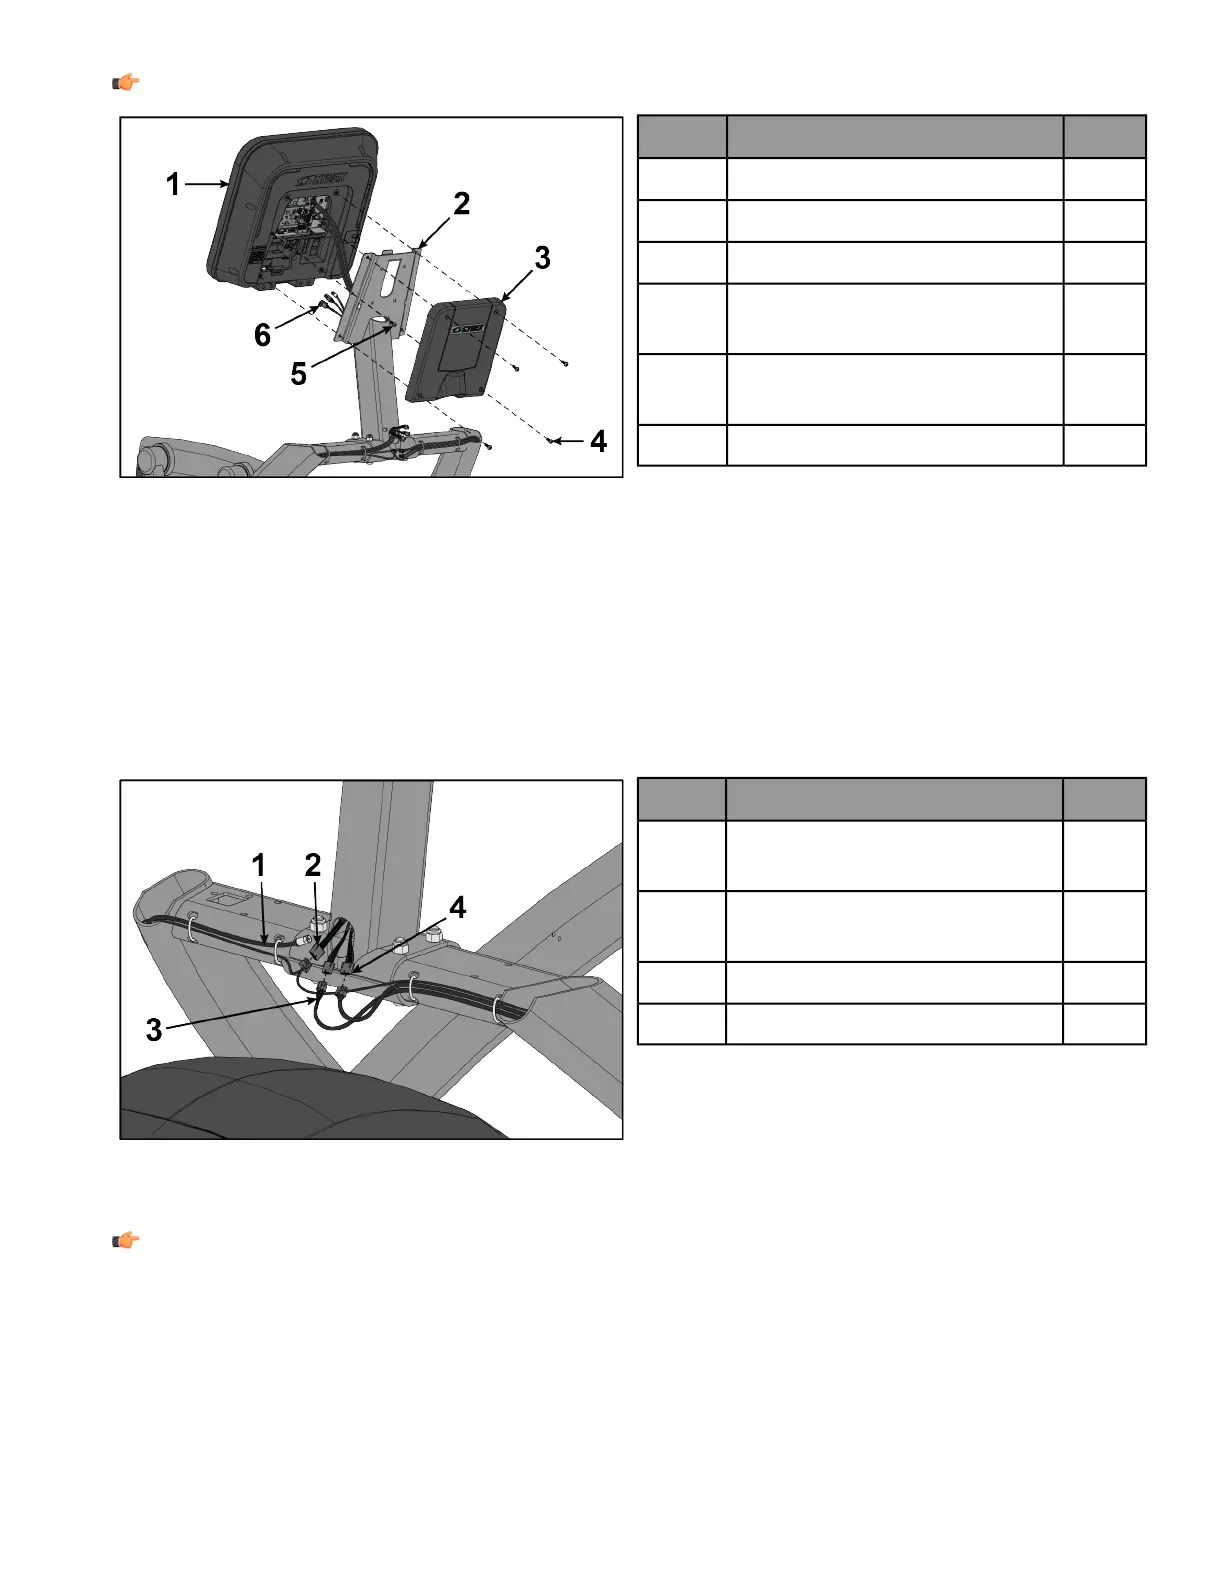
QtyDescriptionItem
1Console Assembly1
1Weldment, Console2
1Cover, Console Back3
4
Screw, Pan Head Phillips, M5 x 0.8
x 14
4
1
Grounding Screw, Pan Head
Phillips, M5 x 0.8 x 14
5
Media Cables6
5. Exit cables from hole at base of console weldment.
6. Install grounding screw securing console assembly to console weldment using a Phillips screwdriver.
7. Install screws securing console assembly and console back cover to console weldment using a Phillips
screwdriver.
Install Console Cables to Base (Basic Cabling)
This procedure applies to the Basic Cabling option.
1. Plug upper display cable into lower display cable.
QtyDescriptionItem
1
Cable, Coax
(previously routed to console)
1
1
Cable, Heart Rate and Keypad
Switches
2
1Cable, Base Signal3
1Cable, Console to Base Power4
2. Plug upper heart rate cable into lower heart rate cable.
3. Plug console power cable connectors into each other.
NOTE: Console power cables must be connected last.
Page 20 of 47

 Loading...