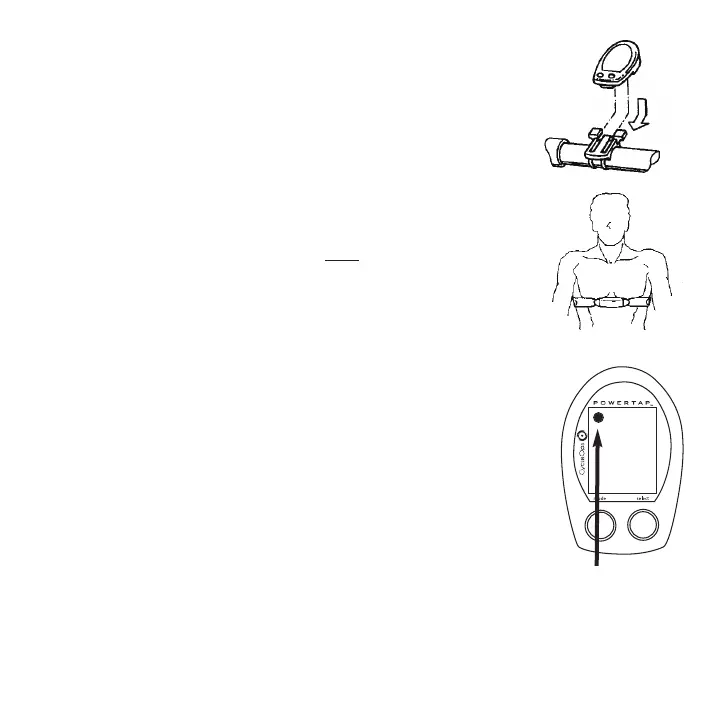
3. Place Computer into Shoe
Place the computer into the computer shoe on the handlebar or stem.
Line up the slots on the base of the computer with the bracket and slide
computer toward the rider (FIGURE 5). NOTE: Ensure the computer is fully
inserted onto the receiver shoe to prevent accidental removal.
4 Heart Rate Monitor Strap (SLC+, SL+ and PRO+ only)
Position the heart rate monitor strap on your torso as pictured in FIG-
URE 6. The
strap should rest just beneath the pectoralis muscles of
the chest. For best results slightly moisten the electrodes where con-
tact is made with skin. The heart rate strap must
be worn to enable
the heart rate function. NOTE: The chest strap for the PowerTap uses a
coded frequency and is not compatible with other manufacturer’s
chest straps. If heart rate is not displayed, consult finding sensors sec-
tion.
5. Verify Installation
Check to make sure all components are properly secured. Spin the
rear wheel and verify trans
mission. To turn computer on press
either button. The computer system may require 30 seconds to
“find” the hub. The illuminated transmition icon in the upper left
hand corner of the display indicates the hub is properly transmit-
ting a signal to the computer (Figure 7). If the transmission icon is
not illuminated consult Finding Sensors Section for further instruc-
tions
.
10
FIGURE 5
FIGURE 6
FIGURE 7