11Cyclone Canopy Installation - English
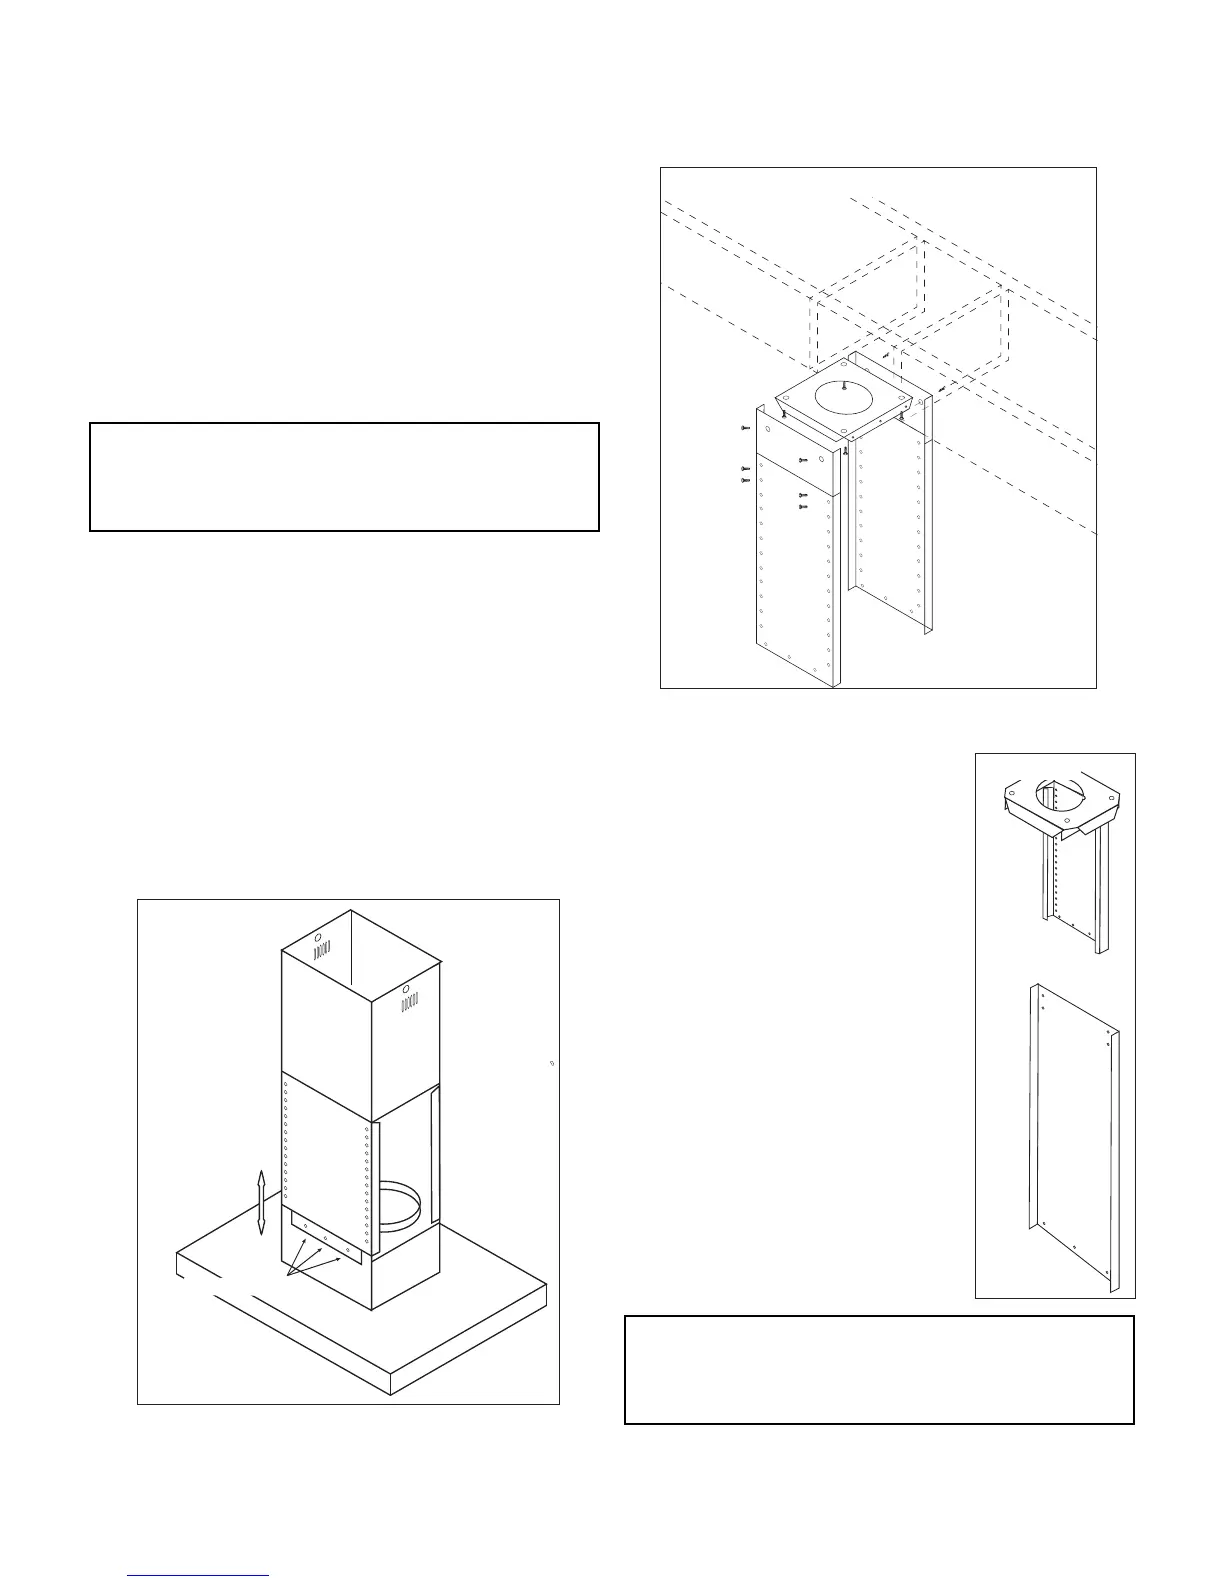
3. Positiontheceilingmountingplateinsuchawaythatoneof
thesideswiththreescrewholesfacesthefrontofthehood.
Secure mounting bracket to the ceiling using four wood
screws.Ensurethatscrewsaredrivenintothecenterofthe
framing for maximum strength. Assemble two upper side
bracketstotheceilingmountingbracketusingsixmounting
screws(threeperbracket)(Figure5&6).
4. Use eight screws to mount the lower brackets to the upper
brackets. Determine lower brackets mounting height based
uponinstallationheightDofthemountingbracket.
Install the Island Hood
1. Removetheltersfromthehood;attachtheadapter/damper
tothetopofthehood.
2. Measure the required length of 6” round metal duct from the
adapter/damper to the ductwork rough-in in the ceiling.
Connectthissectionofducttotheadapter/damperandseal
jointwithmetalfoilducttape.
Mounting Screws
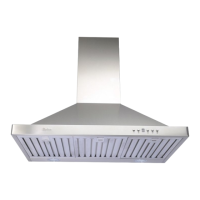
3. Slidethelowerandupperchimneyues
over the installed mounting bracket
andhaveasecondpersonholdittothe
ceiling.
4. Attachthehoodtomountingbracketusing
sixscrews(threeperside)(Figure7).
5. Slidethelowerandupperchimneyues
down on top of the hood. Install the
electrical connection and connect the
duct to the rough-in duct work in the
ceiling. Seal the joints with metal foil
ducttape.
6. Power up hood and check for leaks
aroundducttape.
7. Carefully slide the upper (inner) ue
overuptotheceilingandsecureittothe
mountingplatefrombothsides.
8. Reinstalllterstothehood,peelothe
protectiveplasticlmcoveringtheues
andthehood.
Note: For some models, the “L” shape support frame may be
used (Figure 8). e installation procedures are same except
that the hood is mounted on one side. If need be, use an
adjustable string wire from other side to keep the hood level.
Figure6.
Figure7.
Figure8.
Note: 10 Feet Ceilings
ForSI520,usethemountingbracketsandductcoverssupplied.
For any other models, optional extension mounting brackets
andductcoversneedtobeordered.