8 Cyclone Canopy Installation - English
Install the Wall Mount Hood
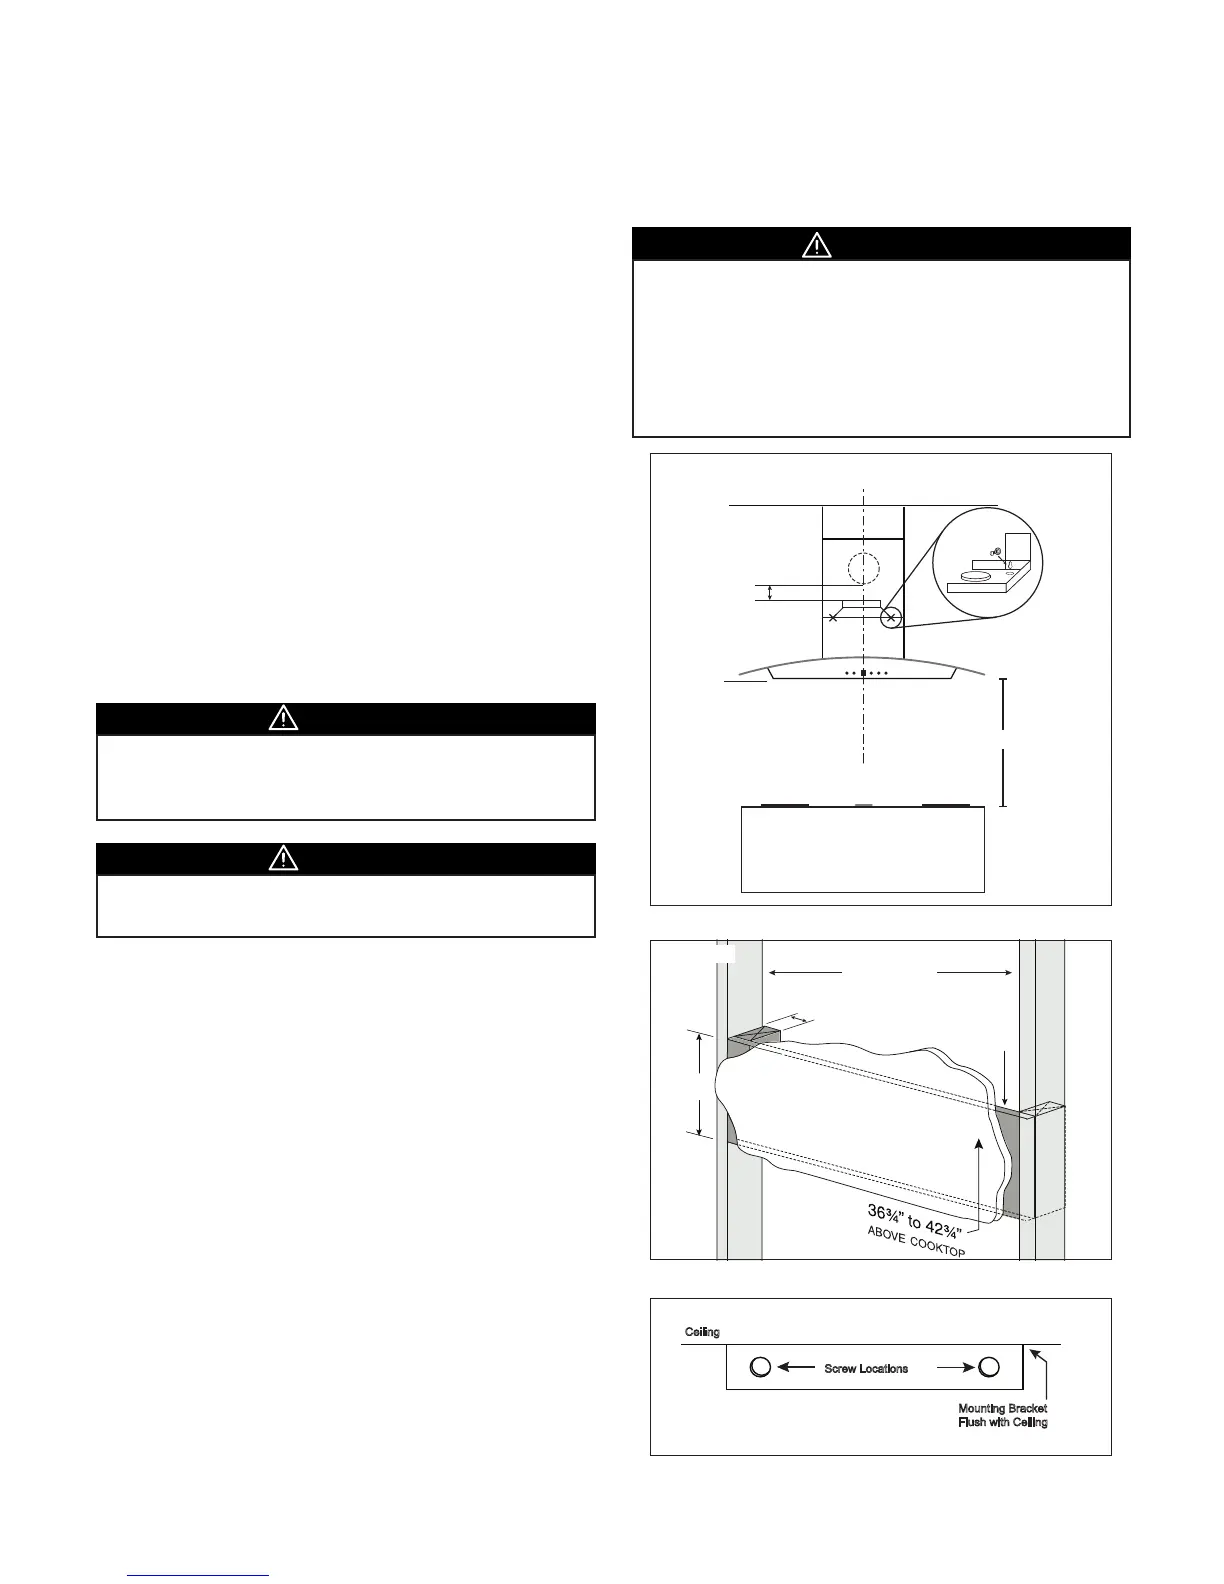
1. Measure from range top to hood bottom and use a leveler
to mark lineA (28”minimum fromrangetopforelectric/
ceramicstoves,30”minimumfromrangetopforgasstoves).
2. PlaceandmarkcenterlineC/L.
3. Use the hood fan as template to nd the mountingscrews
position. Keep the hood bottom centeredand levelon line
A.Markthepositionofthetwomountingscrews(Figure1).
Important: e minimum allowable distance from the top of the
damper on range hood to the bottom of the ductwork protruding
from wall is 3”.
4. Fastentwomountingscrewsintostudswherepossibleatthe
positionsmarkedwithanX.Donotfastenscrewsalltheway.
5. Wherestudsarenotavailable,youmustconstructwoodwall
framingthat is ushwith surface ofwall studs.Wood wall
framingshouldbeatleast1/2”thickand3”high.Assemble
wood wall framing to wall studs for a secure installation.
Makesuretheheightoftheframingallowsthehoodfantobe
securedtothewoodblock(Figure2).
6. Centertheuppercovermountingbracketwiththecenterline
andmountitushwiththeceilingbydrillingpilotholesand
usingsmallanchorsprovided(Figure3).
7. Install6”roundadapterifnotpreinstalled.
8. Removetheltersfromthehood.
9. Hang hood onto screws and hand tighten. If possible, use
extrascrewstofurthersecurethehoodtothewallfrominside
thehood.
10. Install 6” round duct over the adapter, connect it with the
ventingductcomingfromthewallorceiling.Usemetalfoil
ducttapetosealthejoint.
11. Installelectricalconnection.Turnonthehoodandcheckfor
leaksaroundducttape.
12. Placetelescopicductcoversontohoodandextendinnertop
ductcoverupwardsandsecuretoductcoverbracket.
13. Reinstall ltersto the hood. Remove protectiveplastic lm
coveringtheductcoversandhood.
• Woodblockingmayneedtobeaddedbehindthedrywall
ifno studsarepresent.Wall anchors mayalsobe used,
checklocalcodesbeforeusingwallanchors.
CAUTION
• Whencuttingordrillingintowall,donotdamageelectrical
wiringandotherhiddenutilities.
WARNING
Min. 3”
Min. 1 ½”
Framing Behind
Drywall
Wall Studs
C/L
A
Min. 28-30”
Min. 3”
Ceiling
Screw Locations
Mounting Bracket
Flush with Ceiling
Wall mount HooD InStallatIon
• Atleasttwoinstallersarerequiredduetotheweightand
sizeofthehood.
• Turnopowercircuitattheservicepanelbeforewiring
thisunit.
• Allelectricalworkmustbedonebyaqualiedelectrician
in accordance with all applicable codes and standards.
israngehoodmustbeproperlygrounded.
CAUTION
Figure3.
Figure1.
Figure2.