Figure 18 Successful BULK-OUT Transfer
1. Click the Transfer Data-OUT button again. The PC dispatches a second packet to FX2LP, and the 7-segment
readout increments to 2.
2. Highlight the Bulk in endpoint (0x86) entry. The Transfer button label now indicates -IN. Clicking this
button leads to the following:
• 512 bytes transfer from FX2LP to the host, which it displays as hexadecimal values.
• LED D2 flickers to indicate the IN transfer.
• The 7-segment readout decrements to 1.
3. Click the Transfer Data-IN button again. The second queued packet transfers to the host, and the 7-
segment readout indicates 0 packets waiting. This sequence confirms the double-buffered operation of the
two endpoints.
4. Select the Bulk out endpoint again. Then, position the mouse cursor inside the Text to send box and type
1234. The hex values display in the Data to send box and the Bytes to Transfer box increments for every
digit typed. Click the Transfer Data-OUT button.
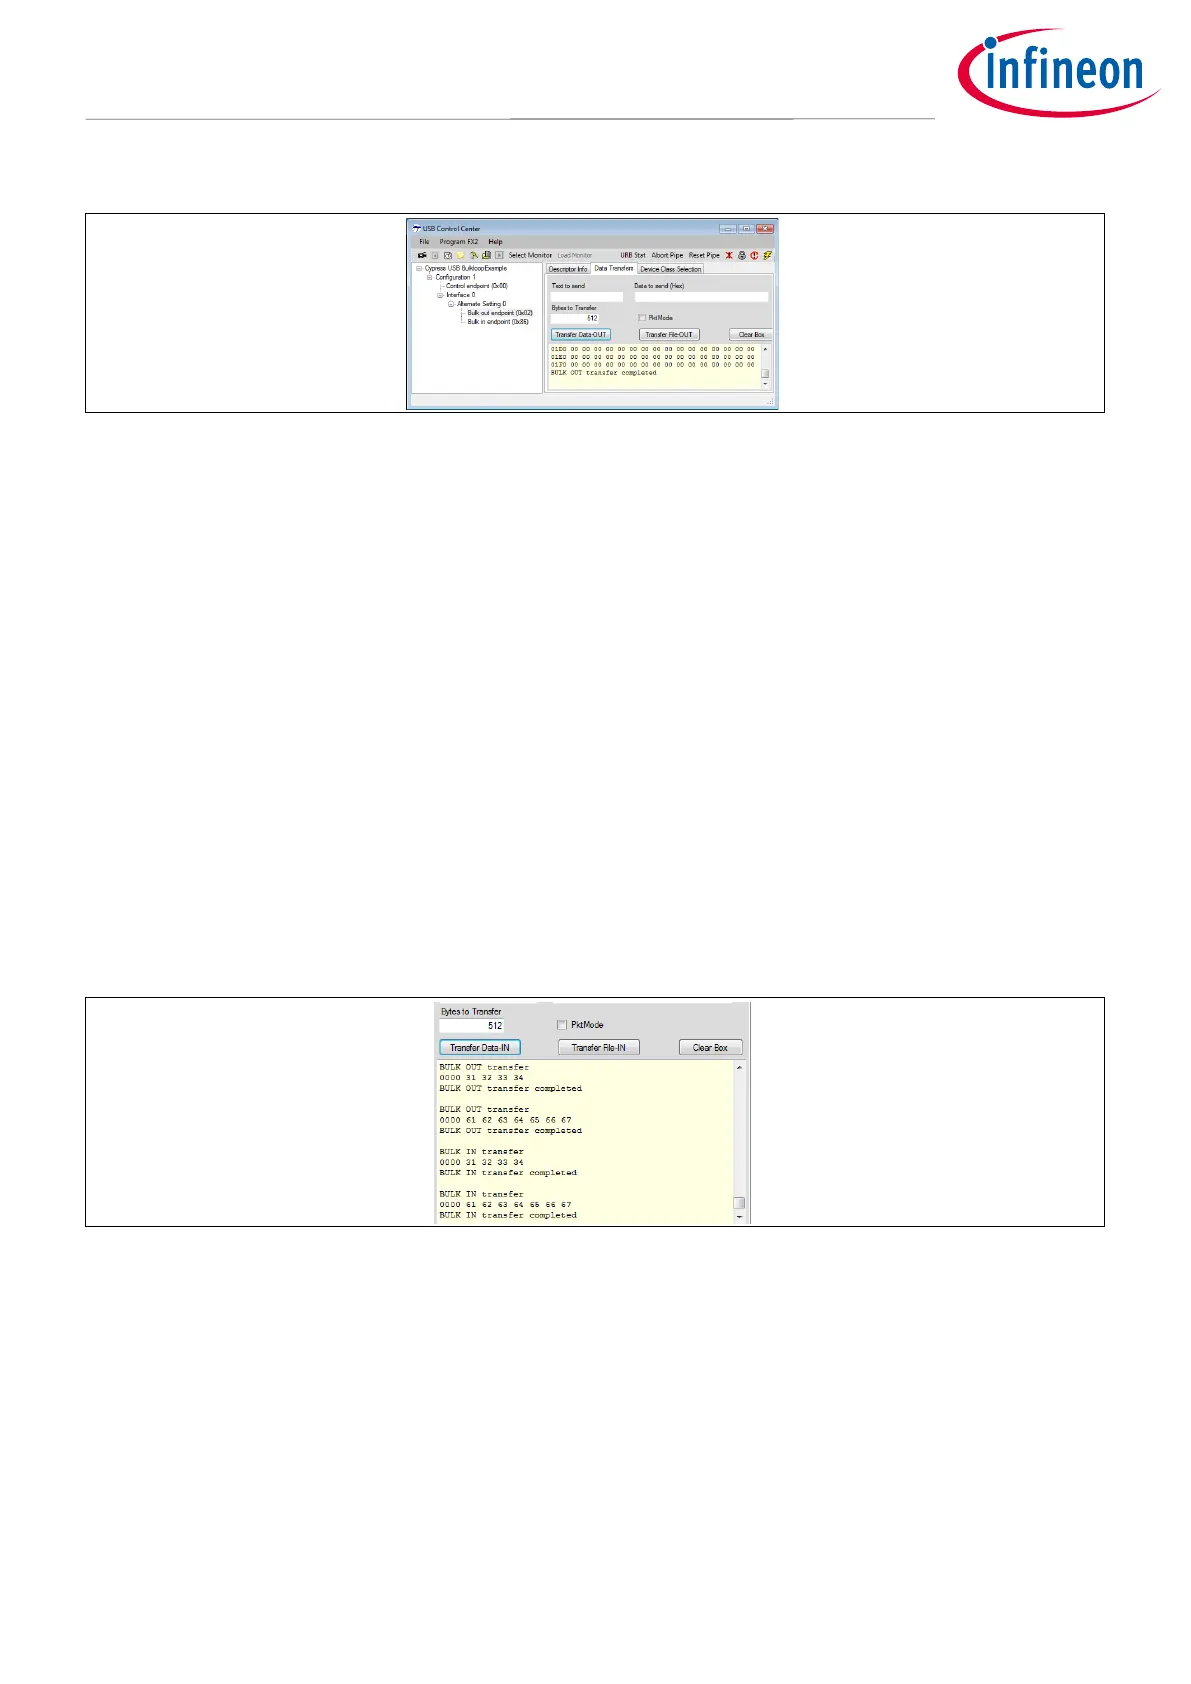
5. In the Text to send box, type abcdefg, then click the Transfer Data-OUT button.
6. Select the Bulk in endpoint, and leave the default Bytes to Transfer value of 512 bytes. Click the Transfer
Data-IN button twice to read the two packets of data that was transferred.
Figure 19 Two Packets OUT, Two Packets IN
As Figure 19 demonstrates, a feature of USB is that a USB peripheral always sends the smaller of bytes-
requested (512, in this example) and bytes-available (4 or 7).
5.2.2 Using BULKLOOP_VCS
A second Visual Studio project called Bulkloop_VCS performs streamlined transfers in and out of the FX2LP
Development Board. It continuously sends and receives BULK data while keeping a running total of bytes
transferred. Like the USB Control Center, it displays the device characteristics in the left panel for information.
Unlike the USB Control Center, it automatically sets up and conducts continuous transfers when the Start
button is pressed.
 Loading...