11D-Link DNS-321 User Manual
Section 3 - Configuration
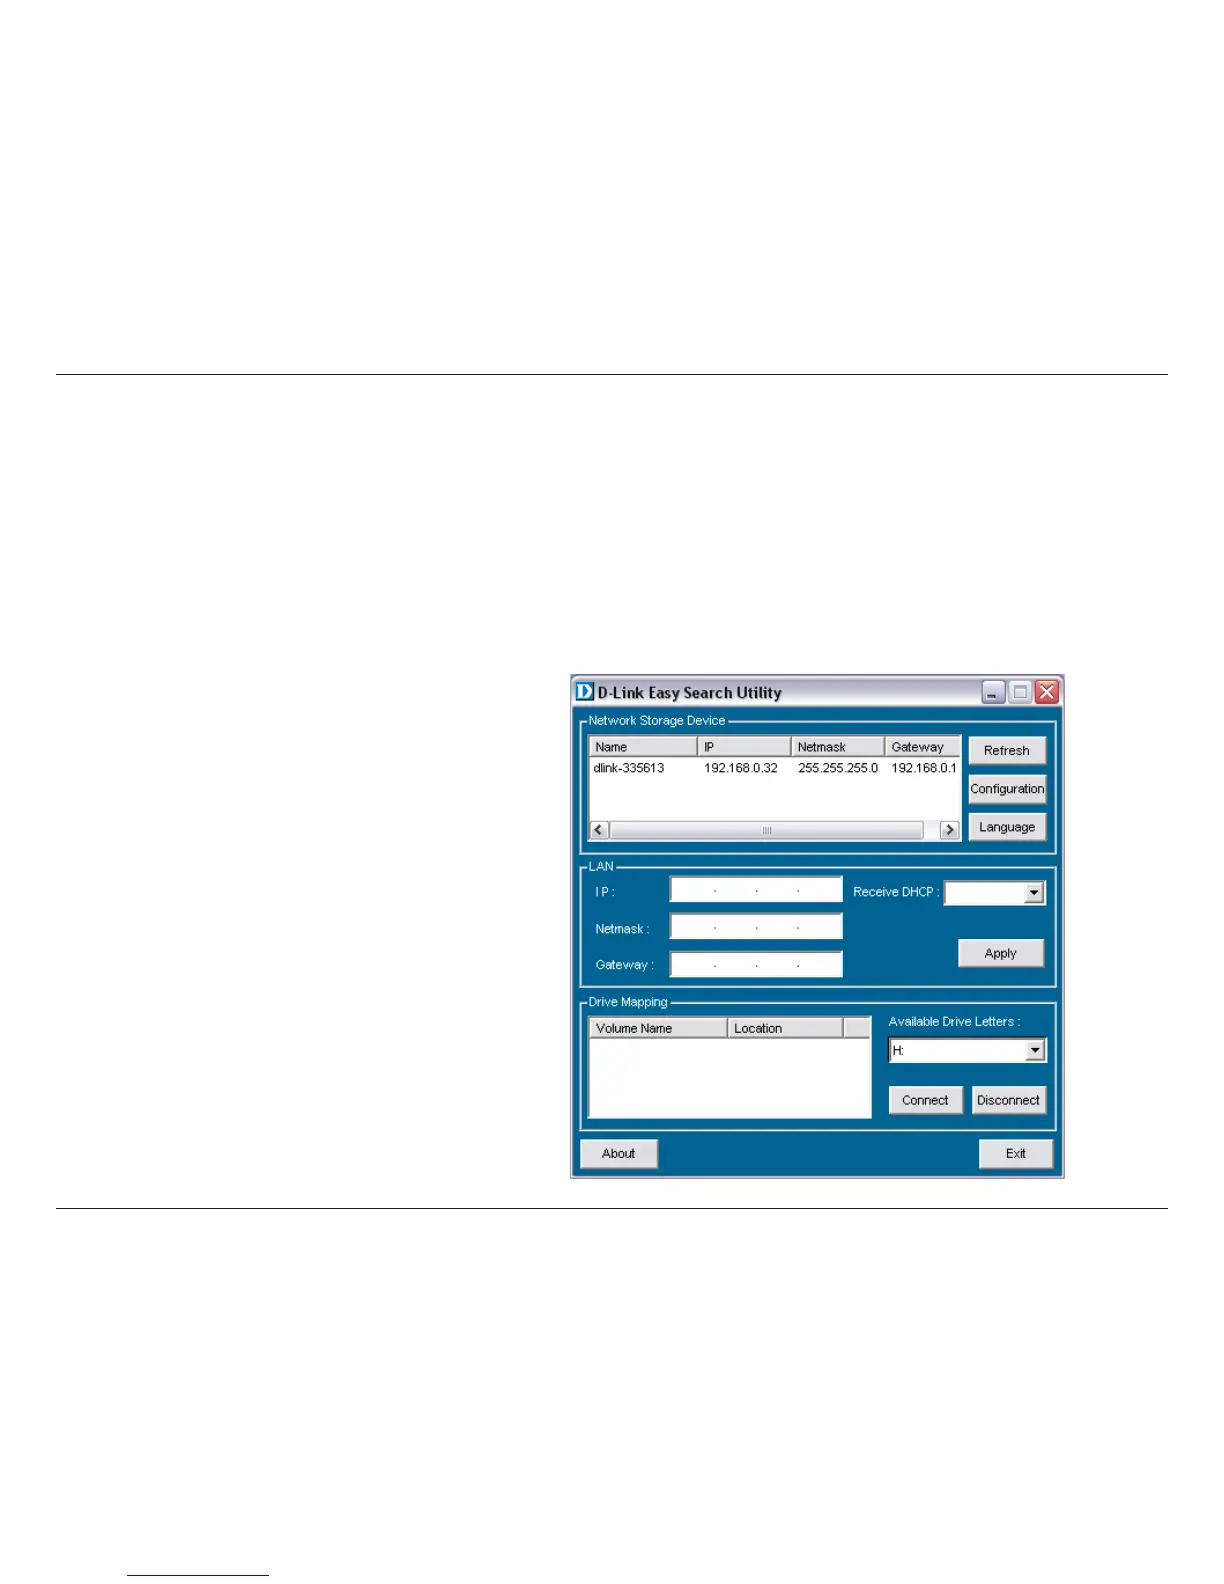
Configuration
When first powered on, during the initial boot sequence, the DNS-321 will wait to be assigned an IP address via DHCP.
If it does not receive a DHCP assigned IP address, by default it will have a self-assigned IP address of 192.168.0.32.
It is recommended to use the included D-Link Easy Search Utility when accessing and configuring the DNS-321 for
the first time. If you want to change the IP address before logging in or if you are unable to connect to the DNS-321
IP address, you can use the Easy Search Utility provided on the product CD to locate the device on your network and
make any needed changes.
The Easy Search Utility displays
the available DNS-321 devices on
the network.
Refresh
Volumes available for mapping are
displayed here.
Click Configuration to access the
Web-based configuration utility of
the DNS-321.
Click Apply to save changes to the
LAN Settings.
Configure the LAN Settings for the
DNS-321 here.
Network
Storage Device
Refreshes the device list.
Configuration
LAN
Apply
Drive Mapping
Available
Drive Letters
Choose an available drive letter.
Click Connect to map the selected
volume. Click Disconnect to
disconnect the selected mapped
volume.
Exit
Click Exit to close the utility.
Easy Search Utility