9D-Link DNS-321 User Manual
Section 2 - Installation
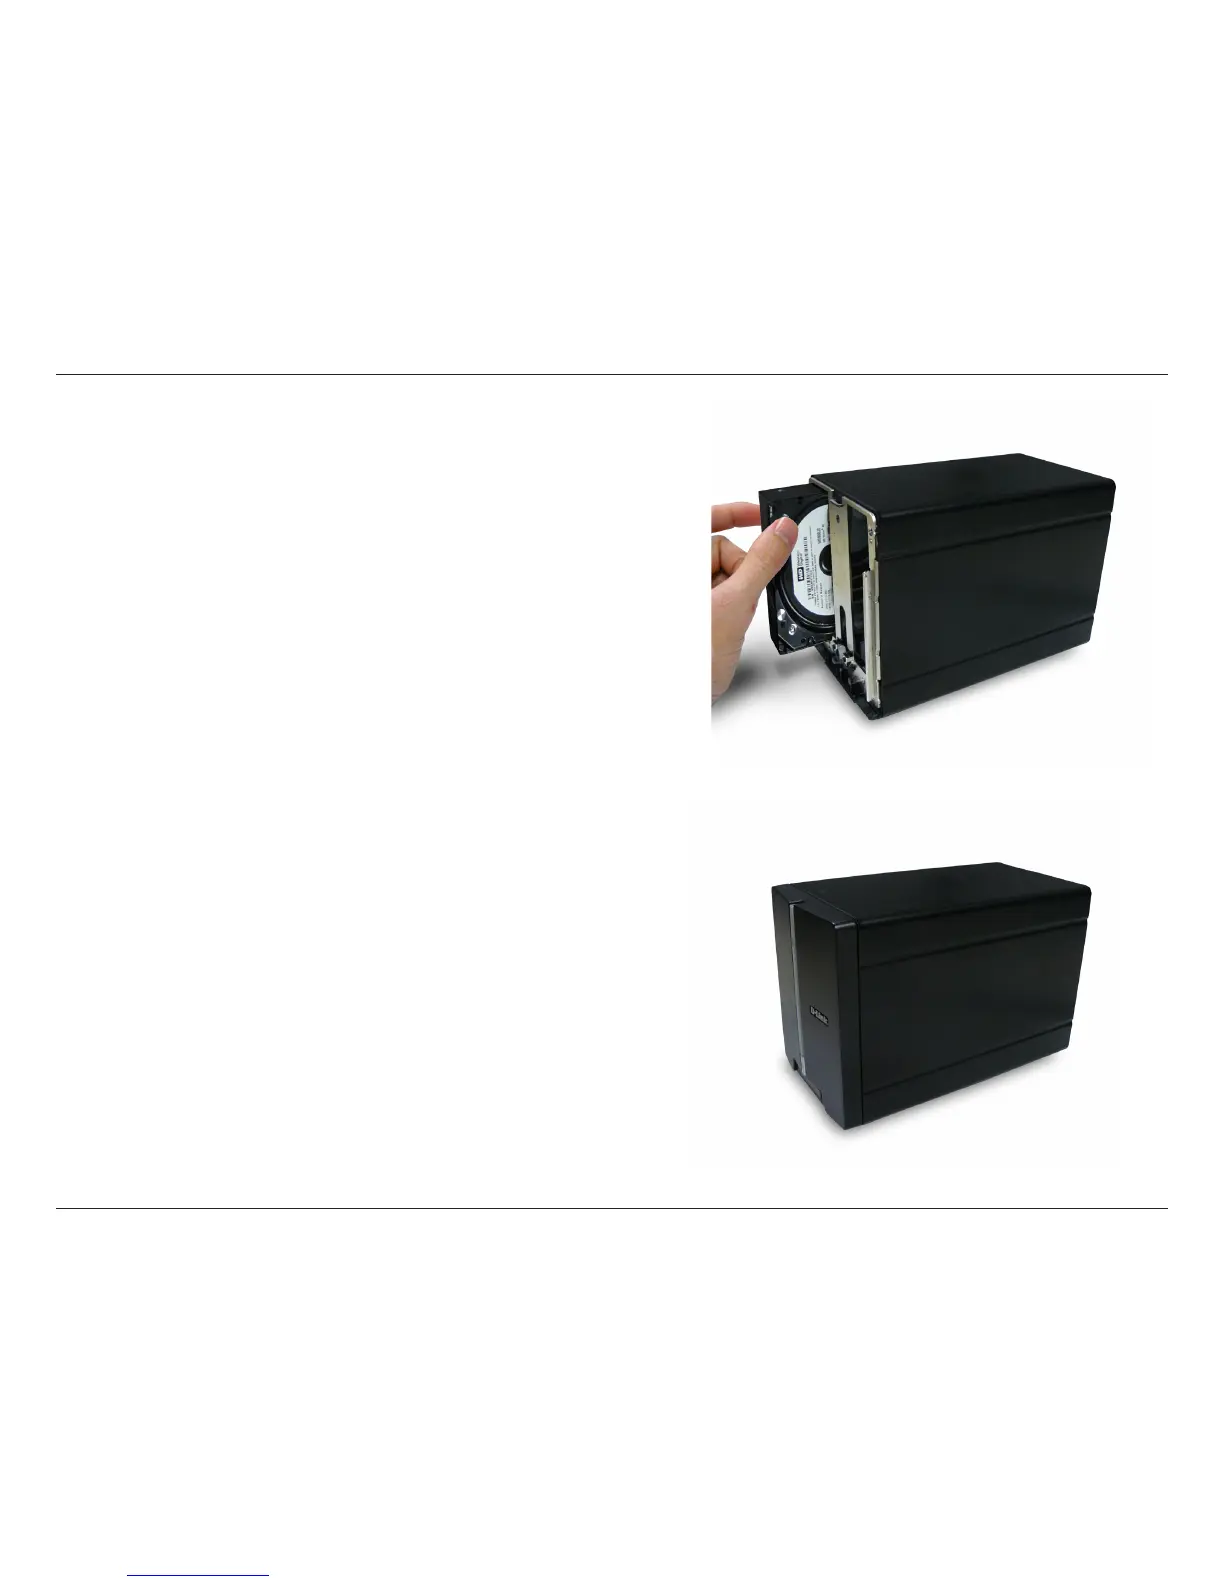
3. Insert a 3.5” SATA hard drive into an available drive
bay. Make sure to align the drive connector to the SATA
connector on the bottom edge inside the drive bay of the
DNS-321. Gently push the drive in until it connects. When
a drive is inserted properly, you will feel it “seat” into the
connector. Some hard drives that are thin or oddly shaped
may need to be guided carefully into position. If a drive
is not properly seated, the light will not illuminate after
powering on the device.
4. Attach the faceplate to the front of the device.