Do you have a question about the DAHON UNIO E20 and is the answer not in the manual?
Explains power button use and current speed display.
Covers battery indicator, riding time, and mileage displays.
Details how to access and adjust riding information settings.
Information on automatic sleep mode and display backlight.
Explains how error codes are shown on the LCD display.
Step-by-step guide on how to fold and unfold the e-bike safely.
Instructions for setting the correct height and angle of the handlebar.
Guidance on adjusting seatpost height and saddle angle.
Procedures for adjusting bicycle brakes and gear derailleur.
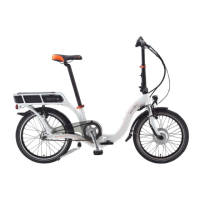
Steps for safely removing and installing the seatpost battery.
Detailed instructions on connecting and charging the e-bike battery.
Information on recommended charging duration and indicator lights.
Explains the built-in protection features of the charger and battery.
Guidance on battery upkeep, charging intervals, and storage conditions.
Details the warranty period and coverage for the e-bike components.
Notes on part wear and motor behavior under load.
Explanation of safety symbols and the importance of following warnings.
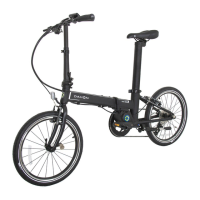
The DAHON Unio E20 is a pedal-activated electric bicycle designed to provide power assistance for a comfortable riding experience. It integrates DAHON Power Support Technology, offering a synergy between the rider's pedal input and additional motor support. This pedelec is specifically designed for commuting, travel, and urban area riding, and is not suitable for very rough or off-road use.
The motor support system activates only when the rider starts pedaling and switches off when pedaling stops, ensuring a natural cycling feel. The system offers five levels of power assistance, ranging from Level 1 (0.3:1 pedal force to motor support) to Level 5 (1:1 pedal force to motor support), with Level 0 being normal function without assistance. This allows riders to choose the appropriate level of support based on their needs and terrain. The system provides a very smooth riding feeling, high torque during starting and at low speeds, and strong power support at cruising speeds, particularly in sports mode. Power support gradually decreases as the speed approaches 25 km/hr, complying with European regulation EN15194, which classifies it as a bicycle, not a moped.
A key feature is the "Boost" mode, activated by a long press of the "-" assist key for 3 seconds. In Boost mode, the pedelec can be ridden without pedaling at a low speed of 6 Km/h, though this feature is not available for pedelecs exported to Japan. The bike also includes a sensor that adjusts the motor's power output based on the pressure exerted by the rider on the pedals, optimizing assistance. The estimated range for the 36V battery is 60km.
The Unio E20 is equipped with a large LCD display that provides essential riding information, including current speed, trip distance, battery life, and the selected riding program. The display also features a backlight, which can be activated by pressing and holding the "+" button for 2 seconds, simultaneously turning on the headlights. The battery capacity indicator shows the remaining charge in blocks, with the last block blinking when the charge drops below 10%, and the icon becoming empty when no power remains, signaling the need for immediate charging. The display can show riding time, single riding mileage, and maximum speed. In case of system failure, an error icon and code will be displayed at a frequency of 1HZ, prompting the rider to consult the manual or a dealer for troubleshooting. The total distance is displayed when no speed is detected, and trip mileage when the bicycle is ridden. Connecting an external charger resets the trip distance to 0, and the total distance resets to zero if it reaches 65535 km. Riding information settings can be accessed by pressing the "+" and "-" keys simultaneously for 2 seconds, allowing users to switch parameters with the "M" key and select values with the "+" and "-" keys.
The display also allows for wheel diameter and voltage settings. It includes a "Sleep Mode" that automatically activates after 5 minutes of inactivity, which can be exited by pressing the "M" key. Error codes are provided for various malfunctions, such as excessive current in the controller (Code 2), motor power cable issues (Code 3), low battery voltage (Code 4), brake lever damage (Code 5), faulty torque signal (Code 6), internal electric circuit issues (Code 8), and high battery voltage protection or incorrect sensor cable connection (Code 9).
For maintenance, it's crucial to perform a final check after assembly, ensuring all bolts and screws are tightened, tires are inflated to the recommended pressure, and brakes are functioning properly. When folding and unfolding the bike, care must be taken to ensure internal cables are not caught, and if they are, they should be pushed back into the frame. The folding process involves adjusting the seatpost and crank, folding the handlebar assembly, and then folding the frame. The battery should not be removed for charging when folding the bike. Unfolding is the reverse process.
Handlebar adjustment involves loosening the quick release, setting the handlepost to an appropriate height (ensuring the safety scale line is not exposed), and then locking it. The stem handle can also be loosened to adjust the handlebar angle. Seatpost and saddle adjustment requires loosening the seatpost clamp, setting the seatpost to an appropriate height (safety line not visible), and then tightening the locking bolt at the bottom of the saddle to adjust its angle (recommended force moment is 18N•m).
Brake adjustment is critical for safety. Improper adjustment or worn brake pads can pose a threat to riders. Brakes should be adjusted or replaced as needed. Rims or discs and brake pads must be kept clean and free of dirt, lubricants, waxes, or polishing agents to maintain friction efficiency. Brake pads are fragile and require proper adjustment based on wear. It is a strict warning that no oil or lubricant should touch the surface of the brake pads, discs, or wheel rims.
Derailleur adjustment involves adjusting the "H" and "L" screws. The "H" screw is loosened if the chain cannot reach the smallest gear and tightened if the smallest gear drops. The "L" screw is loosened if the chain cannot reach the largest gear and tightened if the largest gear drops. Adjustments should be made according to specific conditions, then rotate the gears and adjust the speed until the chain and freewheel operate smoothly and quietly.
The seatpost battery operation requires attention to safety. Before removing the battery, the power must be turned off. To remove, disconnect the power cord under the seatpost battery by unscrewing the connector nut and pulling out the connector. Then, disassemble the seatpost clamp and gently pull out the entire seatpost set. For assembly, open the seatpost clamp, insert the battery into position, lock the clamp, and then insert the power cord into the controller connector, aligning the groove, and tightening the nut.
Charging the battery requires using only the supplied DAHON charger to avoid voiding the warranty, damaging the battery, or causing a fire hazard. The charger's voltage specification must match the local voltage. For the first charge, the battery should be fully charged for at least 12 hours. The charger's LCD indicates charging status: red for charging, green for fully charged. It is important not to fold the Pedelec or use the kickstand for support while the seatpost battery is removed for charging. To charge, remove the charger, turn off the battery switch, connect the charger to the sub-line, pull off the protective cap from the battery charging port under the rear tube, insert the charging port, and then plug the power plug into an electric outlet.
Battery maintenance is crucial for longevity. If 3 months pass without recharging, it's recommended to recharge to ensure maximum battery life and performance and prevent damage. Batteries should be charged prior to use and stored in a cool, dry, well-ventilated place, away from direct sunlight. They should not be incinerated, mutilated, or disassembled, as they may explode or release toxic material. If any irregular noise, variant temperature, or leakage is detected, stop using the battery immediately. For extended storage, the battery should be cycled (charged and discharged) every 3-6 months to maintain performance.
The DAHON Unio E20 comes with a 2-year (24 months) warranty from the date of purchase for the entire bicycle. This warranty also covers all electrical parts, including the charger, display (console), controller, BB sensor, electrical cables, carrier, and motor (motor noise is not covered) for 2 years (24 months).
Safety warnings emphasize that certain fitted parts, such as tires, chains, sprockets, chain wheels, brake pads, and grips, can wear out at different rates depending on usage, road conditions, and weather. The motor has a built-in heat sensor that automatically shuts down the system if it overheats due to steep hills or heavy loads, preventing damage. The manual stresses the importance of understanding safety symbols and explanations, as they are not substitutes for proper accident prevention measures. Failure to obey safety warnings can result in injury, and following safety precautions is essential to reduce the risk of fire, electric shock, and personal injury.
Pre-operational safety warnings include reading and understanding the manual, thoroughly inspecting the PST for loose or damaged parts before each use, and performing necessary adjustments or repairs. The limited warranty will be void if the product is used for purposes other than recreation or transportation, or if it is modified. Wearing a safety helmet is recommended for maximum safety. The manufacturer is not liable for incidental or consequential loss or damage from product use. The Dahon pedelec carrier is not compatible with a rear baby seat. The manual also highlights that mechanical devices are subject to wear and stress fatigue, and components may fail if their designated life is exceeded, potentially causing injuries. Any signs of cracks, scratches, or color changes in highly stressed areas indicate that the component's life expectancy has been reached and it should be replaced. In case of any problems, riders are advised to contact their local Dahon dealer directly.
| Model | UNIO E20 |
|---|---|
| Frame Material | Aluminum |
| Wheel Size | 20 inches |
| Gears | 7-speed |
| Battery Voltage | 36V |
| Range | Up to 80 km |
| Max Speed | 25 km/h |
| Display | LCD |
| Motor | 250W |
| Tire Size | 20 x 1.75 |
| Category | Folding Electric Bicycle |
| Battery | 36V 10.4Ah lithium-ion |