Control Devices EDUS39-605
44 Controls
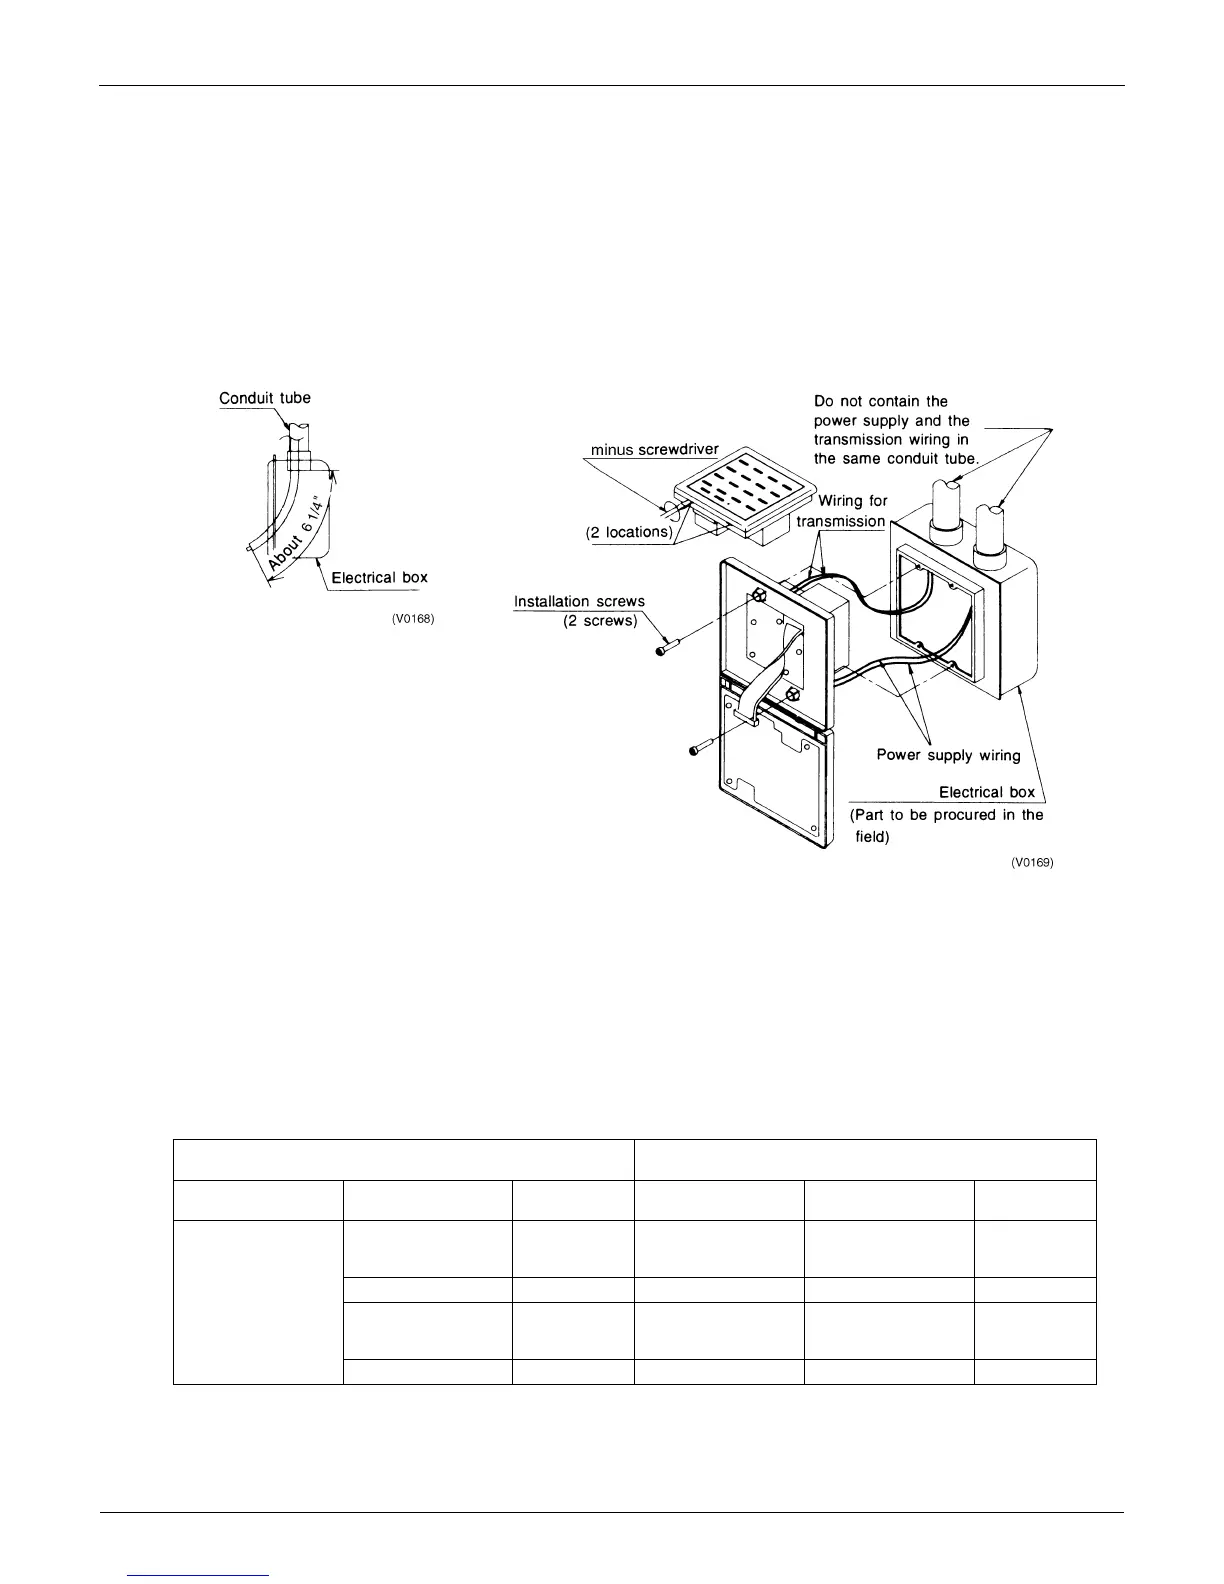
2.5.4 Installation
1. Open the upper part of remote controller.
Insert a minus screwdriver (2 locations) into the recess between the upper part and the lower part of remote controller
and twist the screwdriver lightly.
PC board is attached with both the upper and lower part of remote controller. Do not damage the board with the
screwdriver.
2. Open the upper part of remote controller and install the electrical box, procured in the field, with the attached
installation screws (M4×16).
Note: Suitable length of the electric wire is about 6-1/4” (160 mm) from the inlet of the electrical box. If it is difficult to
contain a long wiring, strip the jacketed part of the wiring.
2.5.5 Initial Setting
1. Connector for setting master controller (X1A) is Pprovided with connector at factory set.
When using 1 unified ON/OFF controller, do not disconnect the connector for setting master controller. Use the unit
with the connector in the state in which it was delivered.
When using multiple unified ON/OFF controllers, or using the unified ON/OFF controller in conjunction with other
optional controllers for centralized control, makes settings as indicated in the right table.
Note:
For instructions on how to set the master controller on the central remote controller, see the installation manual provided
with the central remote controller.
Pattern of connection of optional controllers for centralized
control
Connector for setting master controller (X1A) Settings
Unified ON/OFF
Controller
Central Remote
Controller
Schedule
Timer
Unified ON/OFF
Controller
Central Remote
Controller
Schedule
Timer
1 to 16
——
Set one to USED and
all the rest to NOT
USED.
——
1 to 4 — Set all to NOT USED. (Note) —
—1
Set one to USED and
all the rest to NOT
USED.
—
NOT USED.
1 to 4 1 Set all to NOT USED. (Note) NOT USED.