464
FTX-N/U, FVXS-N, FDMQ-R Series EDUS091558E
3P421082-1C
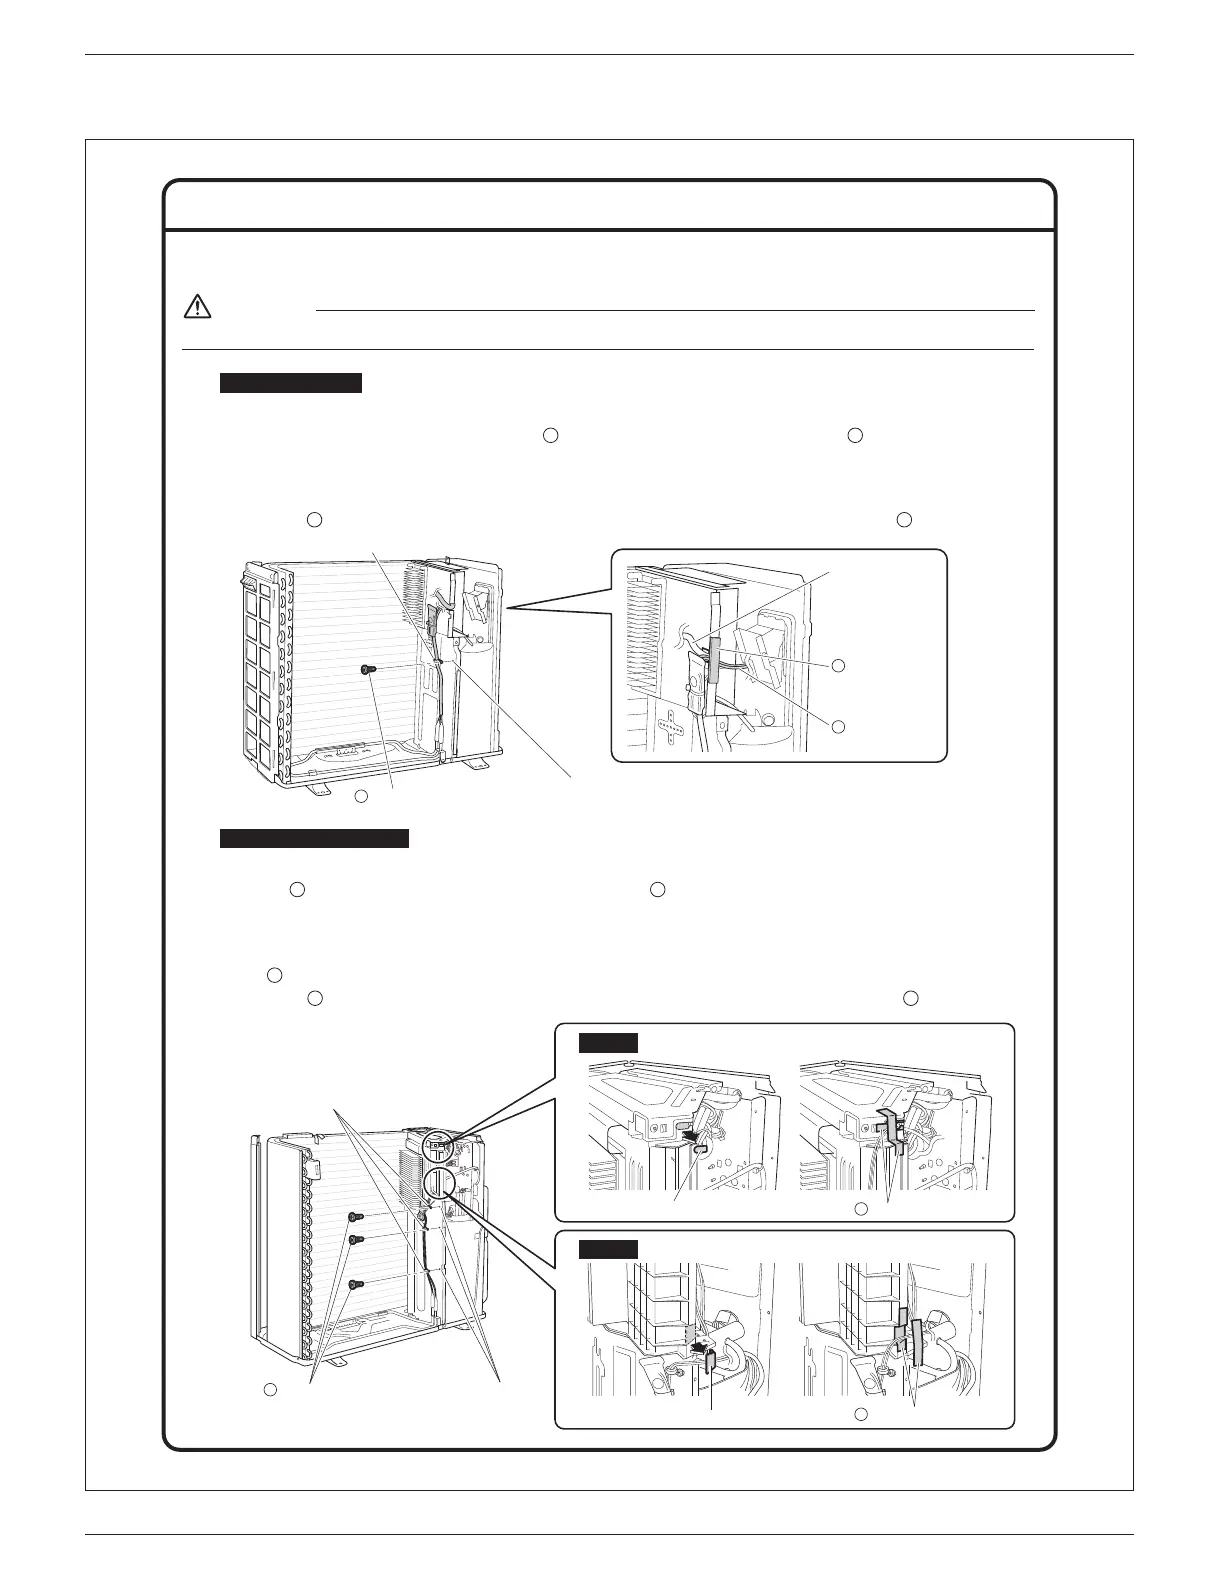
4. Route the harnesses.
r9hen drilling a hole be careful not to damage the soundprooƂng material and other components on the back side.
WARNING
For type A models
1) If there is no hole drill a
I
1/8 inch (
I
3.2mm) hole in the partition plate. (1 location)
2) Fix in place the binding band attached to the drain pan heater harness by screwing the M4 piercing screw into
the hole.
(1 location)
3) Install the fan motor base.
r Be careful not to confuse screw types. Refer to “Installation Procedure (2)”.
4) Place the drain pan heater harness on top of the fan motor harness and Ƃx it in place with the sealing material.
1) If there are no holes drill
I
1/8 inch (
I
3.2mm) holes in the partition plate. (3 locations)
2) Fix the drain pan heater harness in place by screwing the M4 piercing screws into the holes. (3 locations)
3) Install the fan motor base.
r Be careful not to confuse screw types. Refer to “Installation Procedure (2)”.
4) Trim the electrical wiring box with nippers at the locations shown in the Ƃgures then cover the trimmed edges with
the sealing material.
5)
Insert the drain pan heater harness into the space that was trimmed and Ƃx it in place using the sealing material.
A
A
D
B
A
D
D
A B
For type B and C models
Installation Procedure (4)
Binding band
Fan motor harness
If a hole need to be drilled hold the component
in position to determine the location of the hole.
M4 piercing screw
B
If holes need to be drilled hold the
component in position to determine
the locations of the holes.
M4 piercing
screws
B
Sealing material
D
Drain pan
heater harness
A
Binding bands
Trim the electrical wiring box.
Sealing materials
D
Trim the electrical wiring box.
Sealing materials
D
Type B
Type C
 Loading...