English
21
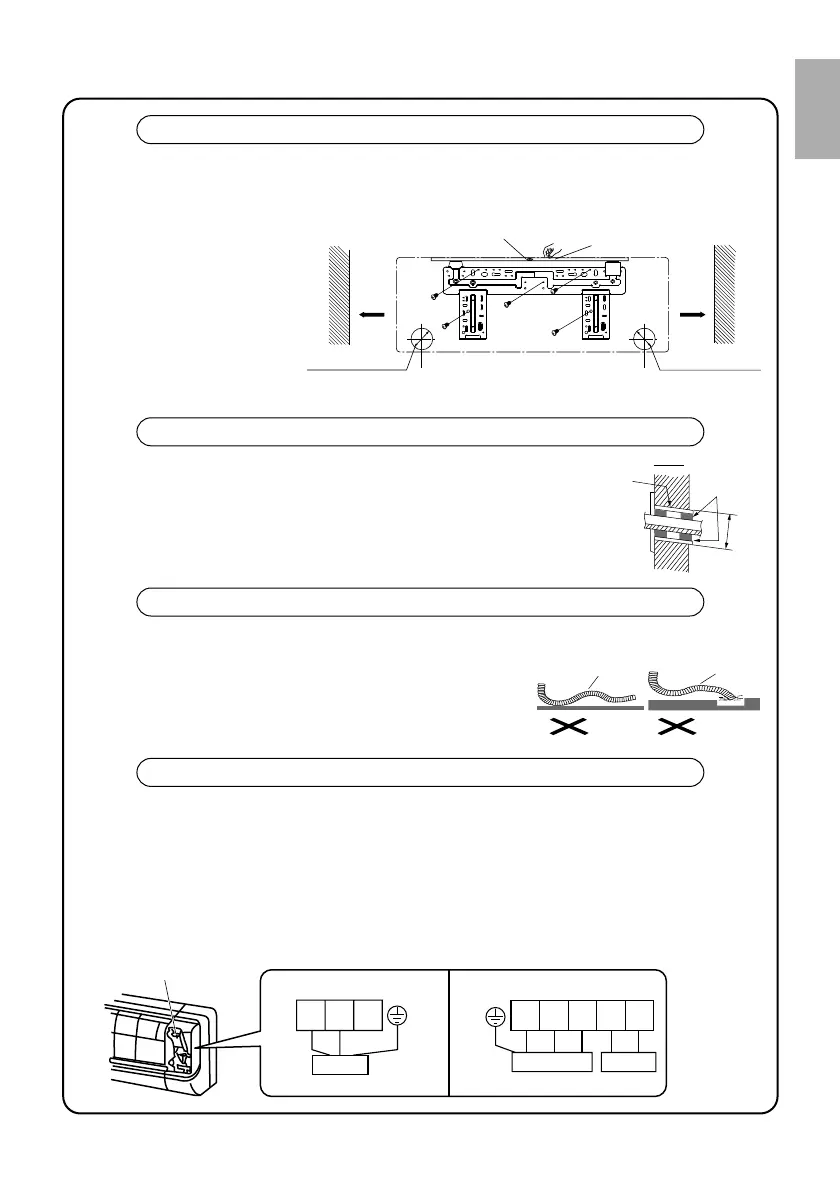
Wiring Cover
Fig.6
Heat pump modelsCooling only models
outdoor unit connection outdoor unit connection
blue black yellow-
green
yellow-
green
blue
brown
black
orange
N(1)
23
N(1)
2345
■
Indoor unit installation
Rear panel installation
Piping hole installation
Drainage pipe installation
Indoor/outdoor electric wire connection
Ф55
1. Initially, mount the rear panel horizontally. The indoor unit has drain outlets on the both sides.
Adjust the unit so that one of the drain outlets is a little lower than the other one so that
flocculated water will be drained from the drain pan.
2. Attach the rear panel to the
wall with screws. (pre-covered
with plastic)
3. Make sure the rear panel is
firmly attached. The weight
should be evenly shared by
each screw.
1. Make the piping hole (55mm) in the wall to angle slightly
downward to the outdoor side.
2. Insert the piping-hole sleeve into the hole to prevent the connection
piping and wiring from being damaged when passing through the hole.
1. For proper drainage the drain hose should be placed at a downward angle.
2. Do not wrench or bend the drain hose, or flood its end with water.
3. Wrap the insulation materials when passing a long drainage
hose through indoor unit.
Wrenched Bent
Flooded
Indoor Outdoor
Wall pipe
Seal pad
Fig.5
Wall
Wall
Center mark
Gradienter
Left Ф55mm
Right Ф55mm
(Rear piping hole)
(Rear piping hole)
Space
to the
wall
150mm
or more
Space
to the
wall
150mm
or more
1. Open the surface panel.
2. Remove the wiring cover Fig.6.
3.
Route the power connection cord and signal control wire (for cooling and heating unit only) from
the back of the indoor unit and pull it toward the front through the wiring hole.
4. Connect the interconnection cord to the terminal block, and then attach the cord with cord
anchorage.
5. Assemble the clamp and wiring cover.
6. Cover the surface panel.
01_EN_3V007382-3F.indd 2101_EN_3V007382-3F.indd 21 5/18/2010 4:55:32 PM5/18/2010 4:55:32 PM
 Loading...