Si041551EB Electrical Box
Removal Procedure 5
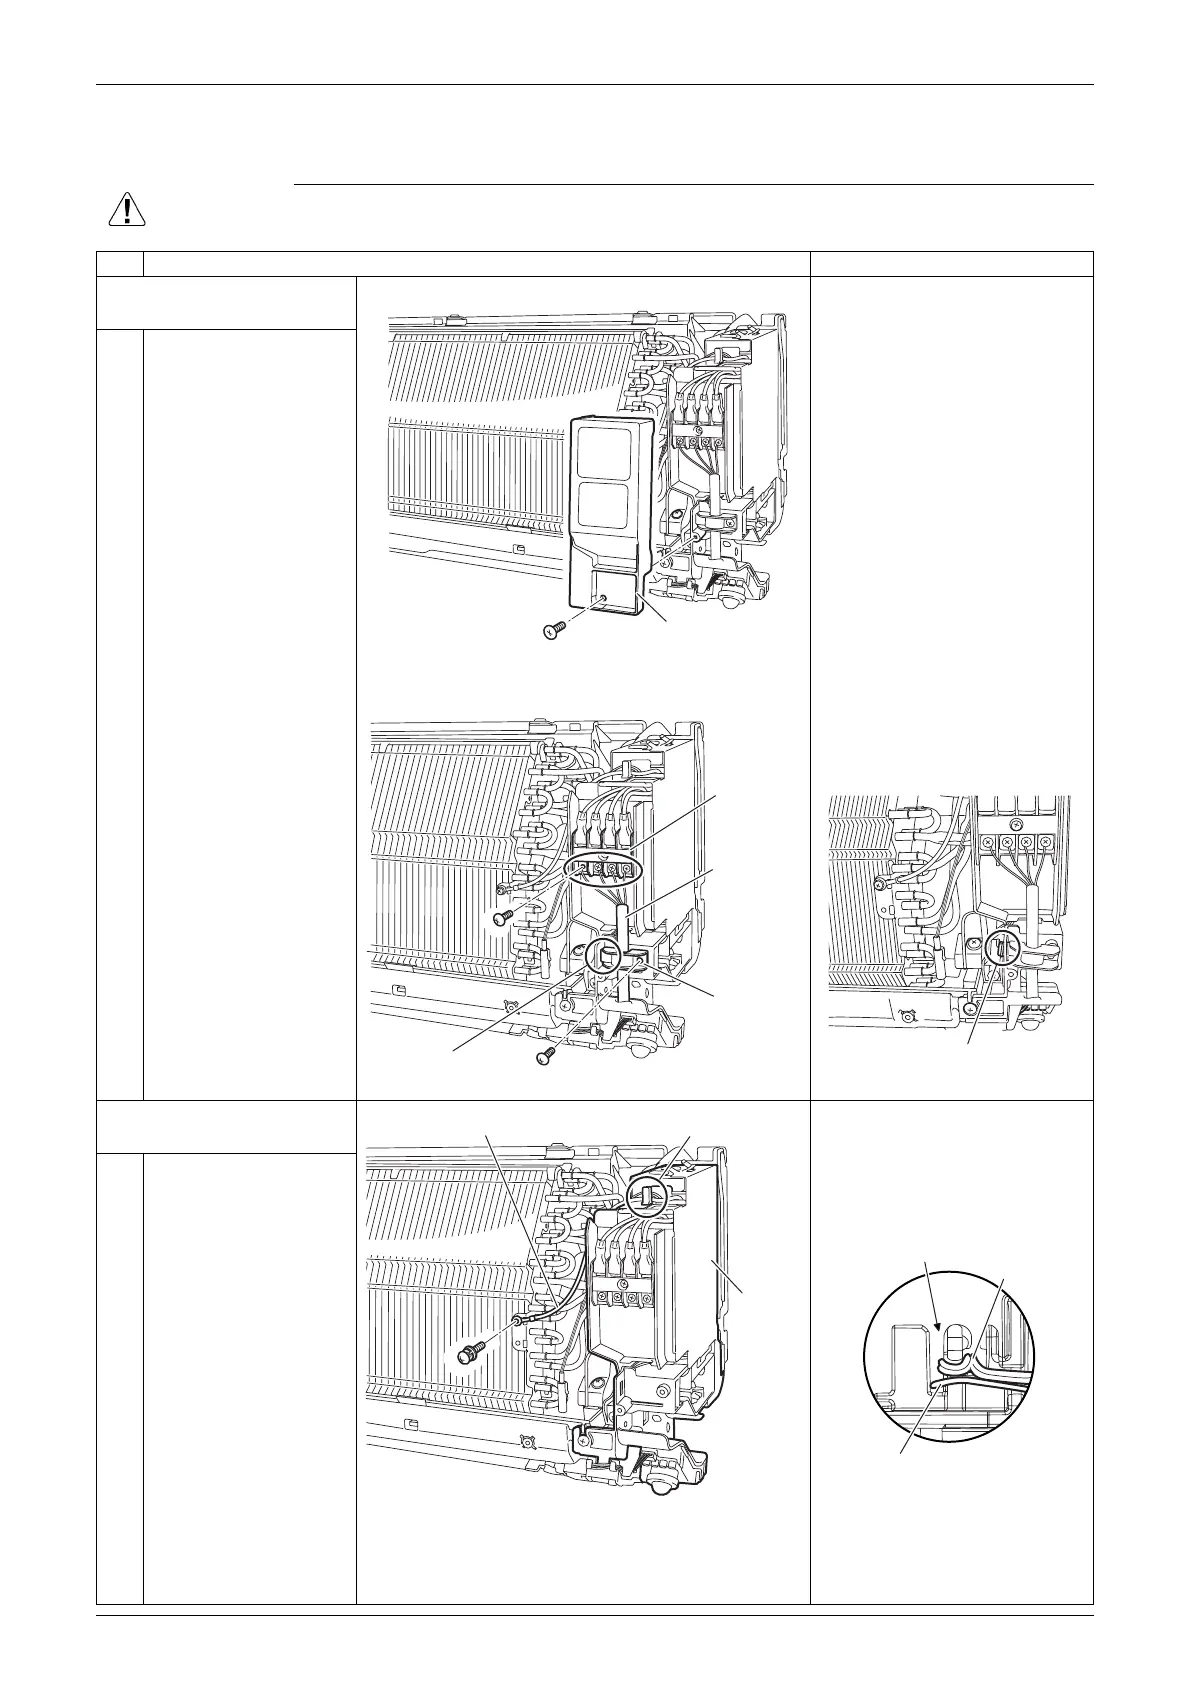
4. Electrical Box
Warning
Be sure to wait for 10 minutes or more after turning off all power supplies before
disassembling work.
Step Procedure Points
1. Disconnect the
connecting wire.
Service cover can be
removed without removing
the front grille.
There is no hook at the top
of the service cover. Be
careful not to drop it when
the screw is loosened.
1 Remove the screw, and
then the service cover.
2
3
Remove the screw,
unfasten the hook and
remove the wire fixture.
Remove the 4 screws
of the terminal board
and disconnect the
connecting wire.
When reassembling, be sure
to fasten the hook before
tightening the screw.
2. Remove the electrical
box.
When reassembling, be sure
to insert the earth/ground
wire in the front slit and
under the thermistor
harness.
1
2
Remove the screw and
detach the earth/ground
wire.
Release the earth/
ground wire from the
front slit at the top of the
electrical box.
Service cover
(R22053)
Connecting
wire
Wire fixture
Hook
Terminal
board
(R22054)
Hook
(R22055)
Electrical
box
Earth/ground wire Front slit
(R24241)
Front slit
Thermistor
harness
Earth/ground wire
(R24242)
 Loading...