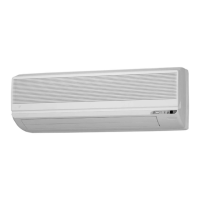
Do you have a question about the Daikin FTKV50NRV16 and is the answer not in the manual?
Instructions for removing the air filters from the indoor unit.
Steps to detach the front panel of the indoor unit.
Procedure for detaching the horizontal air guide blade.
Steps for removing the vertical air guide blades.
Detailed steps for removing the front grille assembly.
Steps to remove the service cover, terminal board, and connecting wires.
Procedure for unfastening hooks and removing the electrical box cover.
Instructions for releasing the ground wire and pulling out the thermistor.
Guide to disconnecting the electrical connectors from the unit.
Steps to remove the electrical box from the bottom frame.
Steps to remove the main control printed circuit board (PCB).
Procedure for unfastening hooks and removing the display/signal receiver PCB.
Steps to remove the swing motor assembly.
Steps for pulling out the drain hose and disconnecting piping.
Procedures for removing screws and detaching the unit from the installation plate.
Steps for bending auxiliary piping and lifting out the indoor heat exchanger.
Steps to remove the right side plate and the screw of the fan rotor.
Procedures for unfastening hooks, releasing the fan rotor, and removing the fan motor.
| Star Rating | 5 Star |
|---|---|
| Refrigerant | R-32 |
| Type | Split AC |
| Energy Efficiency Ratio (EER) | 3.5 |
| Power Supply | 220-240V, 50Hz |
| Energy Efficiency Ratio (Heating) | 4.0 W/W |
| Noise Level (Indoor) | 19 dB (Low) |