29
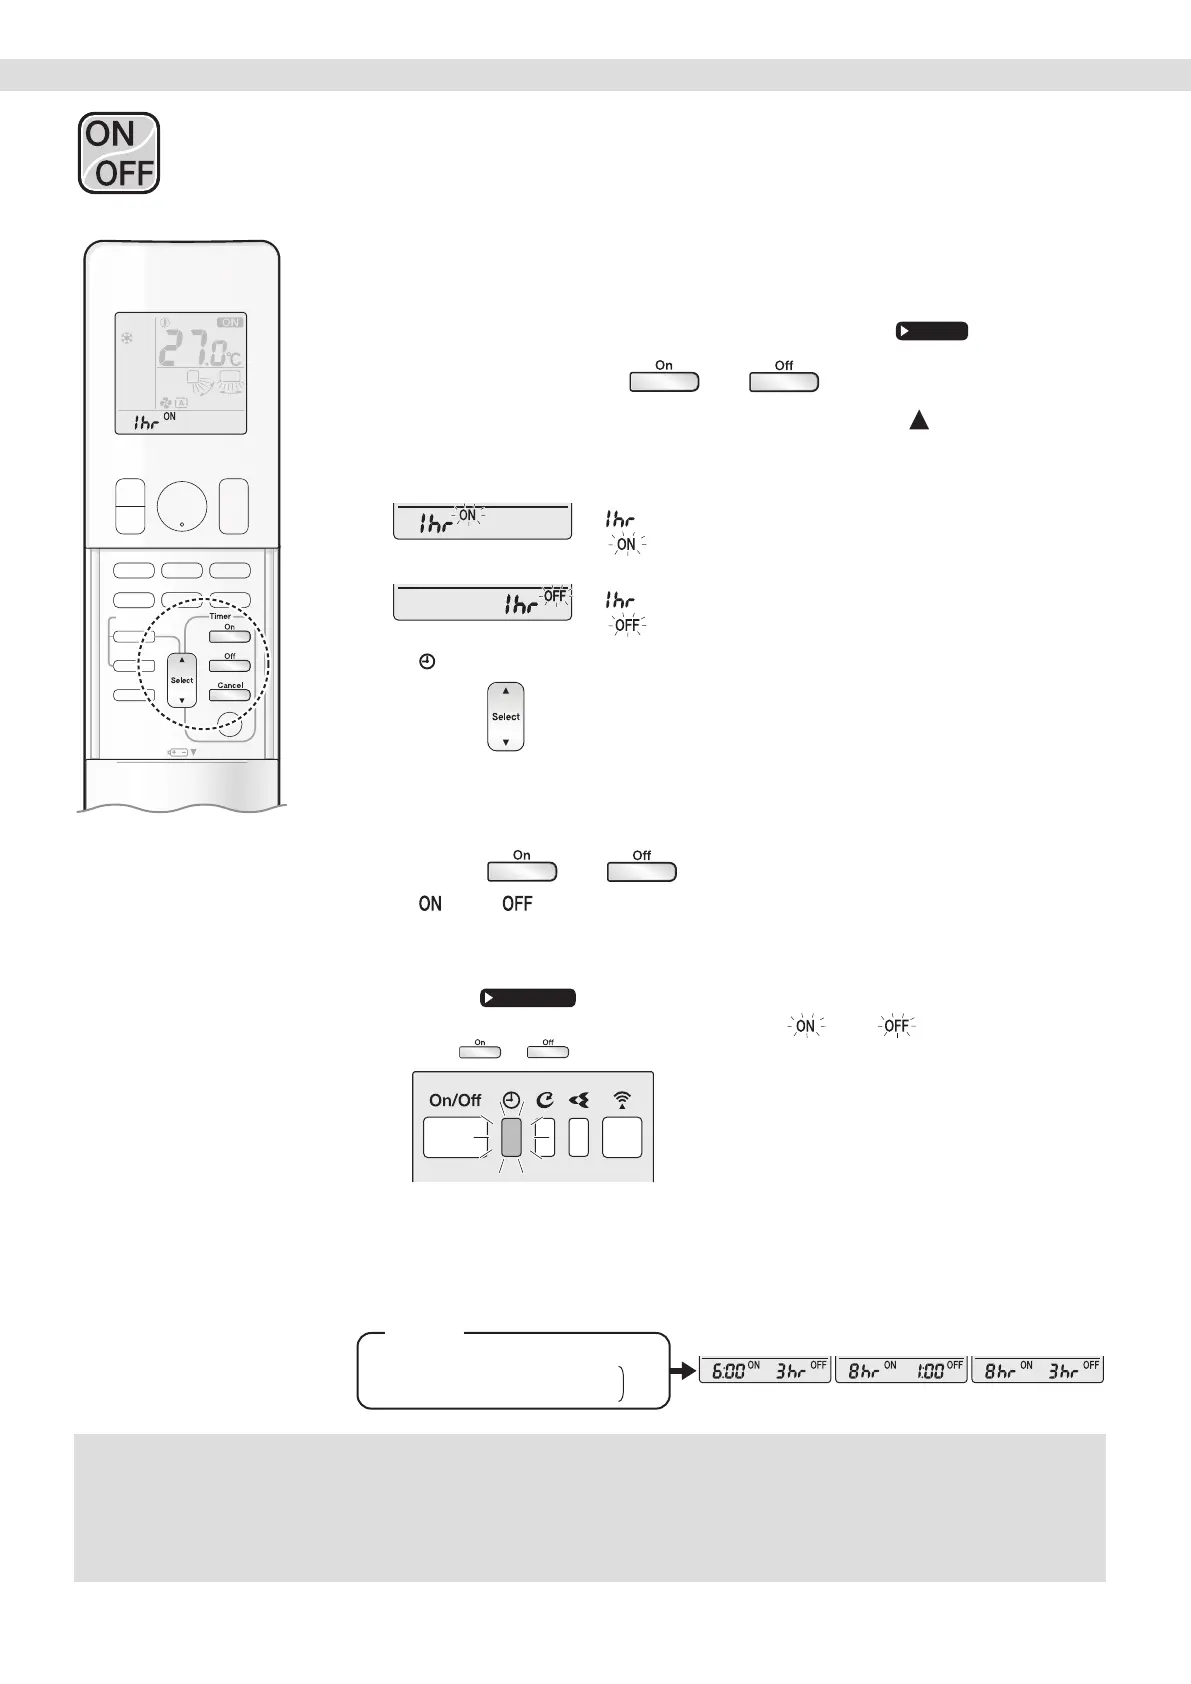
TIMER Operation
[ON/OFF TIMER with an hours remaining display]
(COUNT UP-DOWN ON/OFF TIMER)
• Check that the clock is correct. If not, set the clock to the present time.
1. Press and hold or for about
5 seconds, when signal indicater ( ) blink,
release your nger from the button.
For ON TIMER
“
” appears on the LCD.
“
” blinks.
For OFF TIMER
“
” appears on the LCD.
“
” blinks.
• “
” disappears from the LCD.
2. Press until the time setting reaches the
point you like.
• Each pressing of the button increases or decreases the time setting by 1 hour.
• The time can be set between 1 and 12 hours.
3. Press or again.
• “ ” and “ ”, and setting time appear on the LCD.
• The TIMER lamp lights orange.
• To change the display mode from COUNT UP-DOWN ON/OFF TIMER to 24 HOUR
ON/OFF TIMER, repeat STEP
1, and continue from STEP 2 of “24 HOUR ON/OFF
TIMER”.
• Timer display mode cannot be changed while “ ” or “ ” are blinking.
Press
or to stop the blinking.
Display
Combining display modes
• Different display modes (24 HOUR ON/OFF TIMER and COUNT UP-DOWN ON/OFF TIMER)
can be used for the ON TIMER and OFF TIMER simultaneously.
Com-
bined
(Example)
Present time: 22:00 (The unit is operating)
OFF T MER at 1:00 (3 hours after persent time)
ON T MER at 6:00 (8 hours after persent time)
NOTE
Notes on COUNT UP-DOWN ON/OFF TIMER
• After setting, the time displayed on the LCD will automatically count down by 1 hour for every 1 hour that passes.
For example, if the OFF TIMER is set to 3 hours, the display will change as follows: 3hr
2hr
1hr
blank (OFF)
Switching between ON/OFF TIMER display modes (24 hour clock and hours remaining display)
• When changing timer display modes (from 24 HOUR ON/OFF TIMER to COUNT UP-DOWN ON/OFF TIMER or vice versa), the timer cancels.
The timer must be set again to activate it.
ON/OFF TIMER Operation