Si04-855 Removal of Electrical Box / PCBs / Swing Motors
Removal Procedure 9
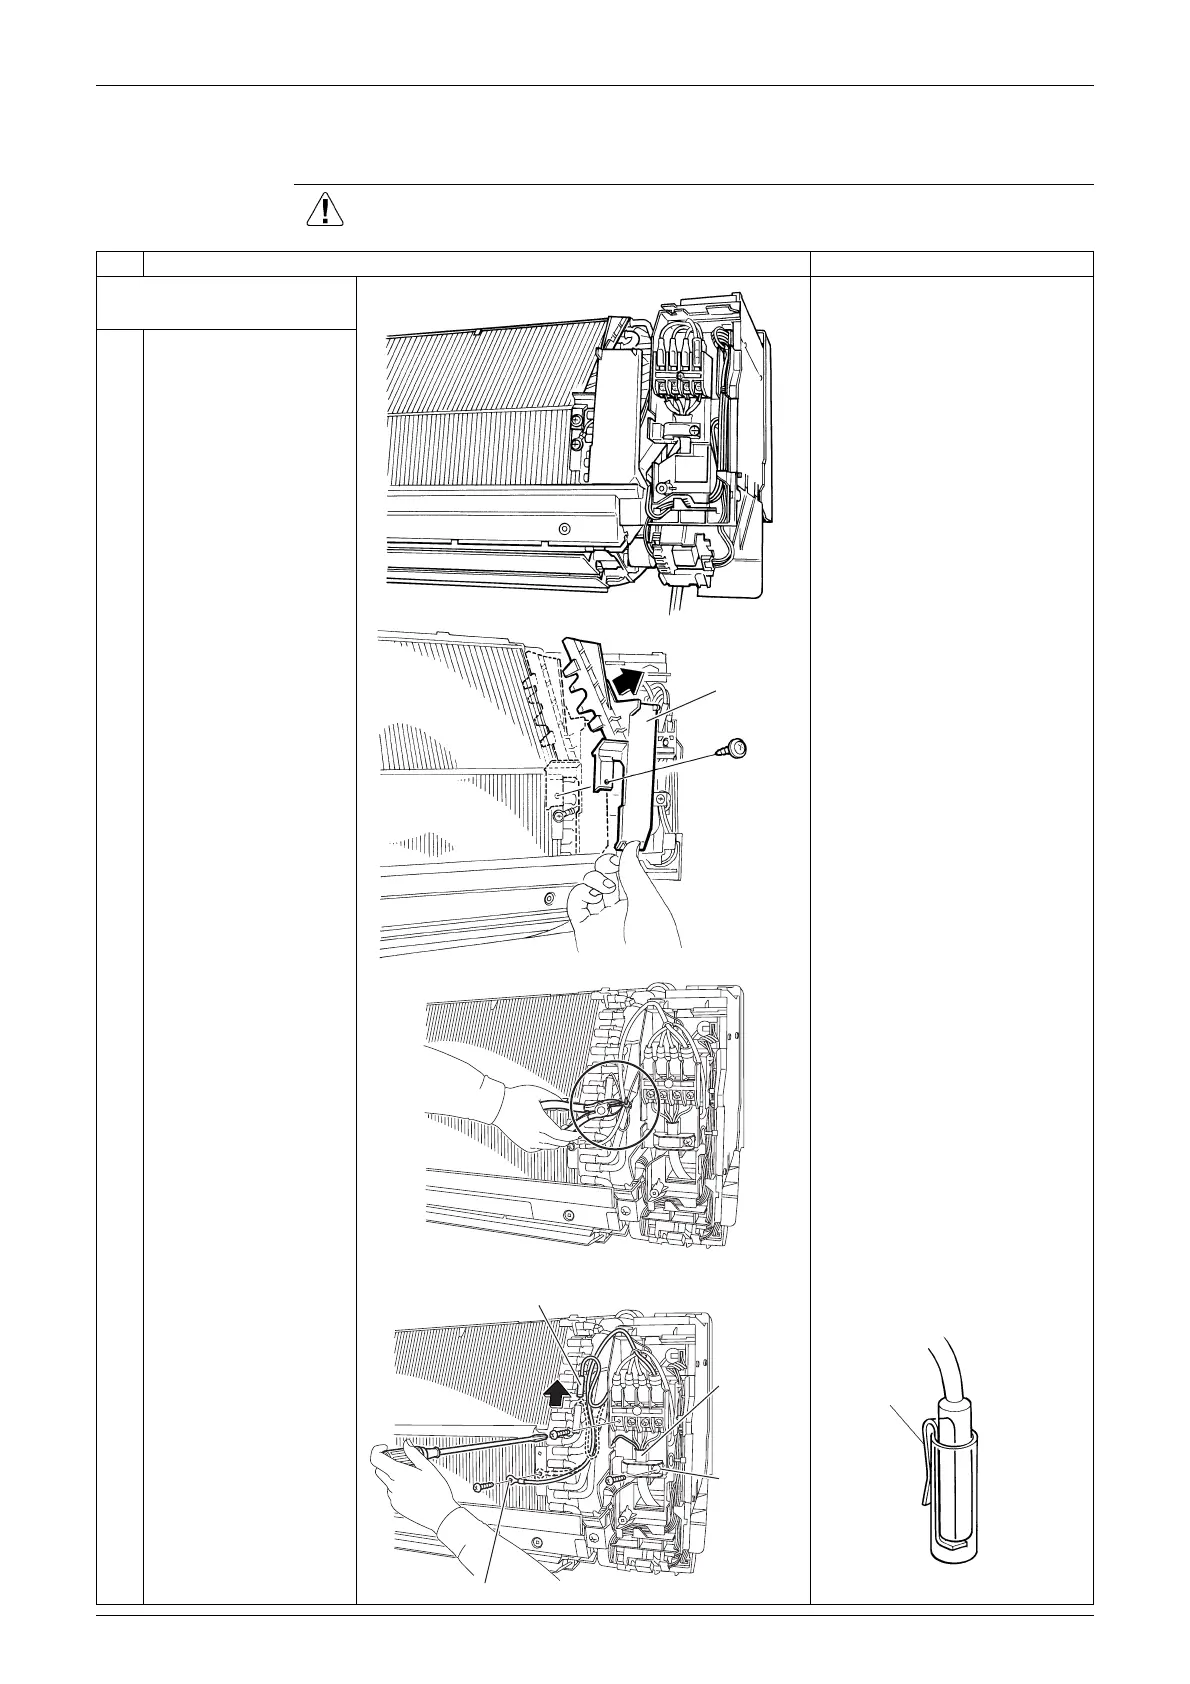
4. Removal of Electrical Box / PCBs / Swing Motors
Procedure Warning Be sure to wait for 10 minutes or more after turning off all power
supplies before disassembling work.
Step Procedure Points
1. Remove the electrical
box.
Preparation
Remove the front grille
according to the “Removal of
Front Grille”.
1
Remove the screw and
remove the drip proof
plate.
2
Cut the clamp.
The locations of the clamp
and the indoor heat
exchanger thermistor are
different depending on the
model.
3
4
5
Pull out the indoor heat
exchanger thermistor.
Remove the screw of
the earth wire.
Remove the screws of
the connection wires.
Be careful not to lose the clip
for the thermistor.
(R2770)
Drip proof plate
(R2771)
(R6707)
Indoor heat exchanger thermistor
Earth wire
(R17175)
Connection
wire
Wire fixture
Clip
(R11234)
 Loading...