System Settings Menu Operation
1.
Select
Alarm E-mail
according to the
operating procedure shown in page 63.
∗
The e-mail function (option) comes standard with the Web function.
∗
Please configure the E-mail server settings which is specified by
your Internet Service provider or network administrator.
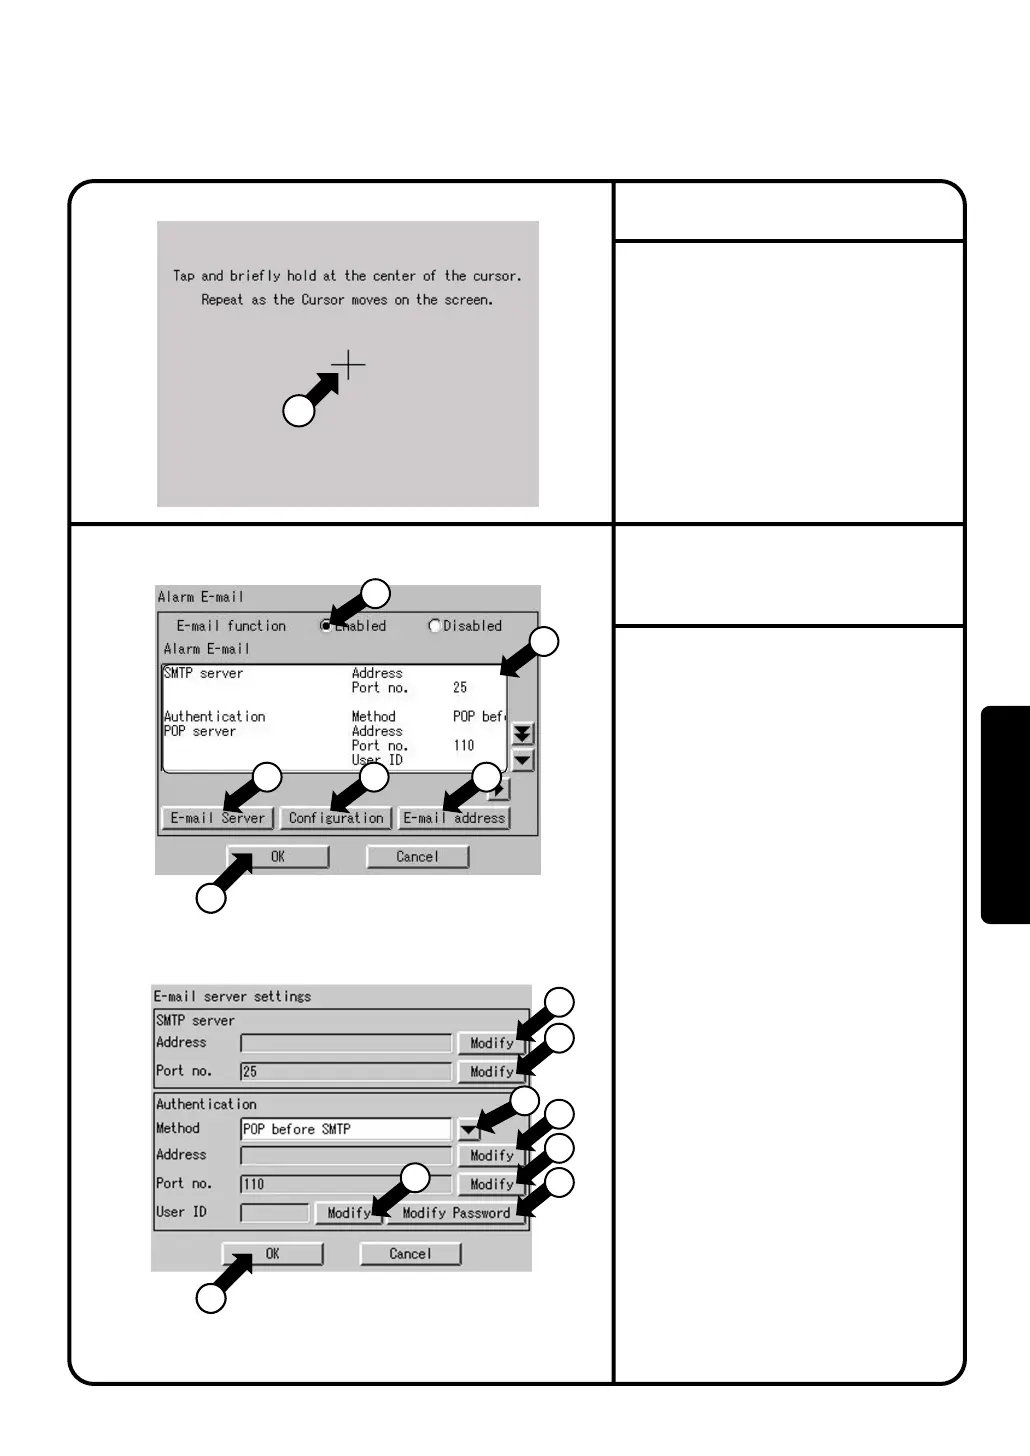
2.
Confirm that the Alarm E-mail screen Screen 1
will be displayed as shown in the left-hand
column.
3.
Select
Enabled
or
Disabled
for the e-mail function
q.
When
Disabled
has been selected, there is no
additional setup operation for the e-mail function.
To continue the setup operation, be sure to select
the [OK] button
@8.
4.
You can monitor the current setting in the
display area w.
5.
Push the [E-mail server] button
e
to display the
E-mail server Settings screen Screen 2 will be
displayed as shown in the left-hand column.
6.
Push the [Modify] button r and enter an
SMTP server address on the input screen.
7.
Push the [Modify] button
t
and enter an SMTP
server port number on the input screen.
8.
Set the authentication method from a pull-down
menu.
Select
No Authentication
,
POP before SMTP
, or
SMTP-AUTH
for the authentication method setting
y
.
9.
Push the [Modify] button u.
Enter the POP server address on the input
screen. Enter the address only if
POP before
SMTP
is selected for the authentication
method.
10
.
Push the [Modify] button i.
Enter the POP server port No. on the input
screen. Enter the port No. only if
POP before
SMTP
is selected for the authentication
method.
11
.
Push the [Modify] button o.
Enter the user ID that is used for
authentication on the input screen. Enter the
user ID if
POP before SMTP
or
SMTP-AUTH
is selected for the authentication method.
Alarm E-mail
Screen 1 Alarm E-mail
Screen 2 E-mail server Settings
5
28
5
11
1
2
4
5
7
8
10
6
9
3 12 20
1.
See page 63 and select
Touch Panel
Calibration
.
2.
Screen 1 Touch Panel Calibration, which is
shown on the left, appears.
3.
Follow the instruction shown on the screen
and press the intersection of the crosshairs
q
and keep it pressed for about 1 second.
4.
The crosshairs are moved. Repeat the
operation described in step 3 on a total of five
points.
When calibration is finished, the System
Settings automatically appears within 30
Screen 1 Touch Panel Calibration
Touch Panel Calibration
1
90
Operation