Read First
14
English
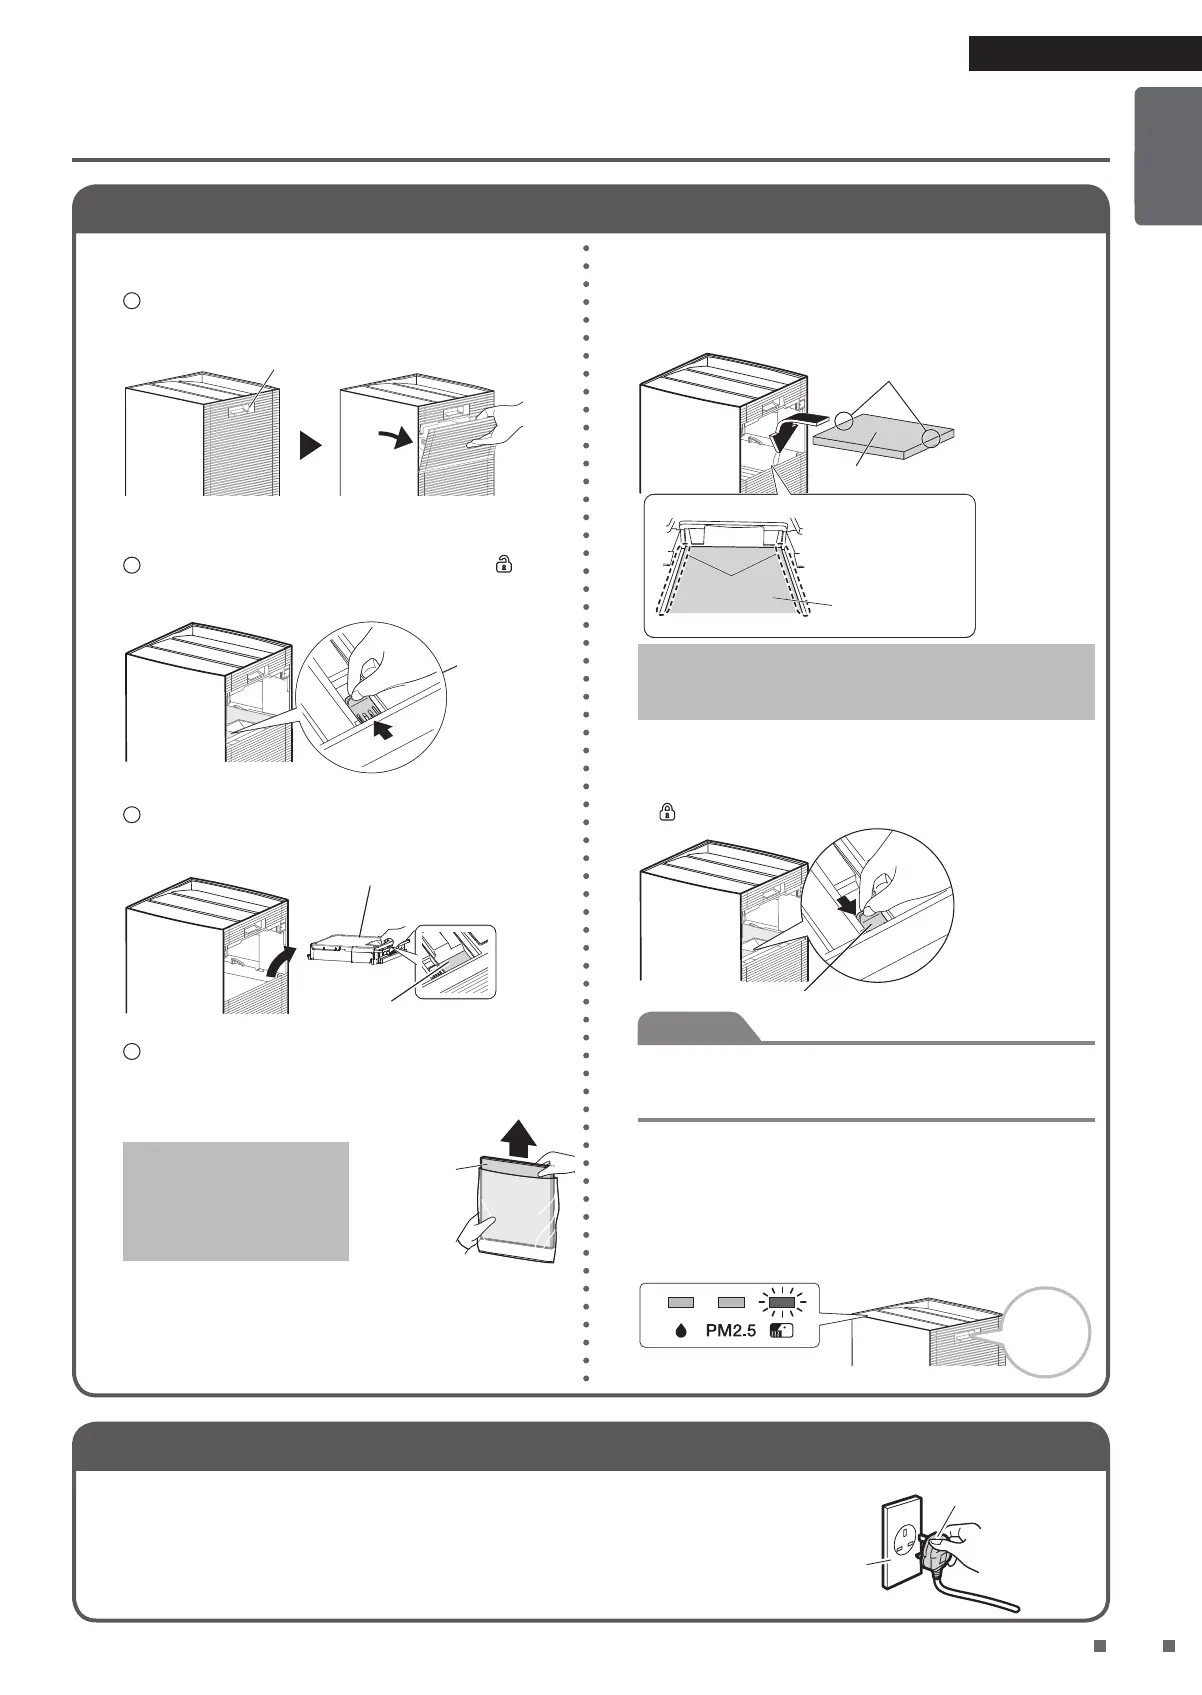
Remove the service cover.
3 Attaching the Deodorising Filter
1.
1
Firmly hold the service cover grip and slowly pull
it towards your direction while pressing the lever.
Lever
Remove filter fixing unit.
2.
1
Move the fixing switch on filter fixing unit to
side
to unlock.
Fixing switch
2
Lift up the grip on the top of the filter fixing unit
and pull out towards your direction.
Filter fixing unit
Grip
3
Remove fixing tape on the filter fixing unit.
Remove the deodorising filter from the bag.
3.
• Filter has no front and back.
Deodorising
filter
Please wear gloves
when handling the filter.
(To prevent dust from the
deodorising filter from
making your hand dirty.)
• Observe local waste separation regulations when
disposing of the deodorising filter bag and desiccant.
Attach the deodorising filter.
4.
Insert the short side of the filter into the main unit above
the dust collection filter.
Short sides of the fi lter
Deodorising filter
[With the
deodorising
filter installed]
Deodorising filter
Gap on the
left and right
Dust from the deodorising filter may turn the dust
collection filter black, but it does not affect dust
collection performance.
Attach the filter fixing unit.
5.
Attach the filter fixing unit and move the fixing switch
to
side to lock it.
Fixing switch
Attention
• Make sure to lock the filter fixing unit. If it is unlocked
and the unit is operated, performance drop or abnormal
noise may occur.
Attach the service cover.
6.
• When starting operation, if a notification tone sounds
and the odour sensor lamp blinks, the deodorising filter
and the filter fixing unit are not properly installed.
• Re-install the deodorising filter and the filter fixing unit.
3 long
beeps
4 Inserting the Power Supply Plug into the Socket
• The basic sensitivity of the odour sensor will be determined by odour
Power supply plug
Power
socket
levels in the first minute (approx.) after the power supply plug is
inserted every time.
Insert the power supply plug when the air is clean (odour-free).