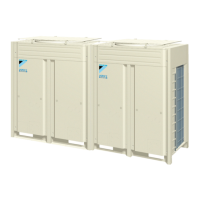
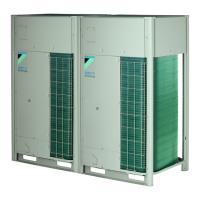
What to do if an error occurred during the Daikin REYQ20T7Y1B test run?
- BbrooksmarioAug 31, 2025
If your Daikin Air Conditioner experiences an error during the test run, re-execute the test run.

What to do if an error occurred during the Daikin REYQ20T7Y1B test run?
If your Daikin Air Conditioner experiences an error during the test run, re-execute the test run.
What to do if Daikin REYQ20T7Y1B Air Conditioner system test run not yet executed?
If the Daikin Air Conditioner system test run has not been executed, execute a system test run.
What to do if Daikin Air Conditioner test run aborted due to communication issues?
If the Daikin Air Conditioner test run is aborted due to communication issues, check the communication wires and then re-execute the test run.
What to do if my Daikin REYQ20T7Y1B has a refrigerant overcharge or stop valve closed?
If your Daikin Air Conditioner indicates a refrigerant overcharge or a closed stop valve, check the refrigerant amount and recharge the unit if necessary. Also, ensure that the stop valves are open.
How to troubleshoot a Daikin REYQ20T7Y1B with an activated high pressure switch?
If the high pressure switch is activated on your Daikin Air Conditioner, check the stop valve situation and inspect for any abnormalities in the field piping or airflow over the air-cooled coil.
How to fix a Daikin REYQ20T7Y1B Air Conditioner indoor unit communication error?
If you experience an indoor unit communication error with your Daikin Air Conditioner, check the user interface connection.
What to do if my Daikin REYQ20T7Y1B Air Conditioner shows a low pressure malfunction?
If your Daikin Air Conditioner is showing a low pressure malfunction, first open the stop valves. Then, check the refrigerant level and recharge the unit if needed. Finally, inspect the user interface display and the transmission wiring between the outdoor and indoor units.
| Brand | Daikin |
|---|---|
| Model | REYQ20T7Y1B |
| Category | Air Conditioner |
| Language | English |
Instructions for preparing refrigerant piping, including material and size.
Specifications and precautions for refrigerant piping materials and cleanliness.
Guidance on selecting the correct piping sizes based on unit capacity.
Guidance on selecting refrigerant branch kits and headers for system configuration.
Procedures for connecting refrigerant piping to the outdoor unit.
Steps for connecting field-installed piping to the outdoor unit.
Instructions on how to operate stop valves and service ports.
Procedures for checking refrigerant piping for leaks and vacuum.
Step-by-step guide to performing a leak test on the refrigerant piping.
Detailed procedure for performing vacuum drying of the refrigerant piping.
Procedures and precautions for charging refrigerant into the system.
Important precautions to observe before and during refrigerant charging.
How to calculate the additional refrigerant amount needed for the system.
Detailed procedures for charging refrigerant, with or without automatic function.
Procedure for automatic refrigerant charging based on system conditions.
Procedure for manual refrigerant charging, including stopping and restarting.
List and explanation of error codes encountered during refrigerant charging.
Instructions for connecting electrical wiring for power supply and communication.
Overview of the process for making field settings for the VRV IV system.
How to use mode 2 for inputting field settings for the outdoor unit and system.
Detailed explanation of field settings that can be configured in mode 2.
Important safety precautions to follow before performing commissioning.
Explanation of the test operation procedure and checks performed.
Step-by-step instructions for conducting the system test run.
Guide to resolving issues by interpreting and acting on error codes.
A table listing common error codes, their causes, and solutions.
List and explanation of error codes appearing on the user interface.


