EN
Page | 46
Preparing the worktop
• The worktop in which the glass ceramic hob is to be installed must be at least 30 mm thick.
• The glass ceramic hob must lie horizontally and be sealed against the wall to prevent liquids
from overflowing.
• The cut edges of the worktop must be sealed with special lacquer, silicone rubber or cast
resin to prevent swelling due to moisture.
• The distance between the cut-out edges on the sides and the left-hand or right-hand wall
must be at least 50 mm.
• The cut-out must be in the middle of the furniture base.
The kitchen furniture, including carrier material, surface coating, adhesives and sealing
materials must have adequate heat resistance of at least 100 °C in accordance with DIN
68930:2009-11
7
.
12.3 Installing the glass ceramic hob
Observe the following when installing the glass ceramic
hob.
• Check the dimensions of the cut-out in the worktop again.
• Keep the edges of the cut-out clean and free from grease.
• Position the glass ceramic hob over the cut-out in the worktop
with the residual heat indicator facing forwards.
The front edge of the glass ceramic hob must run parallel to
the front edge of the worktop.
• Slowly lower the glass ceramic hob into the cut-out until it is
lying flat on the worktop.
• Press down the edge of the glass ceramic hob all round.
• Secure the hob to the worktop from below with:
- 4 pcs. Retaining clamps
- 4 pcs. Fasten the screws.
- 4 pcs. Fasten the screws.
7
Further information can be obtained from the kitchen manufacturer
Carefully place the glass ceramic hob into the worktop. It
must work the first time!
→ Otherwise the glass ceramic hob cannot be easily
lifted out again and the sealing tape does not stick
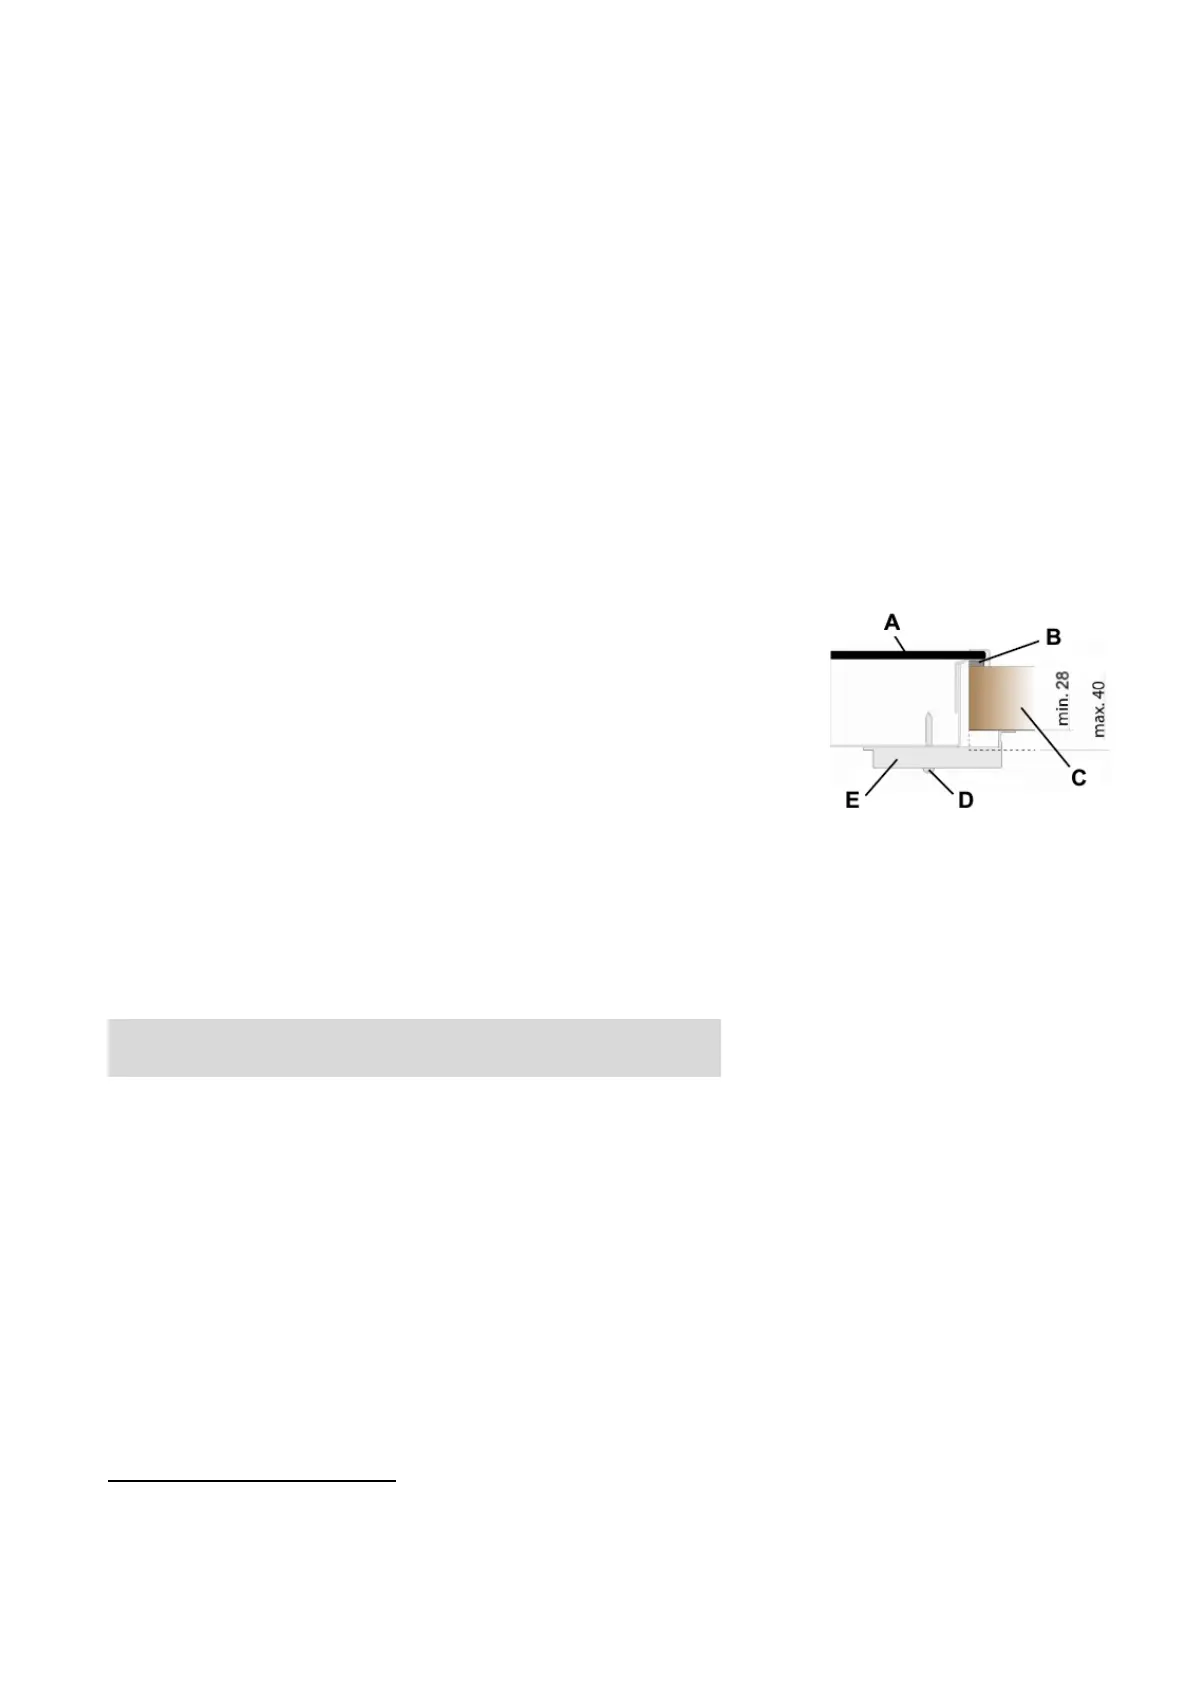
Fig. 7 Cross-section of
installed glass ceramic hob
A Glass ceramic hob
B Seal
C Worktop
D Screw
E Retaining clamp