User Guide | Intelligent Purging System (IPS 8) Ammonia
3 | BC437120335698en-000101 © Danfoss | Climate Solutions | 2023.07
Mechanical / Refrigeration
check
Electrical check
1) Verify that IPS 8 purger is installed, wired, and piped as per Danfoss instructions
2 )Horizontal alignment requirements must be within 2 degrees to IPS top cover. See Fig. 1
3 )The purger unit should be always kept in an upright position - from receipt to nal
installation, including possible lift to a high nal location. See Fig. 2
4) Leave space around IPS for air circulation ow. Do not install it right up to a wall. See Fig. 3
5) Inspection of possible dirt in gas lines. See Fig. 4
a. For purge point connect gas line a slope towards the IPS8 purger, must be observed.
b. No liquid traps
6) Remember to remove rubber plug. See Fig. 5.
7) Carry out proper vacuum on the purge point connect gas line and R717 side of IPS 8 purger.
The R717 side of IPS 8 purger must be pressurized prior to the IPS 8 being put into operation.
8) Before connecting power supply to IPS let it stand upright for min. 6 hours after it has been
placed at its nal location
9) After mechanical installation, but before connecting power supply IPS, please check:
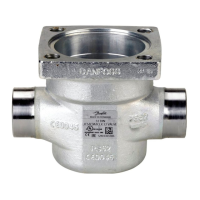
a. If Danfoss drain valve used (Type SV or ICF with ICFD), then check:
b. SV: See Fig. 6a
i. Check throttle valve A is opened, and SV is properly assembled.
ii. Check that port B is closed by bolt.
c. ICFD: See Fig. 6b
i. Check stop valves
ii. Check coil is installed on solenoids (Solenoid for ICF w/ICFD (DO6) – if used)
10) Open stop valves D, as we have vacuumized the pipes before. Open manually one of purge
point solenoids E. See Fig. 6a and 6b
For general mechanical installation guidance/practice. See Fig. 6c
11) Check Main power supply. See Fig. 7
a. 084H5001, IPS 8: 230 V, AC 50 Hz
b. 084H5002, IPS 8: 230 V, AC 60 Hz
c. Power to be connected to Main switch: QS1 and Terminal: XT0
i. Terminals on QS1
1. 3, L2 – Line phase
2. 1, L1 – Neutral
ii. Terminal XT0
1. PE – Earth
12) Check connections to eld connected Purge point solenoids and ICFD solenoid (if used)
See Fig. 8a and 8b
a. Coils voltage. Same as Main power supply. No further action needed.
b. At dierent voltage for eld connected solenoids coils. See Fig. 9