en
it
de
es
fr
nl
pt
da
no
sv
pl
ru
cs
hu
sl
tr
hr
lt
lv
et
ro
sk
bg
uk
bs
el
zh
►►►4. START-UP
►►4.1. PRELIMINARY CHECKS
CAUTION: Check that the power cord is
properly connected.
CAUTION: Check that all the cover pan-
els are in the correct position and are locked via
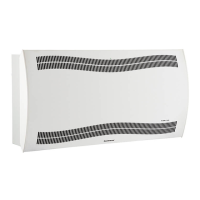
►►4.2. CONTROL PANEL
(PIC. 4)
The unit is equipped with a luminous control pan-
el, which indicates the operating status of the ap-
pliance.
A brief description is provided below:
CONTROL PANEL:
shows [ - - ] when the unit is connected to the
mains and electrically powered.
LED:
ventilation speed (LOW > Low speed / HIGH >
High speed).
alarm. The display will show the error message.
operating mode:
-COOL LED: This LED indicates that the appli-
ance is operating in “COOLING” mode.
-
perature set point is reached.
This LED indicates that the ap-
pliance is operating in “DEHUMIDIFICATION”
mode.
-
midity set point is reached.
-LED FAN: This LED indicates that the appli-
ance is operating in “VENTILATION” mode.
BUTTONS:
on.
Press the “ON/OFF” button to turn the appliance
]).
then on immediately, the compressor does not
start immediately. After a few minutes, the appli-
ance restarts automatically.
to select the desired ventilation speed (LOW >
Low Speed / HIGH > High Speed).
desired set point value. The display will start
and the new set point has been detected by the
electronics.
It is possible to operate the appliance regard-
less of the degree of temperature or humidity in
the environment; in fact, the appliance will work
“CONT” appears on the display.
desired operating mode:
[COOL MODE]: Se-
lect the “COOL” cooling mode on the control
panel.
[COOL MODE]:
2) to outside the room.
control panel.
MODE]
mode on the control panel.
to view the working HOURS/TAC of the appli-
ance.
►►4.3. DISCHARGE PIPE CONNEC-
TION (Set-up)
A discharge pipe can be connected to the appli-
►►4.4. CONNECTING AIR DUCTING
PIPES
Air ducting pipes can be connected to the ap-
pliance. It is recommended to use only pipes of
adequate section and to avoid bends or narrow-
ing of the duct sections.
It is forbidden to move the appliance when it is
ON and when it is connected to ducting pipes.