6 Replacing Splitting Heads
30 OM Hydraulic Stone and Concrete Splitter, Version 1.0 04/2010
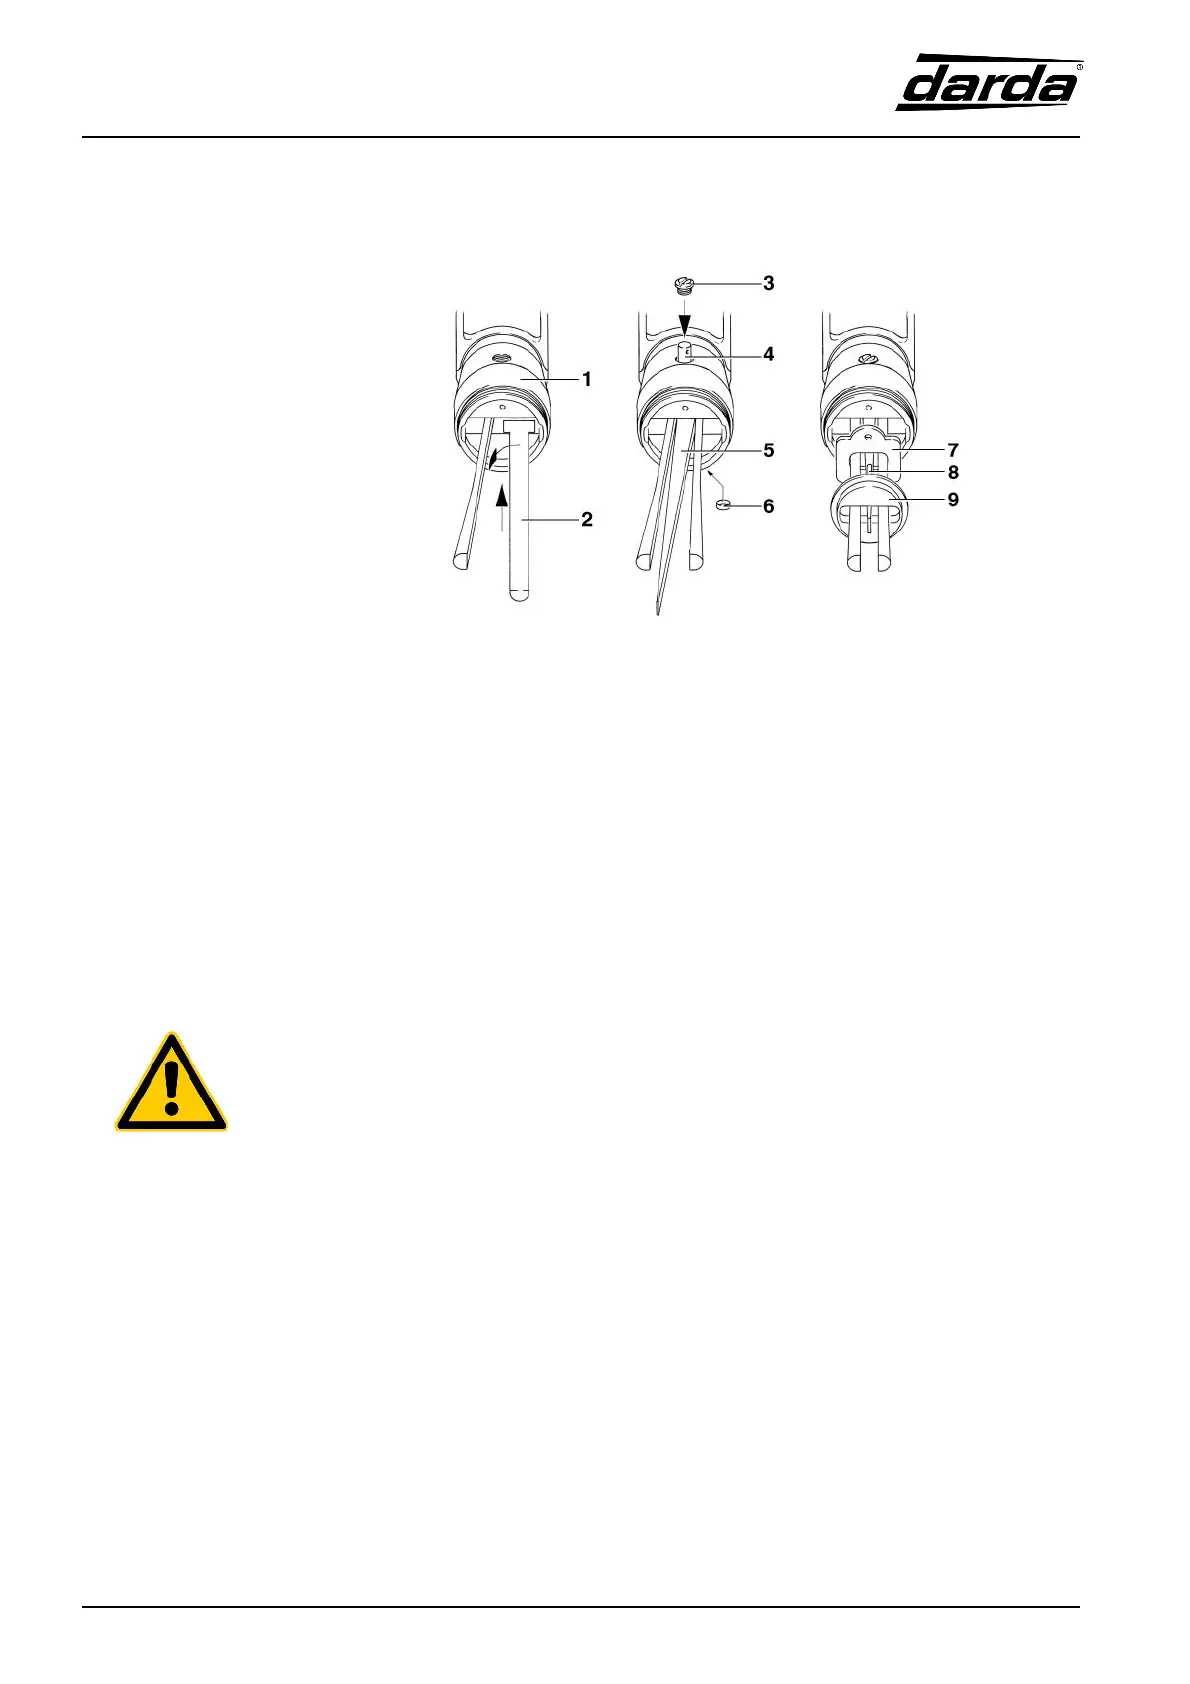
6.1.2 Assembly of the splitting wedge and / or pressure pieces
A B C
1 Built-in pot 6 Plastic cap
2 Pressure piece 7 Rubber disc
3 Screw 8 Guide pin
4 Bolt 9 Guide disc
5 Splitting wedge
Fig. 6-1-2 - 1 Assembly of the splitting wedge / pressure pieces
z If need be, insert the pressure pieces (2) by guiding them into the built-in pot (1)
and turning them 90 º (fig. A).
z Spread the pressure pieces and insert the splitting wedge (5) into the built-in
pot.
z Stick the bolt (4) through the screw opening into the hole of the splitting wedge
and bang it carefully through the wedge head with a mandrel and hammer.
Using the splitting wedge with a not completely inserted bolt leads to dam-
age or destruction of the splitting cylinder!
z Before start-up, close the screw opening by completely tightening the
screw (3)!
z Insert the plastic cap (6) into the hole on the opposite side (fig. B).
z Activate the hydraulic aggregate and retract the splitting wedge completely
(operating lever in position R).
z Press the rubber disc (7) into the recess of the built-in pot.
z Insert the guide disc (9) with its guide pins (8) in the recess of the built-in pot so
that their surface is flush with the front of the built-in pot (fig. C)
z Screw the grommet nut (fig. 6-1 - 1, pos. 3) onto the built-in pot with the sickle
spanner.
z Push the rubber disc (fig. 6-1 - 1, pos. 2) over the splitting head to the front sur-
face of the grommet nut.