18 / 47
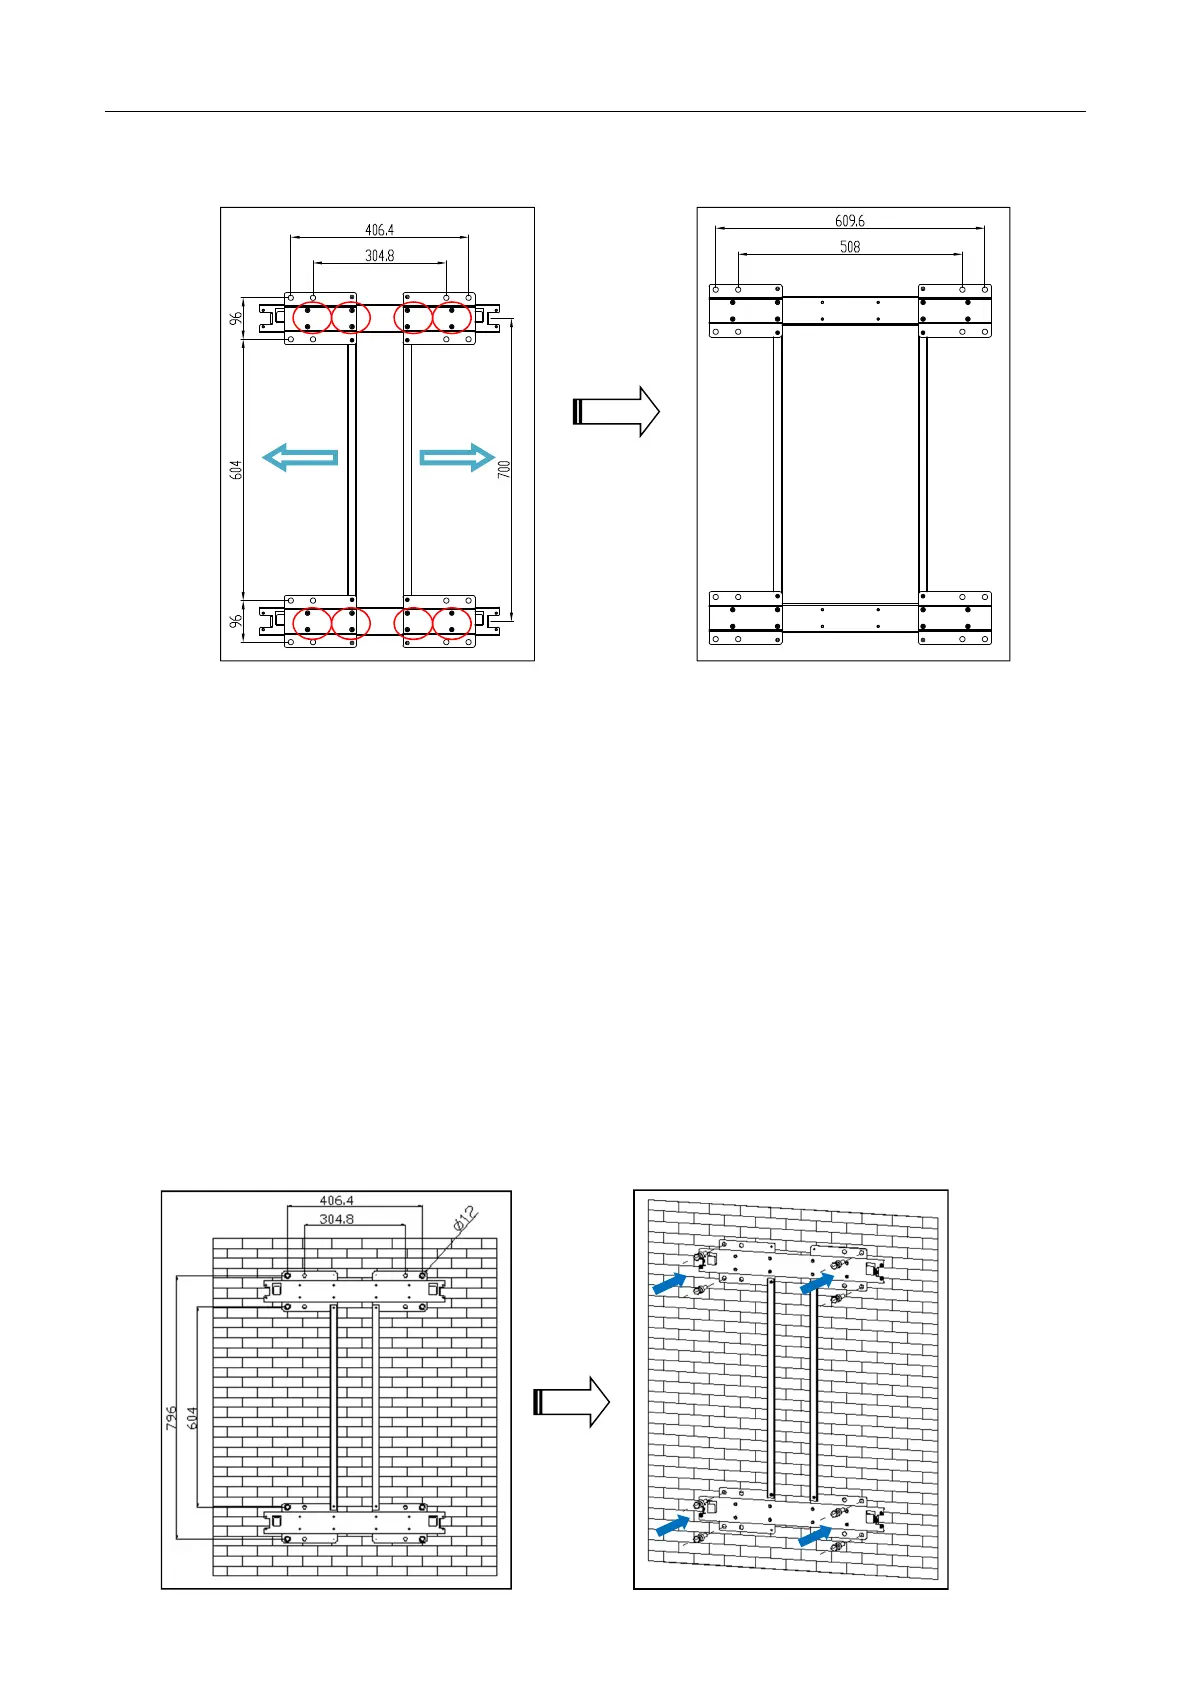
The original mounting bracket is suitable for 12, 16 inch installation space. If it is to be applied to a 20
or 24 inch installation, remove the screws in the red circle in the above figure and move the removed parts
to the left and right by a screw hole in the direction indicated by the arrow to fix the screws. The adjusted
bracket is suitable for 20, 24 inch installation space.
(5) Fixed mounting bracket: Place the mounting bracket on the appropriate position on the wall
(recommended installation height is about 1-1.2 meters, which is calculated based on the bottom of the
fixed mounting bracket). Adjust the mounting bracket according to the width of the mounting wall, draw
with the pen at the mounting hole Mark the hole with a hole diameter ofφ14 at the mark 70mm; insert the
expansion screw seat into the hole and knock it to the end; after unscrewing the screw, fix the mounting
bracket to the wall and tighten the screw with a wrench.
(4) Adjusting the mounting bracket