www.datamax-oneil.com D-2
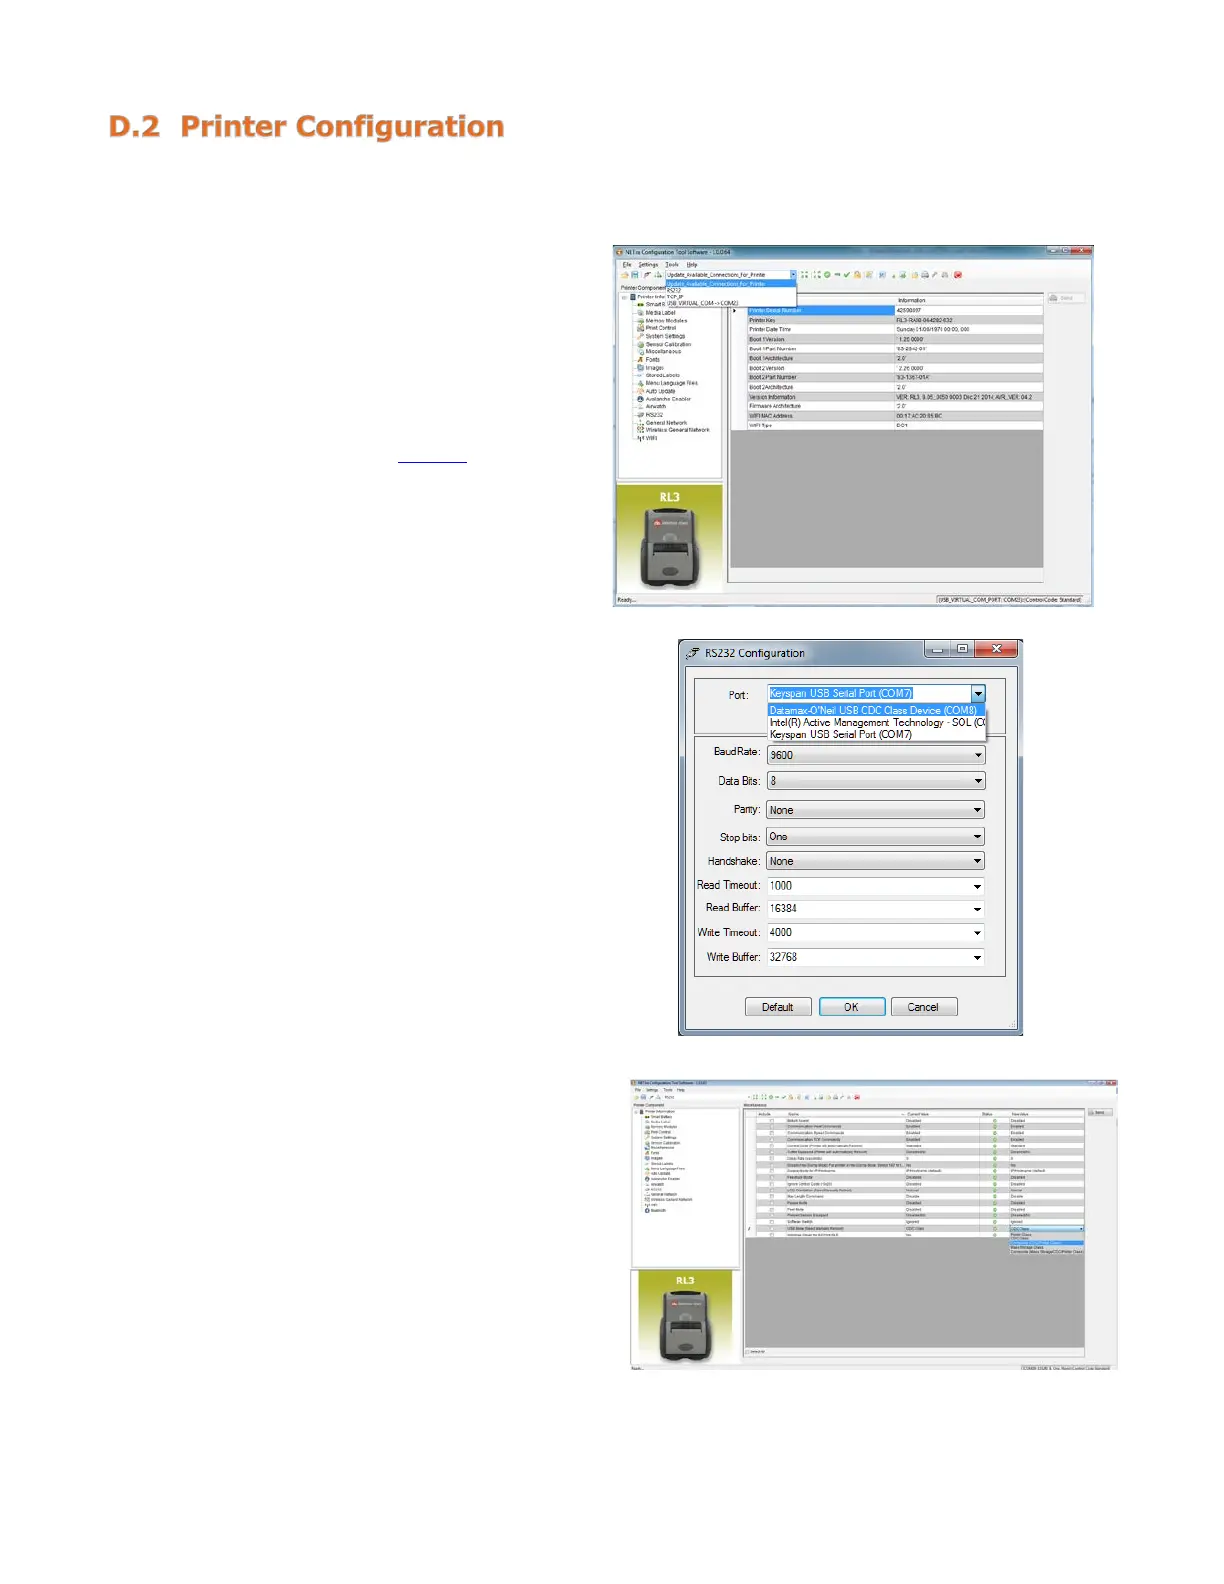
Before attempting a USB connection the printer must first be configured to use the desired USB class. Set
the printer to appropriate USB class for your particular application by using the NETira
™
CT Printer
Configuration Utility.
The default setting is “Composite (CDC/Printer Class).”
1) Turn the printer ON and connect it to the
computer using the USB cable.
Refer to
Section 3.3 - Establishing Printer
Connection
.
2) Install and Open the NETira
™
CT Printer
Configuration Utility application on your PC
(see Section 3.4 for more information).
This configuration utility can be
downloaded from our website
.
3) Query the printer by using the “Update
Available Connection For Printer.” This will
look for the “USB Virtual COM Port.” Once
it is completed, reopen the dropdown
menu and select the assigned port. If the
printer fails to detect the USB Virtual COM
port, check “Click on Settings” and select
the COM port that is assigned to the
Datamax-O’Neil USB CDC Class Device
COM port.
NOTE: The message “Done query printer”
confirms that communication process was
4) Click on the “Miscellaneous” printer
component.
5) Change (or confirm) the USB Mode
parameter setting.
6) After updating the “New Value” column,
click the “Send” button to send this change
to the printer.
7) Proceed to the appropriate section to
complete the USB connection.
Section C.3, Composite Class
Section C.4, CDC Class
Section C.5, Printer Class