4
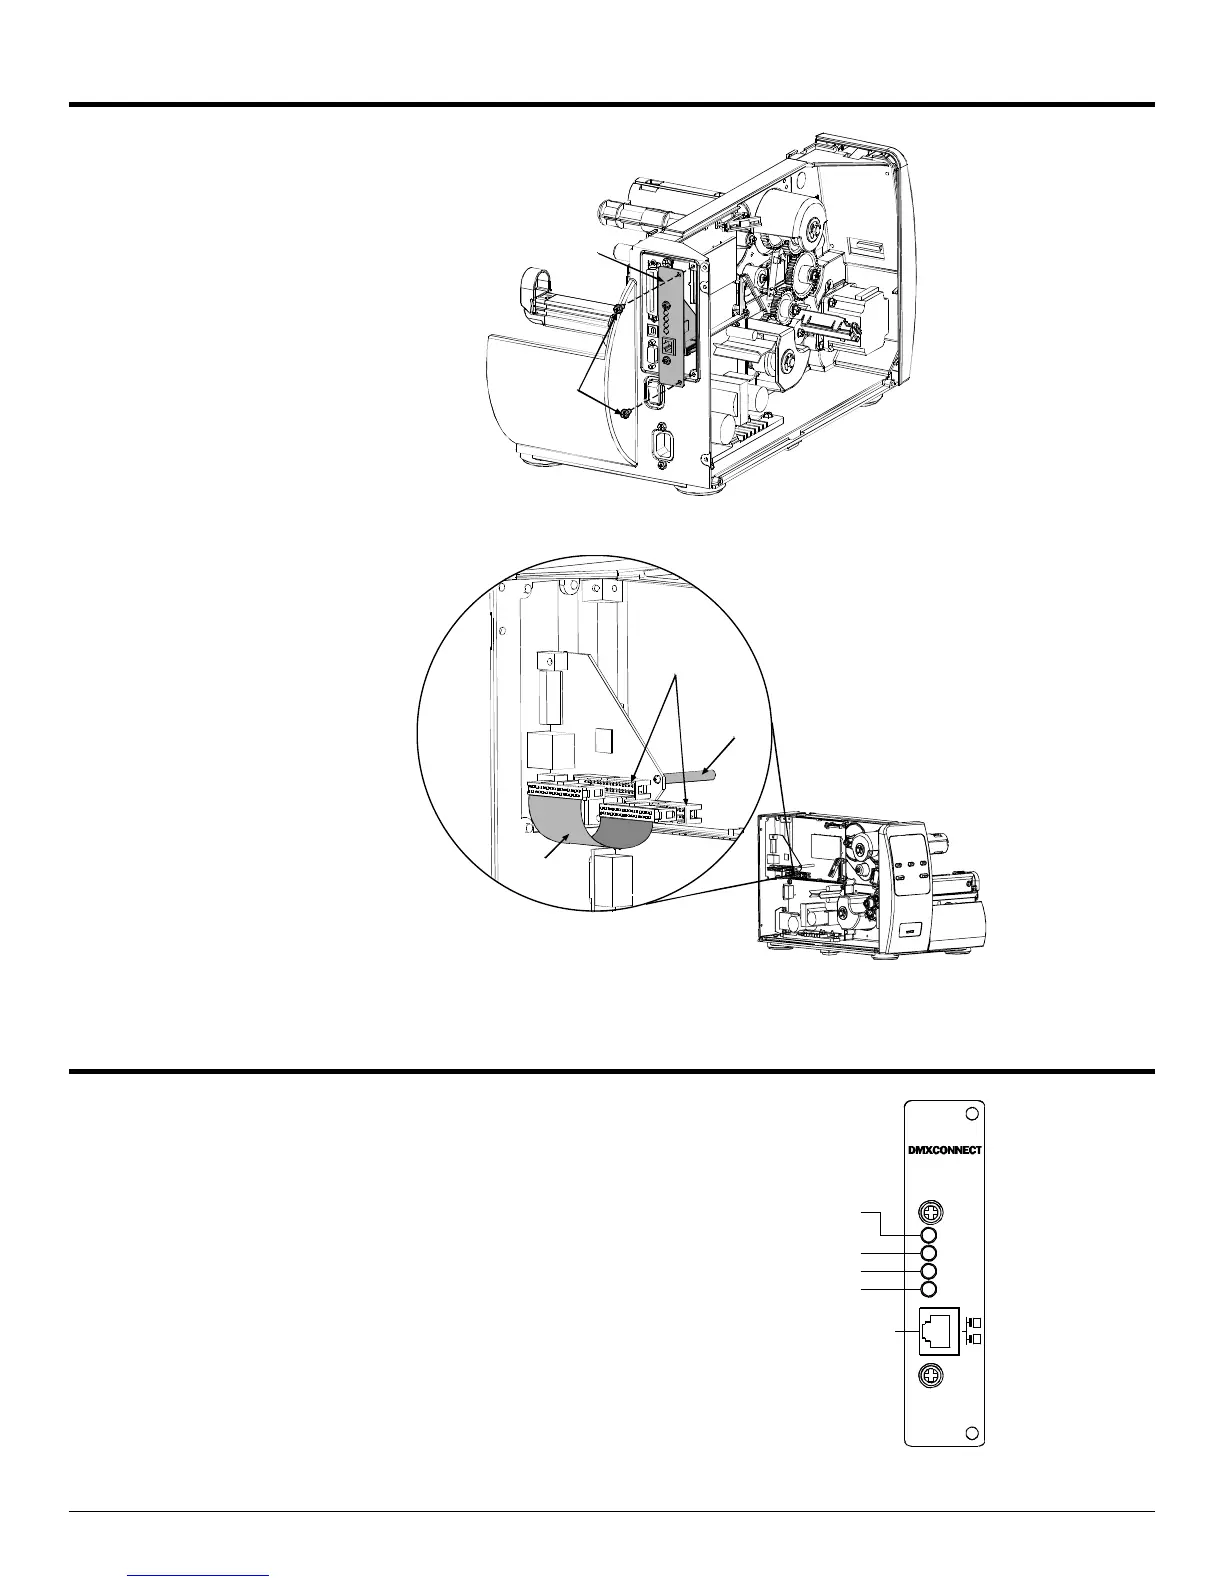
Installing the Internal Ethernet Print Server Assembly
1. Slide the Print Server
Assembly into the rear of the
printer and secure with the two
previously removed screws.
Print Server
Assembly
Screws
2. Install each end of the supplied
Ribbon Cable into its
corresponding connectors on
the printer’s main board and
Print Server Assembly.
3. Insert the Standoff into the
holes in the printer’s main
board and Print Server
Assembly.
4. Re-install the printer’s covers
and associated screws.
Connectors
Ribbon
Cable
Standoff
Indicators and Connector
10M Indicates a valid 10-megabit Ethernet connection is
present when lit.
100M Indicates a valid 100-megabit Ethernet connection is
present when lit.
RX Flashes when data is being received by the printserver.
TX Flashes when data is being transmitted by the printserver.
10M
100M
RX
TX
M-Class Ethernet
Print Server
10 Meg. Ethernet
Connection Indicator
100 Meg. Ethernet
Connection Indicator
Data Transmit Indicator
Data Received Indicator
10M/100M Ethernet Connector
RJ-45 Connector
 Loading...