5
Setup and Configuration
The Internal Ethernet Print Server can be configured in one of two ways:
> Using ‘IP Discovery’ (DHCP, BootP, and RARP)
or
> Using a static IP set using the printer’s front panel.
;
Note: The factory default has IP Discovery ‘Enabled’. If you do not wish to use the IP Discovery function be sure to
set it to ‘Disable’ using the printers front panel before connecting and powering on the printer.
Configuration Using IP Discovery (DHCP, BootP, and RARP)
;
Note: After approximately 3 minutes the printer will display "IP DISCOVER FAILED" if it was unable to find a DHCP
server. This message does not effect the operation of the printer and can be cleared from the display by
pressing the
FEED
button.
Once the Ethernet Print Sever has been installed and connected, plug in the power cord and Ethernet cable then turn the
printer’s power switch ‘On’.
DHCP, BootP, and RARP are server services that provide a method for assigning and maintaining IP addresses. The Print
Server obtains IP information from these services.
The factory default has IP Discovery enabled. This enables all three (DHCP, BootP, and RARP) server services, they are
not individually selectable. The Print Server makes IP requests at power-up. If using this method of discovery, after the
connection is established print a Configuration Label (see below) from the printer to obtain the IP Address and then use it to
install your printer port and driver to complete your setup.
;
Note: Depending upon your server, you may have to wait a minute or two for the assigned IP Address to appear on
the Configuration Label.
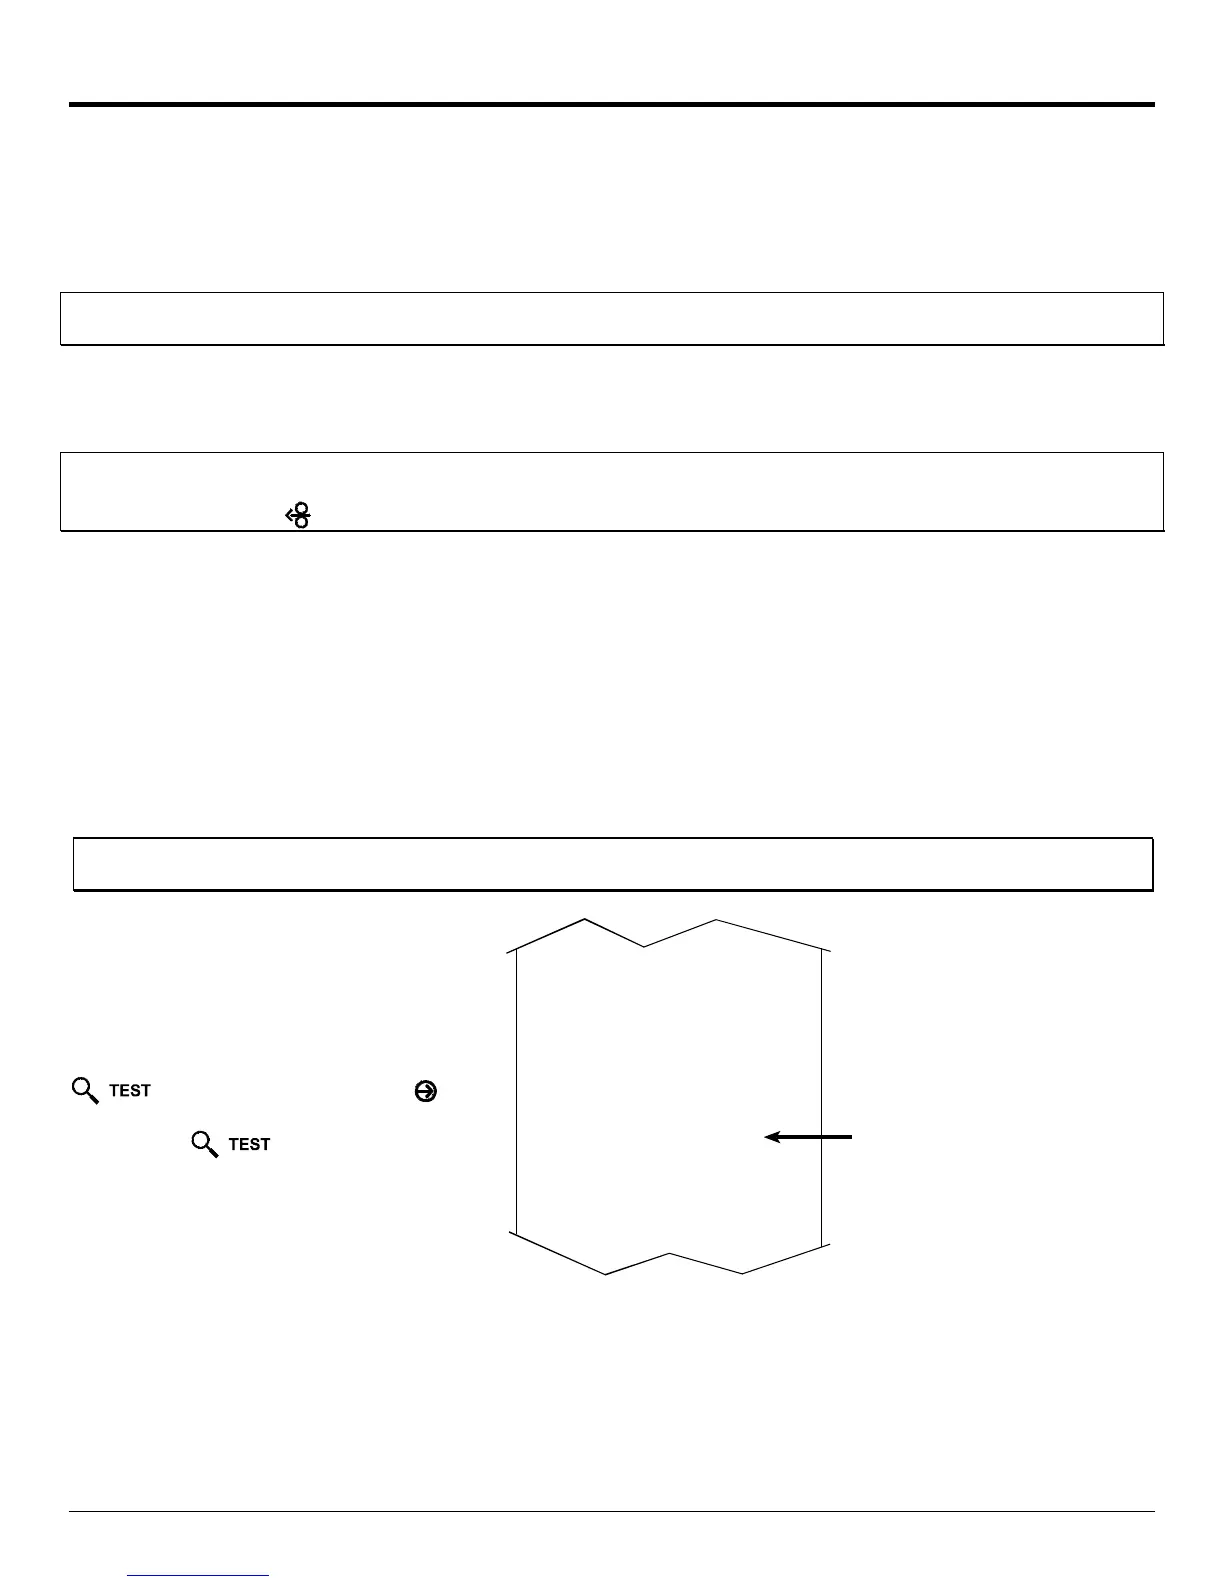
To print a configuration label:
With the printer on, loaded with media (at
least 4 inches wide) and ribbon (if printing
with thermal transfer media). Press the
button once, then use the
FWD
button scroll to
‘PRINT CONFIGURATION’
and press the
button again to print.
COMMUNICATIONS
SERIAL PORT A:
BAUD RATE
9600
PROTOCOL
BOTH
PARI TY
NONE
DATA BITS
8
STOP BITS
1
SERIAL PORT B:
NOT INSTALLED
PARALLEL PORT A:
PORT DIRECTION
UNI-DIRECTIONAL
USB PORT
INSTALLED
NIC ADAPTER:
MAC:00-0d-70-00-00-09
IP ADDRESS
168.24.12.192
SUBNET MASK
255.255.255.255
GATEWAY
168.24.254.254
SNMPTRAP DESTINATION
000.000.000.000
IP DISCOVERY
ENABLED
HOST SETTINGS:
HOST TIMEOUT
10 sec
CONTROL CODES
STANDARD CODES
FEEDBACK CHARACTERS
DISABLED
PRINT CONTROL
HEAT
10
PRINT SPEED
8.0 in/sec
FEED SPEED
8.0 in/sec
REVERSE SPEED
4.0 in/sec
ROW OFFSET
00.00 inches
COLUMN OFFSET
00.00 inches
PRESENT DISTANCE
0.00 inches
CUSTOM ADJUSTMENTS:
DARKNESS
32
CONTRAST
32
ROW ADJUST
0 DOTS
COLUMN ADJUST
0 DOTS
PRESENT ADJUST
64 DOTS
PRINTER OPTIONS
MODULES
A: NOT INSTALLED
B: NOT INSTALLED
D: NOT INSTALLED
F: NOT INSTALLED
G: NOT INSTALLED
X: NOT INSTALLED
Y: NOT INSTALLED
Z: NOT INSTALLED
PRESENT SENSOR:
MODE
DISABLED
RETRACT DELAY
0 X 10mS
Assigned IP
Address
Once you have obtained the assigned IP from the configuration label you can then install the port and printer driver using
the Windows
®
‘Add a Printer Wizard’. See section, Installing the Printer Driver and Port in this document.
 Loading...