QUICKSTART GUIDE 14
3. QUICKSTART GUIDE
THE BASICS
• Connect the displays to the WATCHPAX 60.
• Connect the network to the WATCHPAX 60 using the Ethernet 1 port. The Ethernet 2 port is currently
disabled and reserved for future use.
• Power up the WATCHPAX 60 (see “Power On”).
• Start WATCHOUT software on the production computer which is on the same network. Make sure
you are using WATCHOUT version 6.5 or higher.
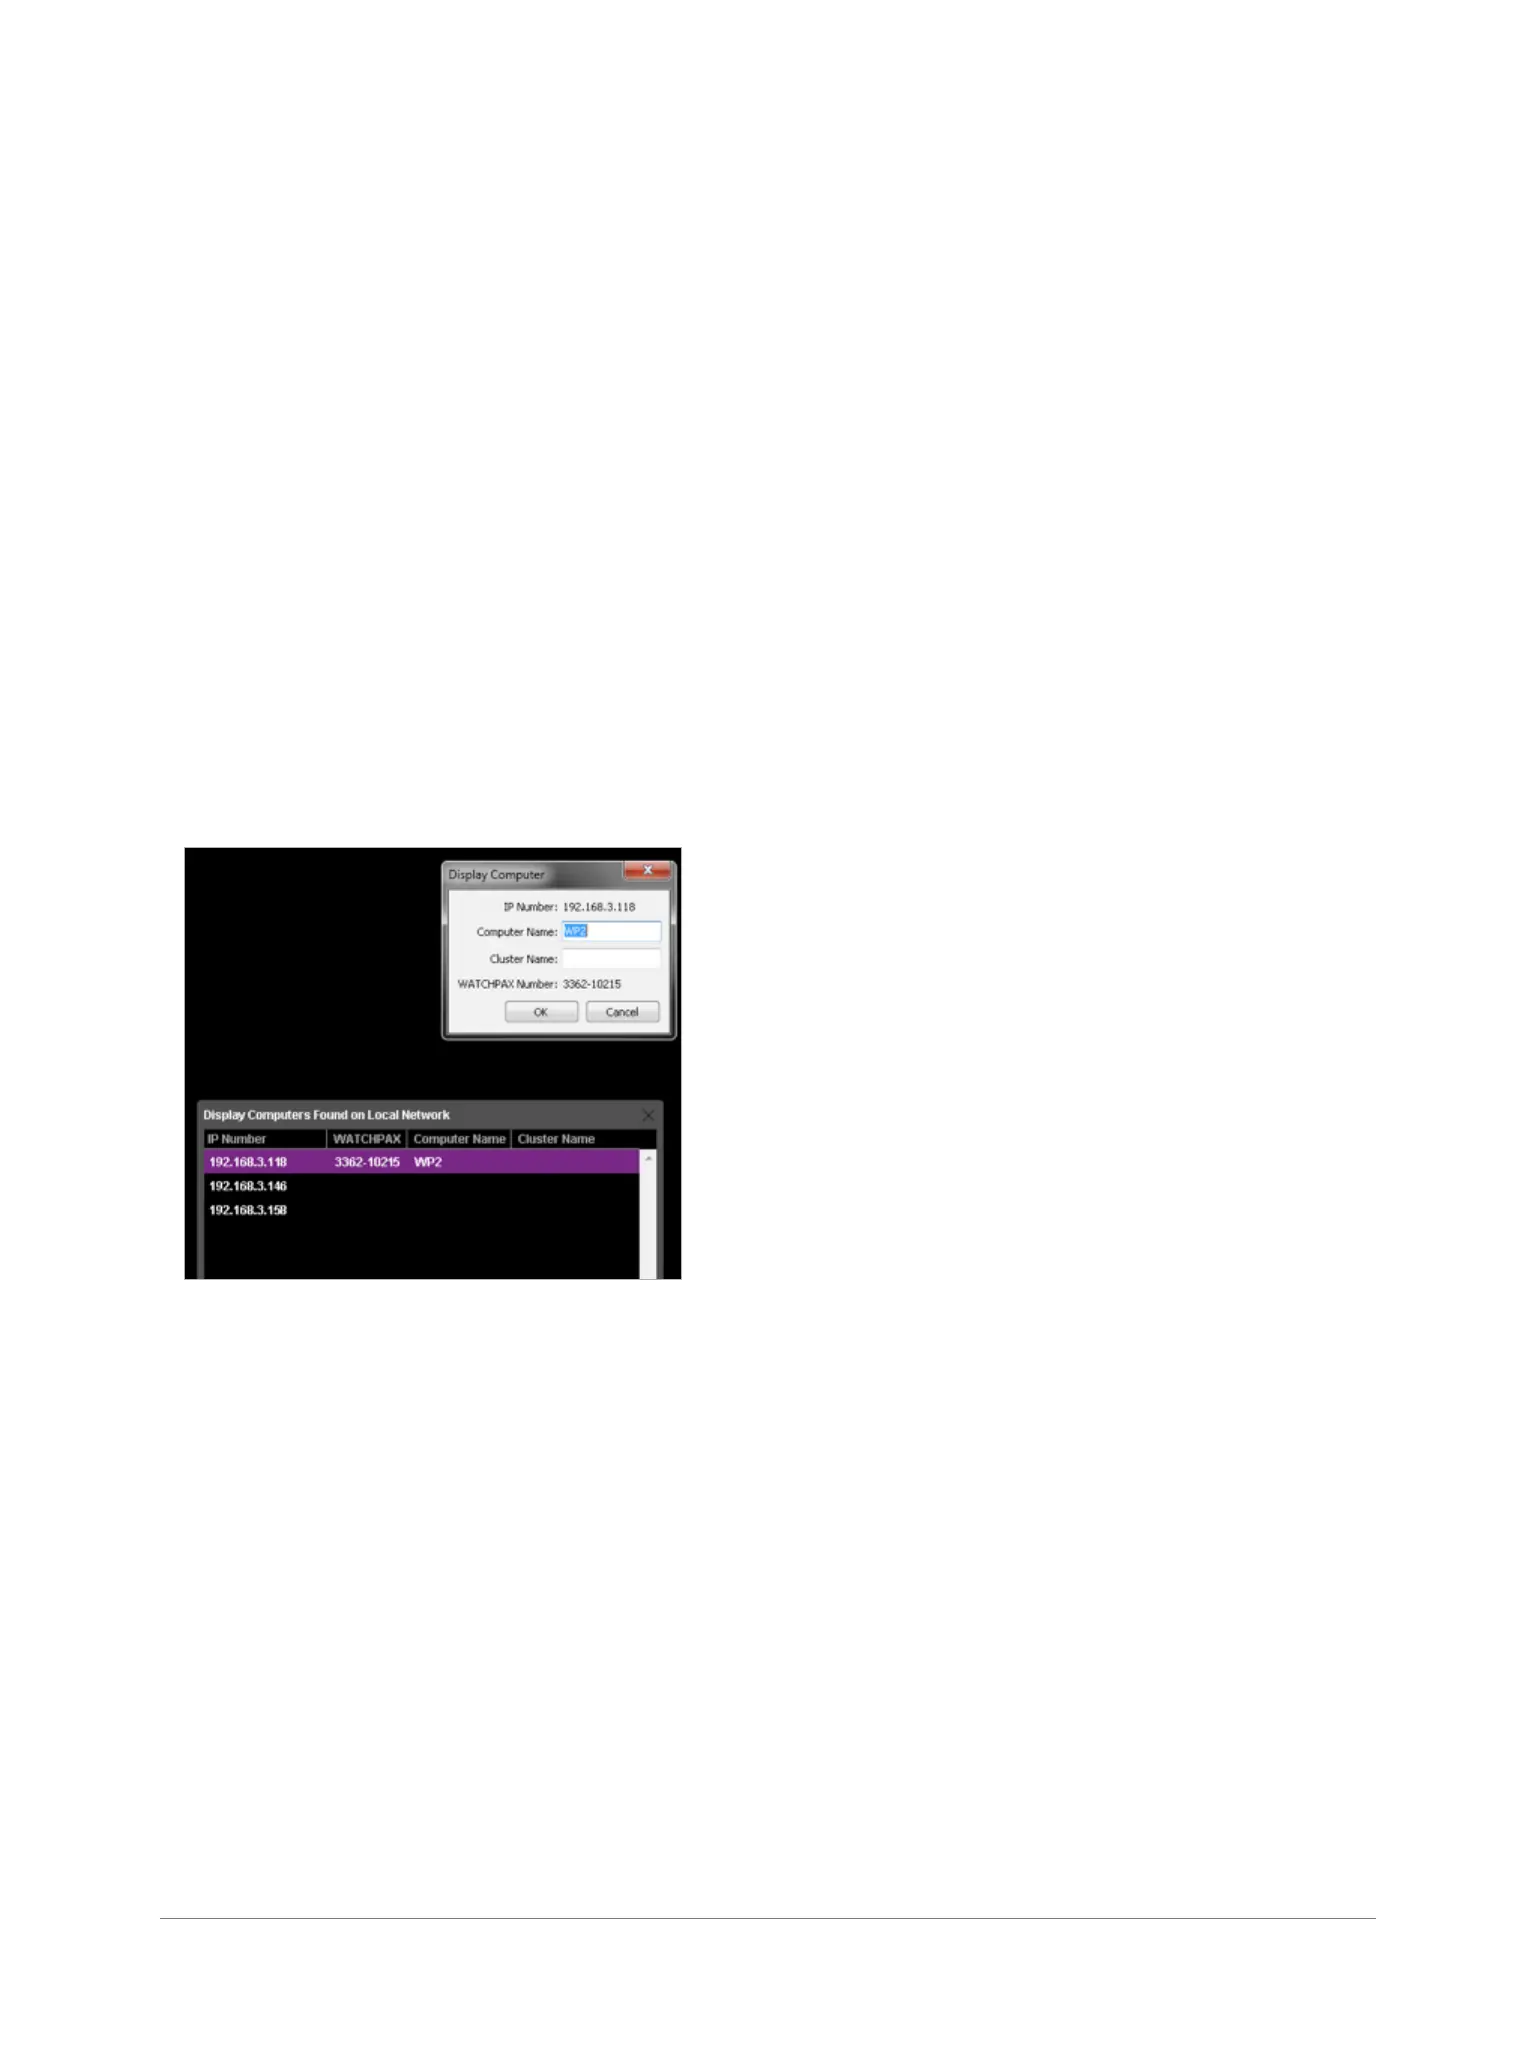
• The WATCHPAX and any WATCHOUT display computers on the local network will be listed in
Window > Network. Assign display and cluster names (if required) by double-clicking an item in the
list, see screenshot.
MANAGE NETWORK SETTINGS
WATCHPAX automatically retrieves an IP address via a DHCP server. If no DHCP server is available,
the WATCHPAX will get a self-assigned IP address in the range 169.254.x.y
If you are using a control system, you may want to use a xed IP address for WATCHPAX. Still in
WATCHOUT, assign a xed IP through the WATCHOUT protocol command “setIP” in the Startup Script
as shown below:
authenticate 2
setIP 192.168.0.32
Make sure you choose an IP address in the correct subnet range. To remove the xed IP number, use
the same command but with an empty string parameter, as below:
authenticate 2
setIP
WATCHPAX and display computers
on the network