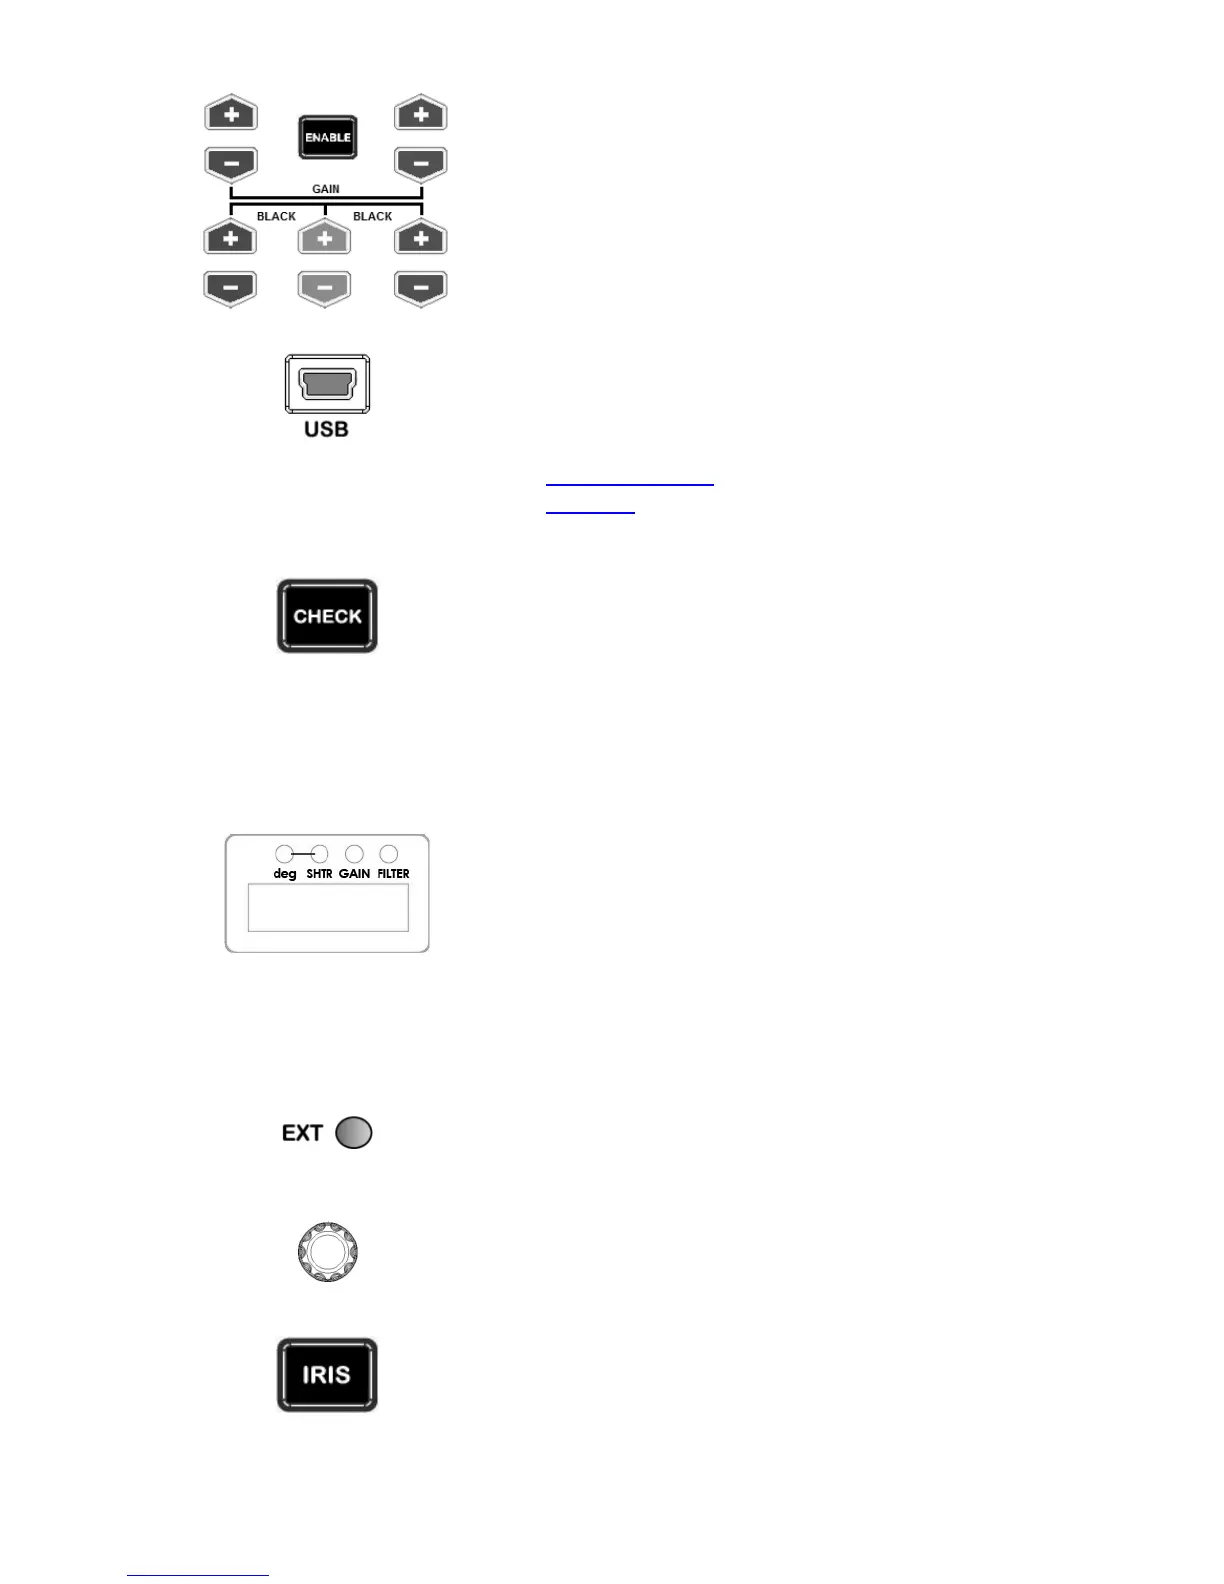
Enable & Painting Adjustment buttons
Press the ENABLE button in the Painting area of the MCU-
100P before choosing to adjust either the level of the Red
and Blue Gain or the RGB Pedestal values.
This port is used for firmware updates or to save/transfer
MCU-100P settings to computer.
See Firmware Update section for firmware upgrade details.
See Section 4 for saving/transferring settings with a
computer.
GAIN value, SHUTTER speed, and FILTER
position, IRIS,
Master Pedestal, R/B Gain and RGB pedestal values are
shown on the display below in this order each time the
CHECK button is pressed.
If the CHECK button is pressed and held down for over two
seconds the MCU-100P unit will switch in to LOCK mode.
The IRIS value, Shutter degree, speed, Gain and Filter
positions can be displayed here by using the CHECK button.
*The M. PED, PAINTING GAIN R/B and BLACK R/G/B values
can also be displayed sequentially here. See CHECK button
also.
When in LOCK mode this display will show Lock.
This LED will be ON when a lens extender is detected on the
chosen camera.
Used to adjust the Iris value. See IRIS and CHECK buttons
also.
To enable or disable Auto Iris.
The button is back lit orange when Auto Iris is enabled.
 Loading...