There is also a Custom mode that let's you set the scan parameters to your requirements.
↑ | Scanning | Camera Control
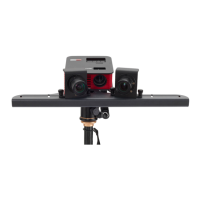
For DAVIDSLS‐x setup types all camera properties and the camera format is set up automatically. For
custom setups, you can change the setup by clicking on CameraProperties or CameraFormat .
Deactivate all filters that might be active in your camera or camera driver (e.g. avoid smoothing and
extra sharpness). Prefer "raw" images.
Be careful with "gain", since this introduces noise to the scans. For many cameras and situations the
lowest (or 0 db) gain value works best.
The Exposure should be set to the same value as the frame rate of the projector (usually 1/60s), otherwise
the camera image will flicker / pulsate when looking at the projection. Increase exposure to multiples of
projector frame rate (e.g. to 1/30, 1/20, 1/15 etc) only in cases when your object is too dark.
When you change the resolution of the camera or some properties like zoom, pan, tilt which influence
the camera's field of view, you have to recalibrate the scanner.
The preview images of the selected camera include an indicator for the scanning quality: Red colored pixels
are likely to produce low quality 3D points or none at all. But keep in mind, this is only an indicator.