DAVID offers several alignment modes. First, start with the alignment mode Free , which allows you to
align arbitrarily positioned scans one-on-one. In order for the automatic mode to align two scans
successfully, the two scans must have a unique region of overlap in common, which must not be too small.
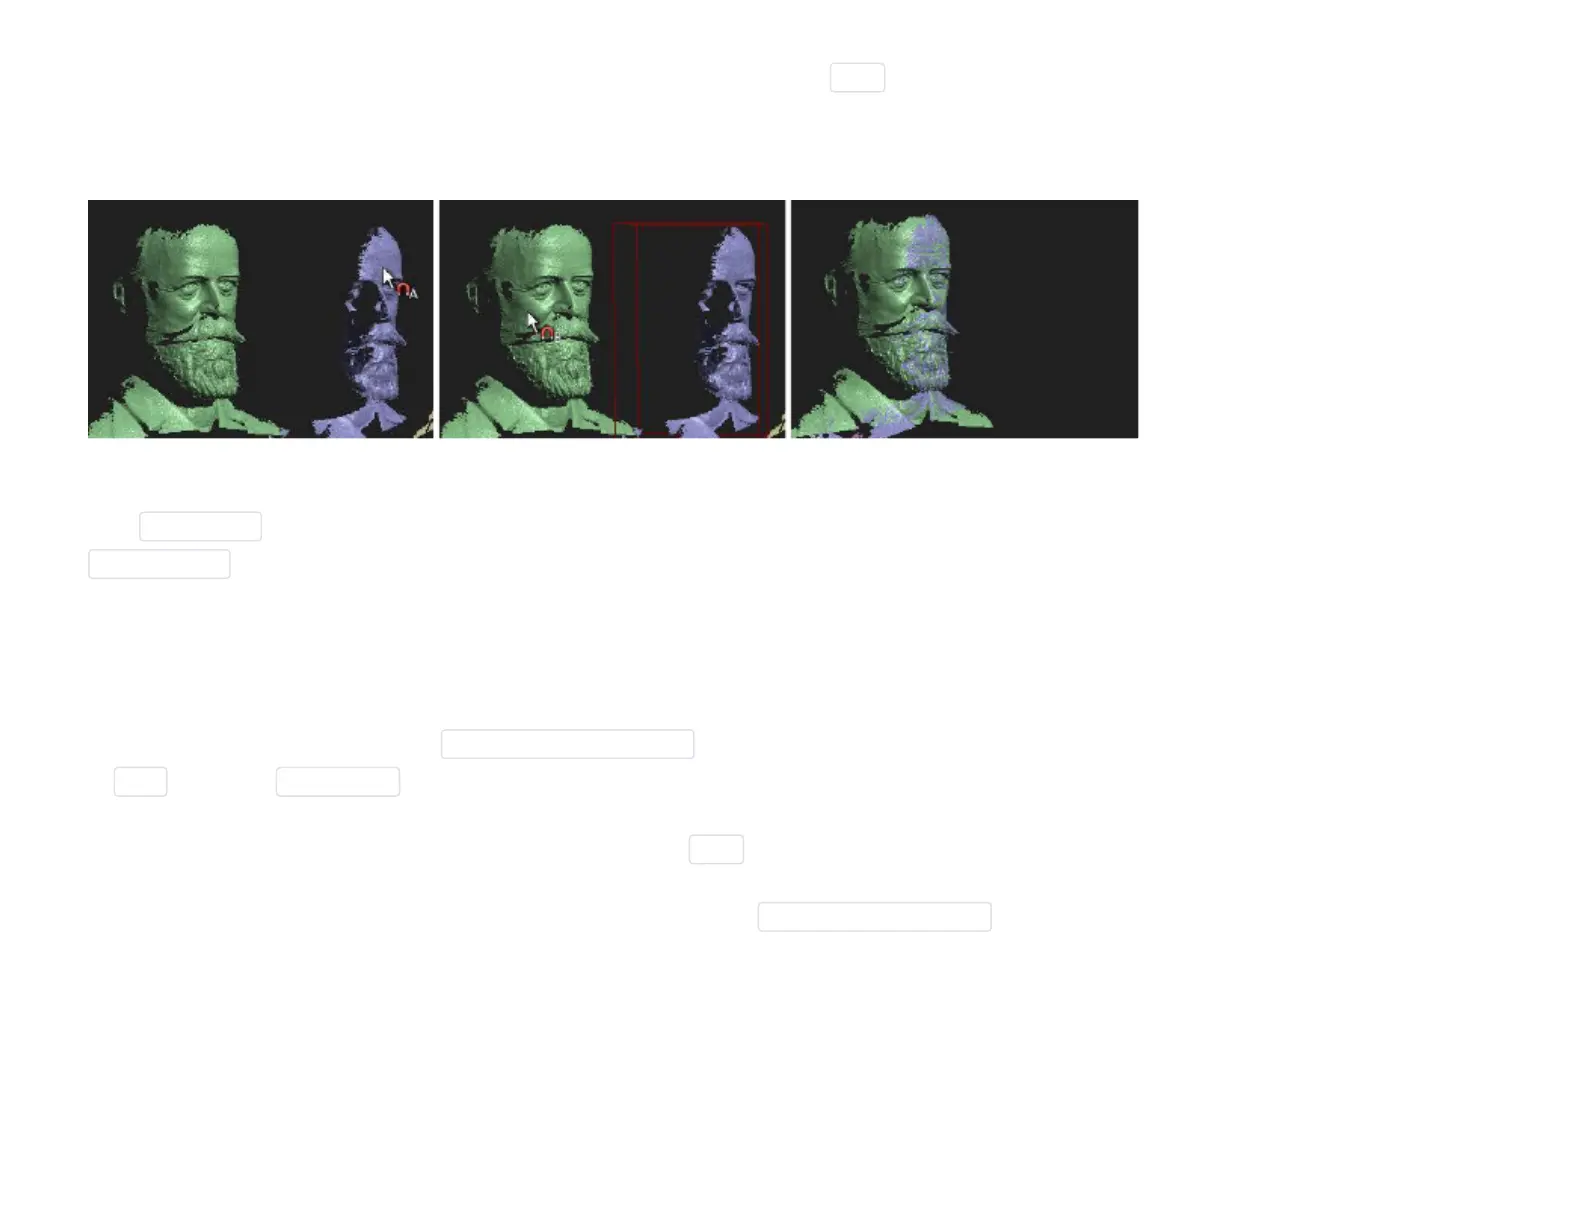
Automatic alignment with two mouse clicks
With AlignScans start the alignment. In the following, you can select scans either in the 3D view or in the
ListofScans . First click on scan "A" which you want to align. Then click on scan B, to which A should be
aligned. Successively align more scans to the already aligned scans. Always choose pairs that have as
much overlap (common areas) as possible. In the above example, the next step would be to align the
yellow to the blue scan: click on the yellow, then the blue scan, etc.
When all scans are aligned, a run of GlobalFineRegistration is recommended. Choose that mode instead
of Free , then click AlignScans .
All movements/alignments can be individually undone by the Undo button.
If the automatic alignment finds false solutions, you should activate ContactPairSelection . Then you can
help DAVID by clicking on distinctive points that are to be aligned with each other (e.g., tip of the nose).
Relevant here is the area within the red circle at the mouse pointer. If you would like to define the contact
pair points very precisely, zoom up close with the mouse wheel before you click. If you want to mark the
contact area only roughly, zoom out before you click.