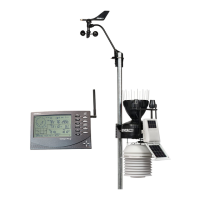
Installing the ISS on a Flat Surface
20
Installation Instructions
There are several ways to mount and install the ISS unit. The following are
installation types that Davis Instruments recommends. Individual ISS locations and
installations may vary.
• Installing the ISS on a flat surface
• Installing the anemometer on a post or flat surface
• Installing the ISS on a pole
Note: All installations require that the rain collector cone be removed for assembly. Use the built-in bubble
level to ensure the main part of the ISS is level.
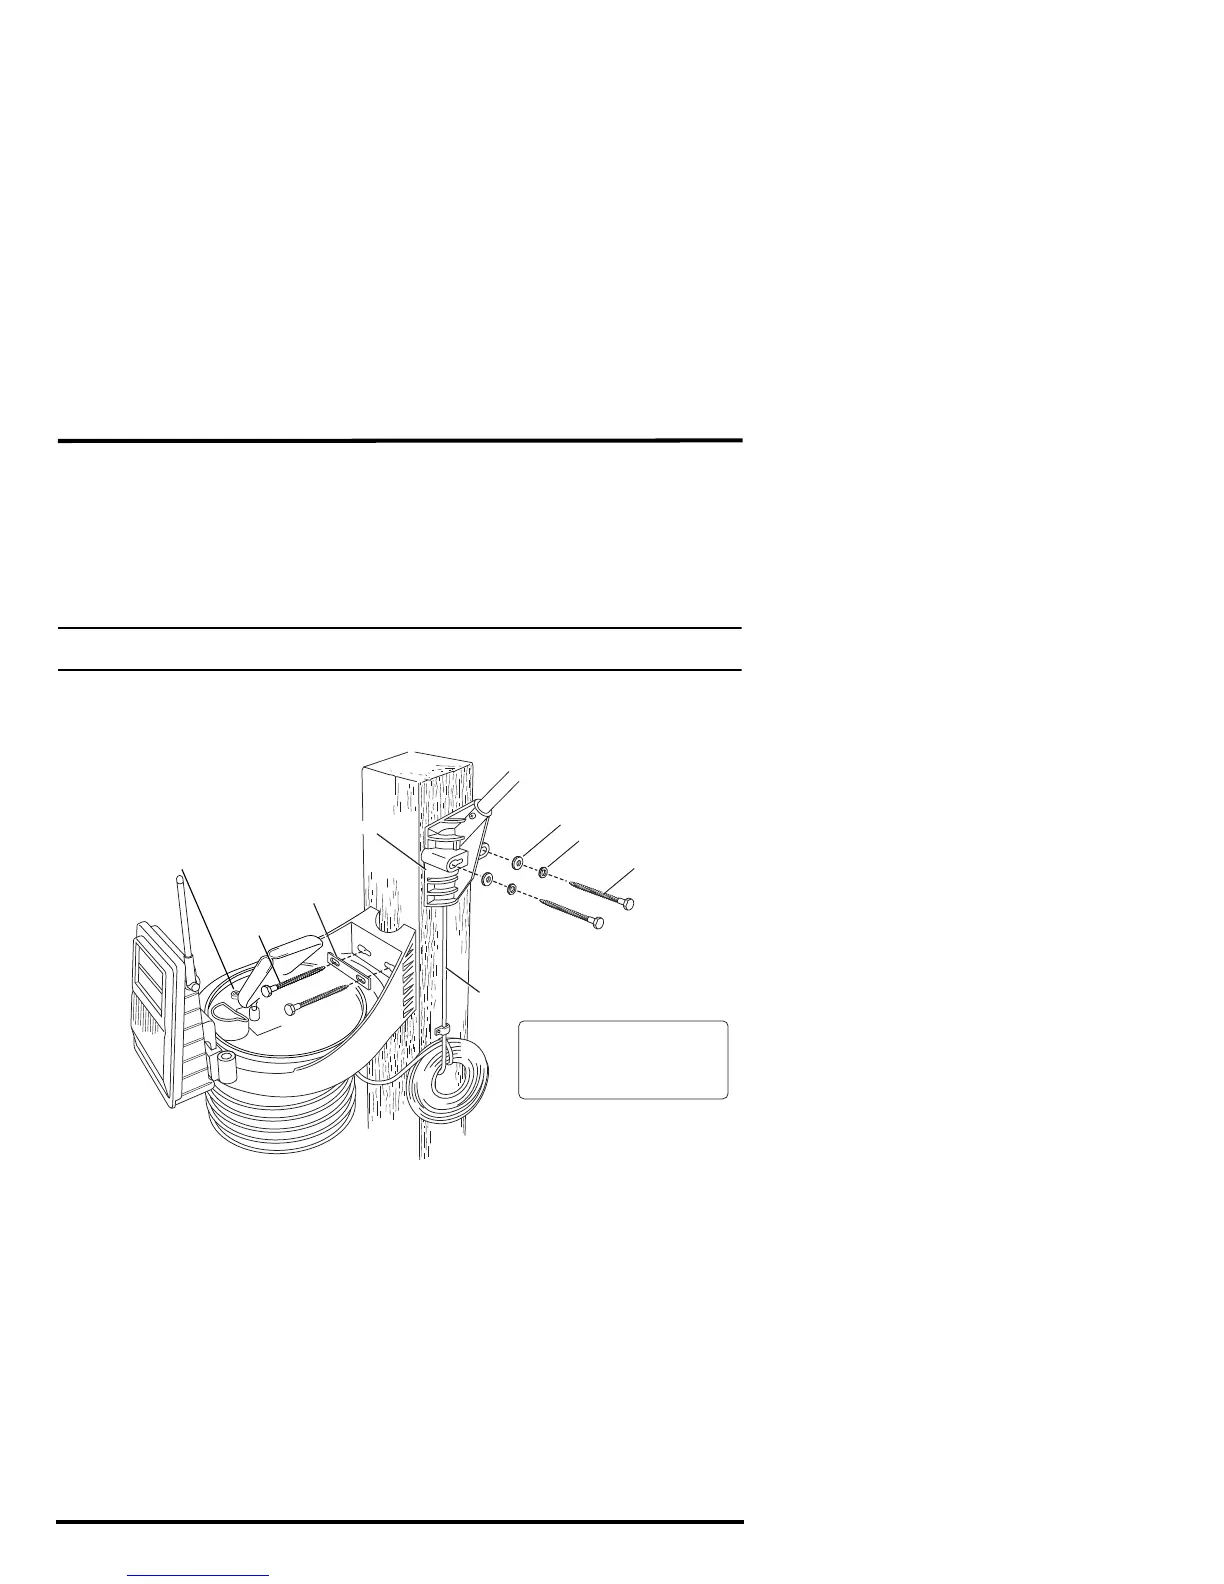
Installing the ISS on a Flat Surface
Refer to the following illustration to install the ISS on a post or flat, vertical surface.
Option 1: Installing the ISS on a Post or Flat Surface
1. With a 3/16" (5 mm) drill bit, drill two holes approximately 2
1
/
8
" (54 mm) apart.
Use a carpenter’s level to ensure the holes are level.
Use the metal backing plate as a guide when marking the holes.
2. Remove the rain collector cone if it is installed on the ISS mounting base.
3. Insert the 1/4" x 3" lag screws through the metal backing plate and the holes in the
mounting base into the post. Make sure the ISS is level by checking the built-in
bubble level.
4. Tighten the lag screws using an adjustable wrench or 7/16’’ wrench.
5. Re-attach the rain collector cone. Set the cone back on the base so its latches slide
downward into the latch openings on the base. Rotate cone clockwise.
6. Place the debris screen (shown in the illustration on page 1) inside the cone, “feet-
down” over the funnel hole.
Backing Plate
1/4" x 3"
Lag Screws
1/4" Flat Washers
1/4" Lock Washers
1/4" x 3" Lag Screws
Anemometer Base
40' of Anemometer Cable
Note: Typically the anemometer and rain
collector are mounted on opposite sides
of the post. They are shown mounted on
adjoining sides to clarify the installation
details.
Bubble Level

 Loading...