Introduction
Page 4 Weather Wizard III
A T
YPICAL
I
NSTALLATION
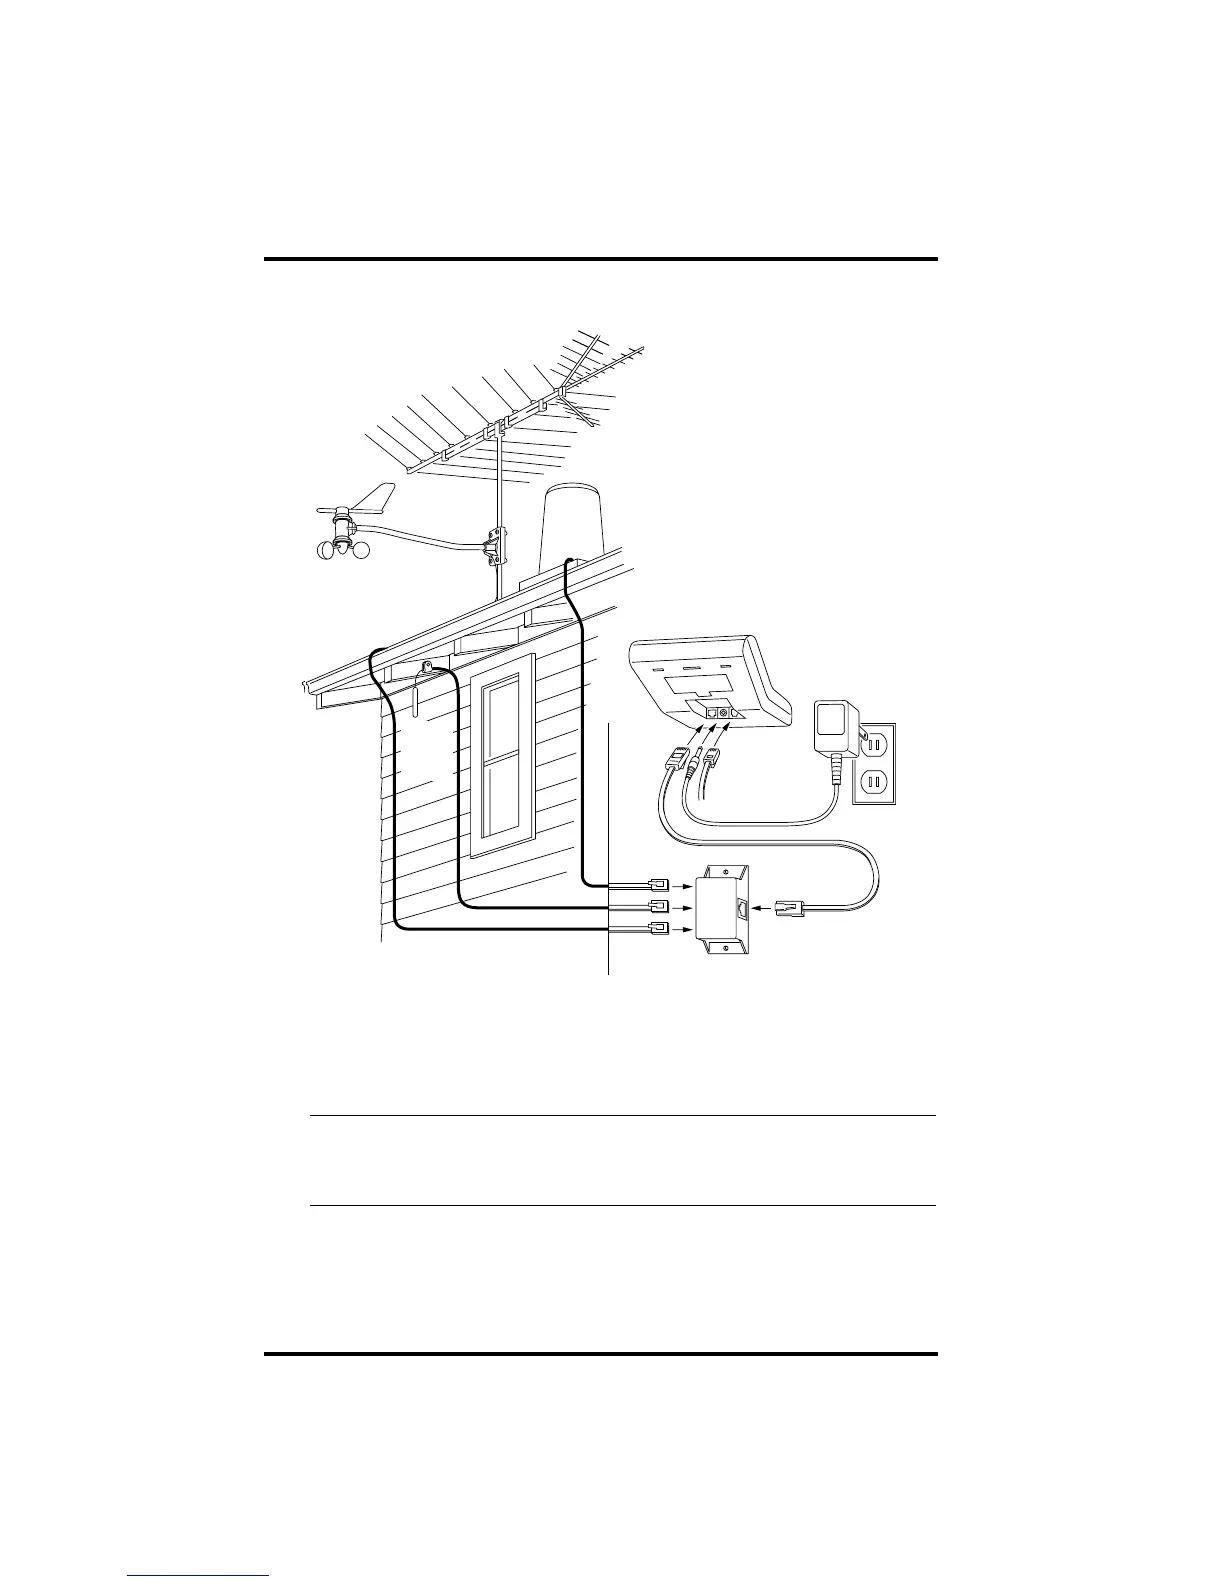
The diagram above shows a typical Weather Wizard III installation. The follow-
ing pages will give you specific instructions for installing your station. To
avoid unnecessary problems, be sure to thoroughly test your system before
installing it.
WARNING:
Climbing on your roof can be hazardous. If you are uneasy about installing your
unit, please have a qualified professional complete the installation. Davis specifi-
cally disclaims any liability for injury or loss resulting from the installation or use
of the Weather Wizard III.
RAIN
TEMP
WIND
WEATHER
COMPUTER
Anemometer
Rain Collector
(optional)
External
Temp-
erature
Sensor
NORTH SIDE OF BUILDING in Northern Hemisphere
SOUTH SIDE OF BUILDING in Southern Hemisphere
Junction Box
To WeatherLink
(optional)
AC Power
Adapter
Power
Outlet
Junction Box
Cable
WEATHER WIZARD III
RAIN
TEMP
WIND
WEATHER
COMPUTER
Anemometer
Rain Collector
(optional)
External
Temp-
erature
Sensor
NORTH SIDE OF BUILDING in Northern Hemisphere
SOUTH SIDE OF BUILDING in Southern Hemisphere
Junction Box
To WeatherLink
(optional)
AC Power
Adapter
Power
Outlet
Junction Box
Cable
WEATHER WIZARD III

 Loading...