Assembling the Station
Page 8 Weather Wizard III
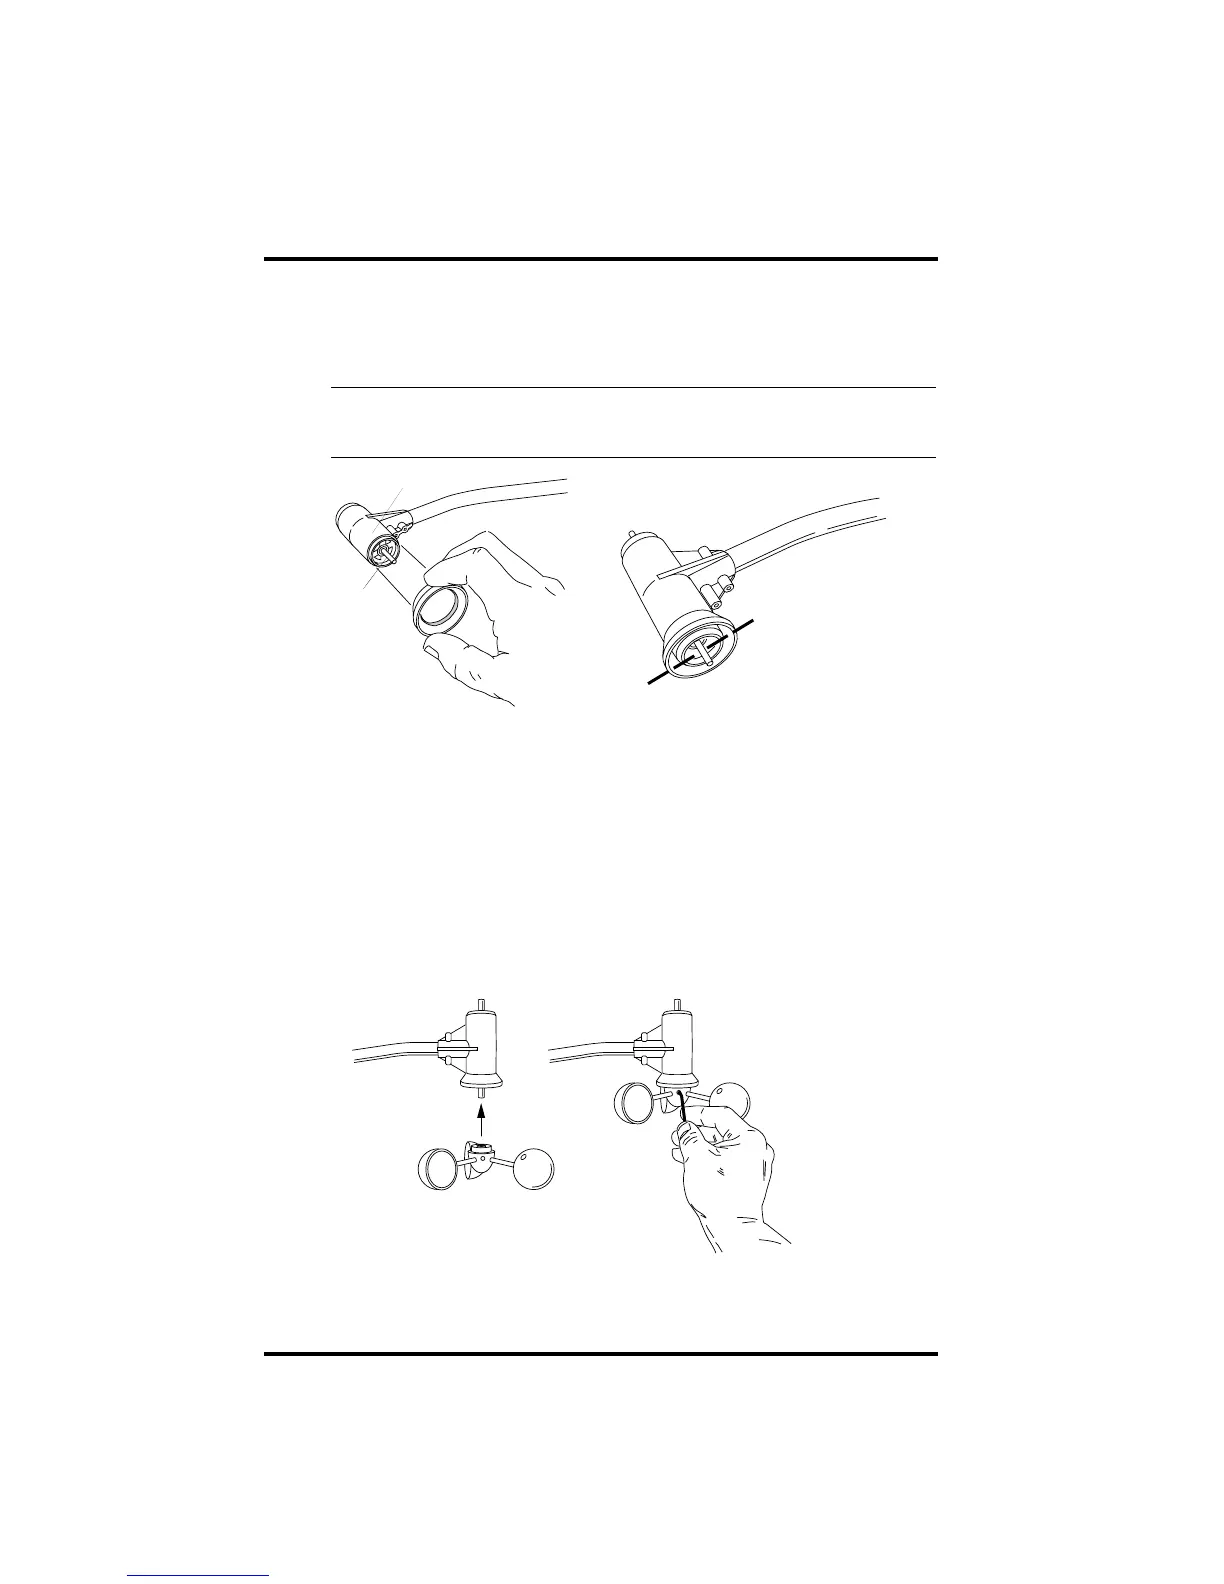
2. Apply adhesive liberally to the inside of the other drip ring and install on the WIND
CUP END OF THE ANEMOMETER CONTROL HEAD as shown below.
The wind cup end of the control head is the smaller of the two stainless steel
shafts.
Note:
When attaching drip ring, make sure the lower edge of the ring is aligned with the lower edge of
the control head. If the drip ring extends below the lower edge of the control head, the wind cups
will not have room to slide on.
3. After the cement has properly cured (according to the cement’s direction), follow the
instructions below to attach the wind vane and wind cups to the anemometer.
To Attach the Wind Cups to the Anemometer Arm
1. Push the wind cups onto the smaller of the two stainless steel shafts at the end of the
arm.
2. Slide the wind cups as far up the shaft as possible.
3. Use the allen wrench provided to tighten the set screw on the side of the wind cups.
Note that when you let go of the wind cups, they should drop slightly.
4. Spin the wind cups. If they do not spin freely, loosen the set screw and lower the cups
slightly. Repeat until the wind cups spin freely.
Smaller Shaft
Control Head
Lower edge of outside ring
(aligned with lower
edge of control head)
Push cups onto
stainless steel
shaft
Tighten set screw
with allen wrench

 Loading...