EasyManua.ls Logo

dbx DriveRack VENU 360 - User Manual

dbx DriveRack VENU 360
116 pages
Print Icon
To Next Page IconTo Next Page
Loading...
Owner’s Manual

Table of Contents

Questions and Answers

  • N
    nbarajasJul 27, 2025
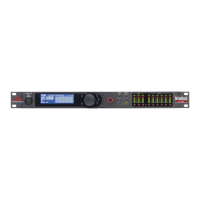
    Why won't my dbx Recording Equipment communicate even with compatible network settings?
    • V
      vjonesJul 27, 2025
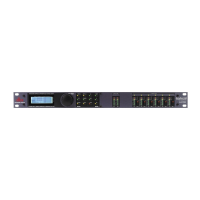
      If your dbx VENU360 Recording Equipment and control device have compatible network settings but still won’t communicate, the traffic is likely being prohibited by a software or hardware firewall. Try disabling the firewall and then relaunching the VENU360 control app.
  • W
    wandabullockAug 10, 2025
    What type of Ethernet cable should I use for my dbx DriveRack VENU 360 Recording Equipment?
    • V
      vhollandAug 10, 2025
      Ensure you are using the correct type of Ethernet cables for the application. If you’re connecting directly to the dbx VENU360 Recording Equipment using a Mac or Windows computer, you must use a crossover Ethernet cable.
  • K
    Katherine ThompsonAug 18, 2025
    How to check Ethernet port LEDs, cables, and connections on dbx DriveRack VENU 360?
    • V
      Vanessa PerryAug 18, 2025
      Ensure the yellow and green LEDs are lighting on the dbx VENU360’s Ethernet port. If using a wired connection from a computer, ensure that these LED indicators are also lighting on your computer’s Ethernet port. If connecting to a switch or router, ensure the activity LEDs for the connected ports are lighting on it as well. Try disconnecting then reconnecting the corresponding Ethernet cables. Try swapping out the connected Ethernet cable for another known-working cable. If an Ethernet port’s LEDs begin lighting after reconnecting or swapping out cables, wait a few minutes then try reconnecting with the VENU360 control app.
  • C
    Carol NguyenNov 2, 2025
    What to do if my dbx DriveRack VENU 360 Recording Equipment IP address reads 'Disconnected' or '0.0.0.0'?
    • M
      Michael DanielNov 2, 2025
      If the VENU360’s IP address reads 'Disconnected' when an Ethernet cable is connected, the connected computer, switch, or router may not be powered on, or the connected Ethernet cable may be faulty. Verify all networked devices are powered on and that all connected cables are known-working. If the VENU360’s IP address reads '0.0.0.0', wait a few minutes to see if an IP address gets assigned. If using static IP or Auto-IP addressing, go into the VENU360’s Utility menu by pressing the UTILITY button then select the “Network” menu option. Make sure DHCP is turned off and that the network settings are configured properly for connecting to the network. If the VENU360 is communicating with the network but cannot be assigned an IP address, this could indicate a problem with the DHCP server setting...

Summary

Warranty

Technical Support & Service

Overview

Introduction

Introduces the DriveRack VENU360, its features, and applications.

Installation

Installation Recommendations

Guidelines for rack mounting, ventilation, and environmental considerations.

Making Connections & Applying Power

Steps for connecting audio, microphones, and safely applying power.

Network Connections

Direct Computer Connection

Steps to connect the VENU360 directly to a computer via Ethernet.

Wired Network Switch;Router Connection

Steps to connect the VENU360 to wired network switches or routers.

Wi-Fi Network Router Connection

Steps to connect the VENU360 to a Wi-Fi network router.

User Interface & Connectors

Front Panel Overview

Detailed description of the VENU360's front panel controls and their functions.

Input;Output Metering

Explanation of input/output signal level and limiter threshold indicators.

Front Panel Buttons

Functionality of key front panel buttons like COPY/PASTE, RTA, UTILITY, and MUTE.

Getting Started

Understanding Operating Modes

Explanation of VENU360's Home, Wizard, Configuration, and Edit modes.

Exploring Home Screens

Overview of available home screens for system status and configuration.

Menu Navigation

Navigation Paths Overview

Diagrams showing navigation paths for Home, Wizard, Configuration, and Edit modes.

Configuring The VENU360

Using The Wizards (Wizard Mode)

Step-by-step guide to using Wizards for system configuration and optimization.

AutoEQ;Level Assist Wizard

Wizards to balance levels and equalize the system to the room environment.

AFS Wizard and Wizard Options

Ringing out the system with AFS and configuring Wizard options.

Configuring XLR Inputs, Master Clock Source, & SRC

Analog and Single-Device AES Connections

Configuring VENU360 for analog and AES connections from a single digital source.

AES Connections with Non-Standard Sample Rates

Configuring AES connections with sample rate conversion and independent clocks.

Using Configuration Mode

Configuration Mode Capabilities

Capabilities include routing, module inserts, linking, crossovers, and output naming.

Configuring Mixers;Routers

Mixer;Router Chain Options

Routing options for input and mid (output) mixer/router chains.

Configuring Processing Module Insert Types

Available Insert Module Types

Lists processing module types for input and mid insert slots.

Linking;Unlinking Processing Modules

Naming Outputs

Operating The VENU360

Editing Processing Modules

How to edit processing module parameters and copy/paste settings.

Managing Presets

Recalling, storing, copying, and deleting user and factory presets.

Manually Optimizing A System Using The VENU360

About Speaker & Amplifier Tunings

Explanation of speaker and amplifier tunings and their role in setup.

System Optimization Steps

Steps for setting crossovers, driver alignment, gain structure, and frequency response.

EQ The System In The Venue

Using AutoEQ Wizard or manual EQ to adjust the sound system's frequency response.

Ring Out The System With AFS

Using AFS Wizard or manually ringing out the system for increased gain before feedback.

Add Finishing Touches

Applying additional processing like subharmonic synthesis and compression.

Processing Modules & Parameters

Inputs Module

Description of the fixed VENU360 inputs and their assignments.

Router Module

Parameters for routing signals or mono-summed signals within the VENU360.

Mixer Module

Parameters for mixing multiple signals for input or output processing chains.

Advanced Feedback Suppression (AFS) Module

AFS Parameters

Parameters for the AFS module, including AFS, Clear Mode, Mode, and Type.

AFS Filter Control and Modes

Controlling AFS filters, modes (Fixed/Live), and filter types (Speech/Music).

AFS Filter Allocation and Sensitivity

Managing Fixed/Live filter allocation and adjusting AFS sensitivity.

AFS High Pass and Selected Filter

Setting High Pass filter and selecting individual AFS filters.

Automatic Gain Control (AGC) Module

AGC Parameters

Parameters for the AGC module, including AGC, Target, and Max Gain.

AGC Limiter and Control Parameters

Controlling AGC limiter behavior and various gain control parameters.

Delay (DLY) Modules

Delay Module Types

Types of delay modules: Backline, Fill, and Alignment.

Delay Parameters

Parameters for Delay modules, including DELAY and LENGTH.

Compressor (CMP) Module

Compressor Parameters

Parameters for the Compressor module, including COMPRESSOR, THRESHOLD, RATIO, GAIN, OVER EASY.

Compressor Auto and Timing Parameters

Controlling compressor auto mode and timing parameters.

Graphic EQ (GEQ) Module

GEQ Parameters

Parameters for the GEQ module, including GRAPHIC EQ, QUICK CURVE, and FREQUENCY.

GEQ Quick Curves and Frequency Adjustments

Selecting EQ curves and adjusting frequency band gain.

Noise Gate (GAT) Module

Gate Parameters

Parameters for the Noise Gate module, including GATE, THRESHOLD, RATIO, MAX ATTEN, ATTACK, HOLD, RELEASE.

Parametric EQ (PEQ) Modules

PEQ Parameters

Parameters for PEQ modules, including PARAMETRIC EQ, FLATTEN, TYPE, FREQUENCY, GAIN, Q, SLOPE.

AutoEQ (AEQ) Module

AEQ Parameters

Parameters for the AEQ module, including AutoEQ, Flatten, Type, Frequency, Gain, Q, Slope.

Subharmonic Synth (SUB) Module

Subharmonic Synth Parameters

Parameters for the Subharmonic Synth module, including SUBHARMONIC SYNTH, SUBHARMONICS, LEVELs.

Crossover Module

Crossover Parameters

Parameters for the Crossover module, including LP FREQUENCY, LP TYPE, GAIN, POLARITY, PHASE, HP FREQUENCY, HP TYPE.

Limiter (LIM) Module

Limiter Parameters

Parameters for the Limiter module, including LIMITER, THRESHOLD, OVER EASY, AUTO, ATTACK.

Limiter Timing and Peak Stop Parameters

Controlling limiter timing, peak stopping, and overshoot.

RTA

RTA Parameters

Parameters for the RTA and signal generator, including SOURCE, RATE, GRAPH OFFSET, TYPE, HOLD.

Signal Generator Control

Turning the signal generator on/off and configuring its output.

Signal Type, Route, and Amplitude

Configuring signal type, routing, and amplitude for RTA and generator.

Utility Menu

System Information and Analog Settings

Viewing system info and adjusting analog input/output clip levels.

XLR Input Format and Clock Settings

Configuring XLR input format, AES, SRC, and clock source.

LCD and Screen Settings

Adjusting LCD display contrast, backlight, and home screen timeout.

Preset and Mute Power-Up Settings

Configuring how the VENU360 powers up with presets and mutes.

Network and Security Settings

Configuring network, app security, device name, and navigation settings.

Preset Recall List Management

Setting the range of presets accessible from the front panel.

Power-Up Functions

Initialize With Mutes On

Forcing the VENU360 to boot with all outputs initially muted.

System Lockout

System Lockout Options

Options to lock front-panel controls, with exceptions for AFS Clear and Mutes.

Soft Reset

Factory Reset

Application Guide

Application 1: Full Range Mains

Configuring the VENU360 for full range systems without an active crossover.

Application 2: Full Range Mains + Subs

Configuring the VENU360 for full range mains and subs.

Application 3: Bi-Amplified Mains + Aux-Fed Subs

Configuring bi-amplified mains and aux-fed subs.

Application 4: LCR Full Range Powered Mains + Subs

Configuring an LCR system with full range mains and subwoofers.

Application 5: Full Range Stage Monitors

Configuring the VENU360 for up to 6 full range stage monitors.

Application 6: Bi-Amplified Stage Monitors

Configuring up to 3 bi-ampable 2-way stage monitors.

Application 7: Using The AES Digital Inputs

Using AES digital inputs with a digital console for PA systems and monitors.

Using The VENU360 Control Application

Device Requirements

Information on device requirements for the VENU360 control application.

Networking

Networking Overview

Common network settings for connecting the VENU360.

Network Troubleshooting

Troubleshooting common issues when connecting the VENU360 over a network.

Technical Information

Firmware Updates

How to update the VENU360's firmware via USB or Ethernet.

DSP Block Diagram

Diagram illustrating the VENU360's internal signal processing flow.

Ethernet Cable Recommendations & Diagrams

Recommendations and pinouts for Ethernet cables.

Audio Cable Diagrams

Diagrams illustrating various audio cable connections.

Dimensions

Specifications

Additional Resources

dbx DriveRack VENU 360 Specifications

General IconGeneral
Branddbx
ModelDriveRack VENU 360
CategoryRecording Equipment
LanguageEnglish

Related product manuals