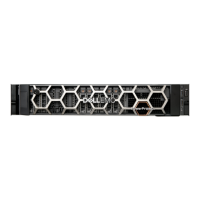
Connecting ES30 shelves
The cabling diagrams in this section show maximum configurations. Not all systems
will have all the disk shelves shown in the diagrams.
Add shelf-to-shelf cables between shelves in a loop and to the controller as shown in
the diagrams.
1.
Cable from the B Controller EXPANSION port of the lower shelf to the B
controller HOST port of the next higher shelf.
2.
Then cable from the A Controller HOST port of lower shelf to the A controller
EXPANSION port of the next higher shelf
ES30 cable information
When connecting ES30 shelves, different cables are required for the following
connections:
l
Connecting the primary node to the ES30 shelf loop
l
Connecting an ES30 shelf to an ES30 shelf within a loop
Table 1 Cables for primary or single node to ES30 shelf loop
HD-mini-SAS connector on controller, SFF-8088 connector keyed for host port
on ES30
Cable model code Part number Cable length
X-SAS-HDMS2 038-003-810 2 m (79 in)
X-SAS-HDMS3 038-003-811 3 m (118 in)
X-SAS-HDMS5 038-003-813 5 m (196 in)
Table 2 ES30 to ES30 cable options
Mini-SAS cable, SFF-8088 connectors on both ends, one end keyed for host
ports and the other keyed for expansion ports
Cable model Part number Cable
length
X-SAS-MSMS1 038-003-786 1 m (39 in.)
X-SAS-MSMS2 038-003-787 2 m (79 in.)
X-SAS-MSMS3 038-003-751 3 m (118 in.)
X-SAS-MSMS4 038-003-628 4 m (158 in.)
X-SAS-MSMS5 038-003-666 5 m (196 in.)
DD6300 with ES30 cabling
The DD6300 system supports a maximum of four shelves, cabled in a single set.
Connect Cables and Power On
24 Data Domain DD6300 System Installation Guide
 Loading...


