>
Dell EMC Quick Start
Page 2 of 8
1. Unpack your system
If your Unity system arrived pre-racked, begin installation at Step 4 of this guide.
Verify that you have the following components:
You will also need a minimum of two Cat 5 or better Ethernet cables.
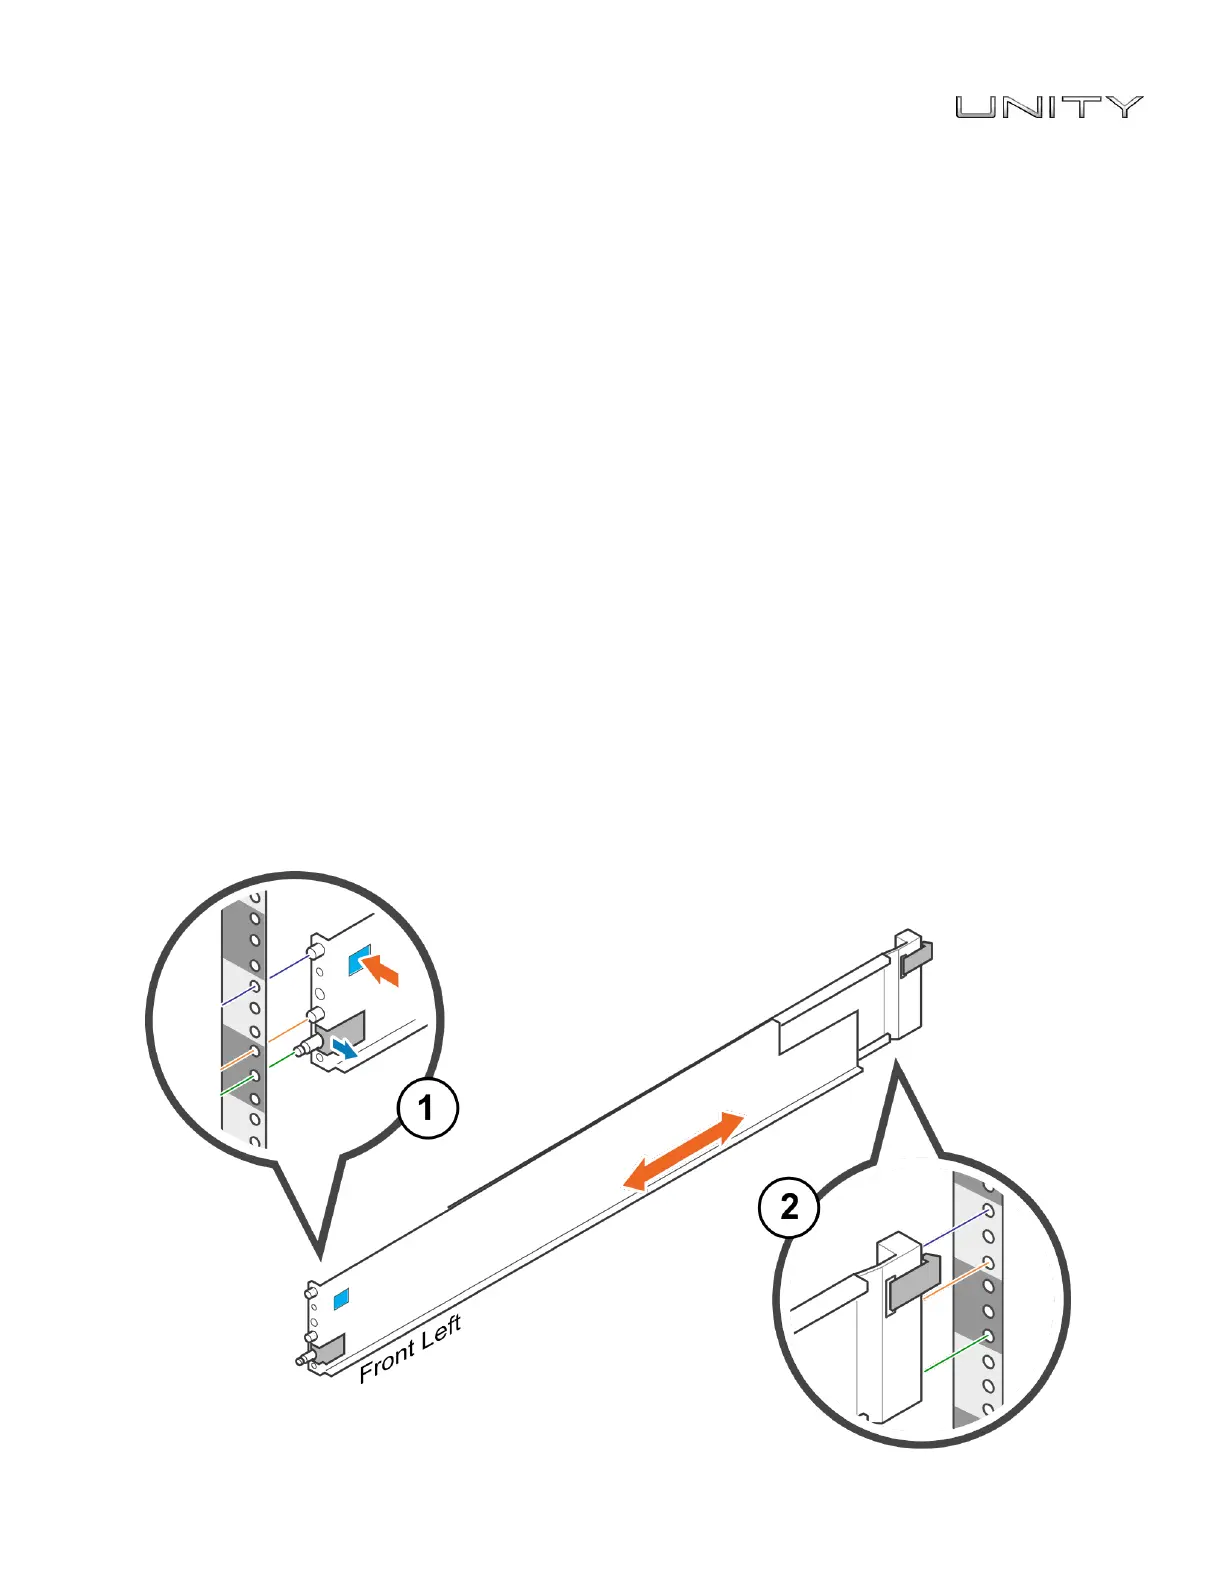
2. Install the rails
When installing the rails, ensure that the rail pins are lined up correctly:
• For the front end of the rail, the bottom pin of the rail goes through the middle hole of the lower U, and the top
pin goes through the top hole of the upper U.
• For the rear end of the rail, the bottom pin of the rail goes through the bottom hole of the lower U, and the top
pin goes through the top hole of the upper U.
1. Position the rail so the label FRONT is located at the front of the rack and facing towards the inside of the
rack, while orienting the rear of the rail to align level with the holes on the rear of the rack.
2. From the rear of the rack, pull the rail straight back until the latch is locked.
3. To install the front of the rail, press the blue latch release button until the latch rotates open.
4. Pull the rail forward until the pins slide into the holes on the front of the rack, then release the latch to secure
the rail in place.
5. Repeat for the other rail.