Steps
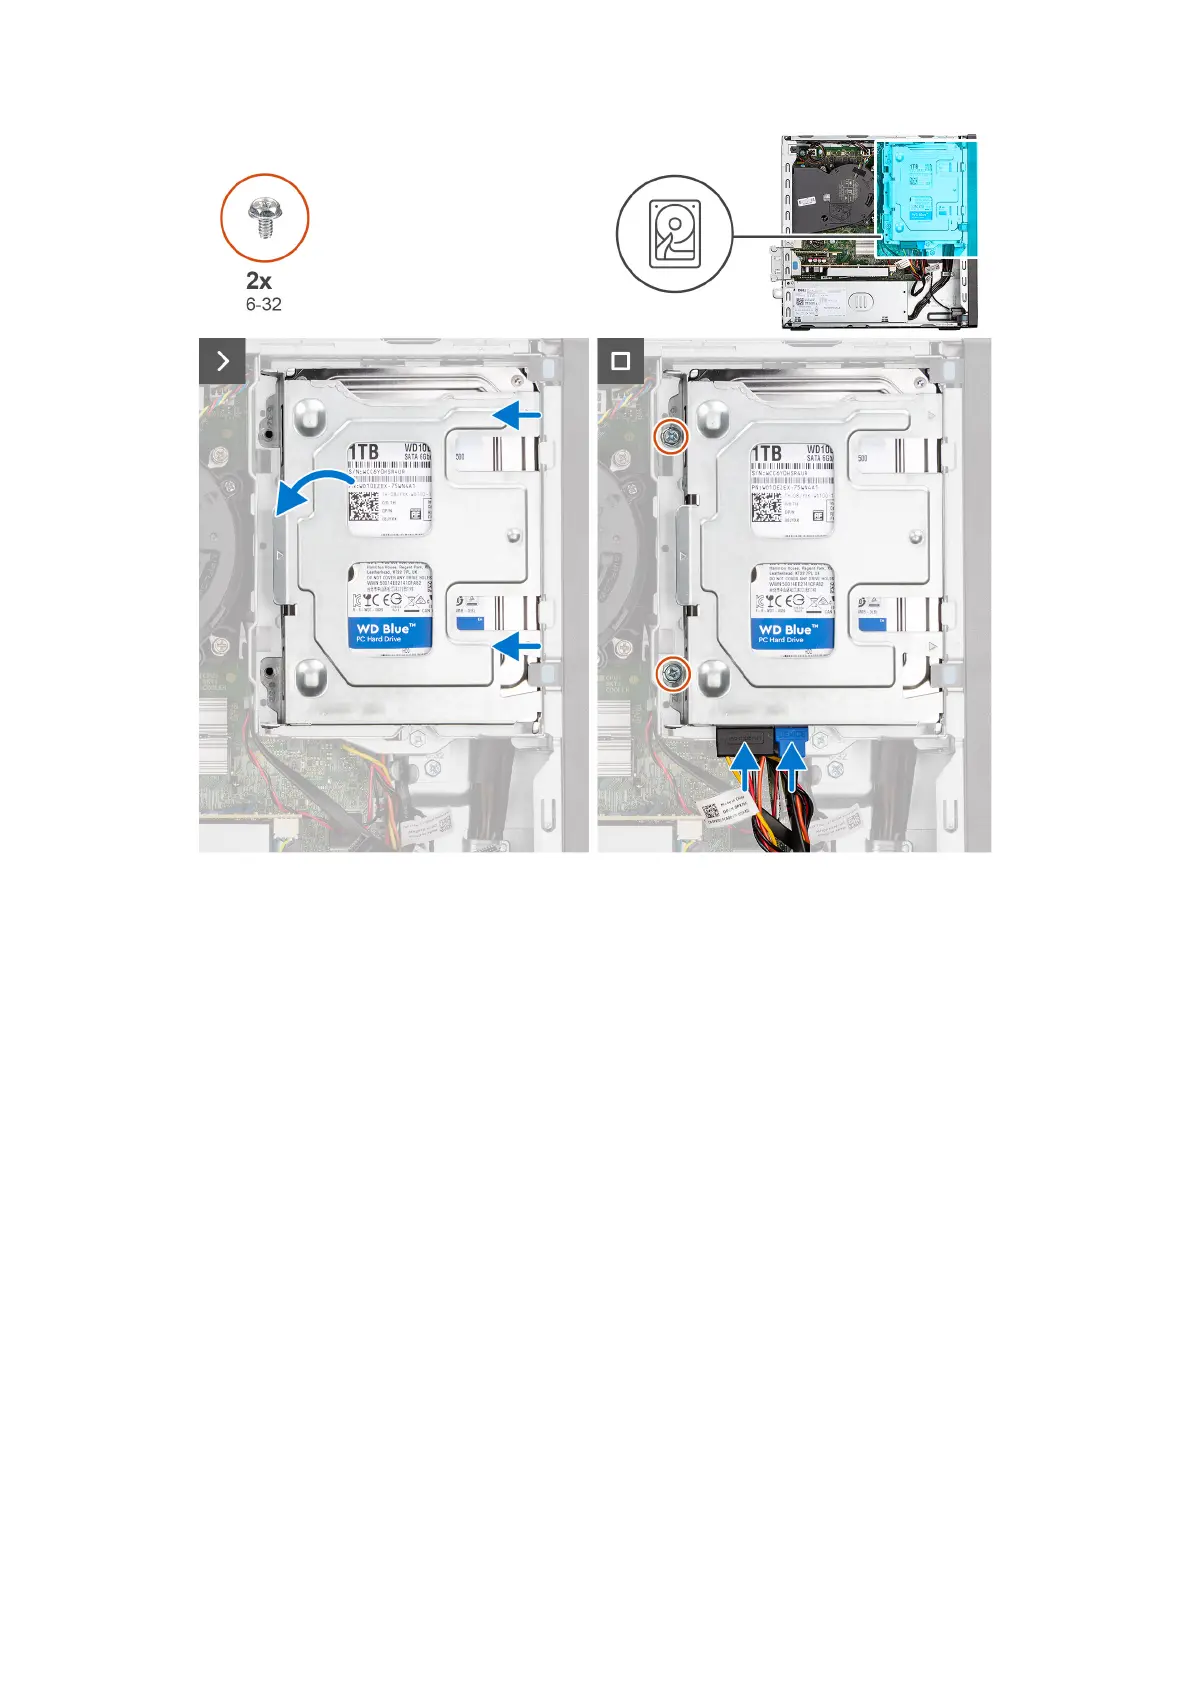
1. Slide the hard drive into the hard-drive carrier.
2. Replace the two screws (6-32) to secure the hard drive to the hard-drive carrier.
3. Align the tabs on the hard-drive carrier with the slots on the chassis and snap the hard-drive carrier onto the disk-drive
cage.
4. Replace the two screws (6-32) to secure the hard drive carrier on the chassis.
5. Connect the data and power cables to the connectors on the hard drive.
Next steps
1. Install the side cover.
2. Follow the procedure in After working inside your computer.
Gabbia del disco rigido
Rimozione della gabbia del disco rigido
Prerequisiti
1. Seguire le procedure descritte in Prima di effettuare interventi sui componenti interni del computer.
2. Rimuovere il pannello laterale.
3. Rimuovere il pannello anteriore.
4. Rimuovere il disco rigido da 2,5 pollici, se applicabile.
5. Rimuovere il disco rigido da 3,5 pollici, se applicabile.
Rimozione e installazione delle unità sostituibili dal cliente (CRU)
47