Change the iDRAC network port
About this task
iDRAC provides the ability to disable the dedicated iDRAC Ethernet port and assign the iDRAC connection to share one of the
network daughter card Ethernet ports. This step is optional.
Steps
1. Connect to the system serial console or connect KVM to the system.
2. Reboot the system.
3. During the system boot process, press F2 to access the BIOS menu.
4. Select iDRAC Settings.
5. Select Network.
6. Under Network Settings, change NIC Selection from Dedicated to one of the following values:
Table 8. iDRAC NIC to physical port mapping
iDRAC NIC selection Physical network port
LOM1 - [NIC Integrated 1-1-1] Network daughter card port 1
LOM2 - [NIC Integrated 1-2-1] Network daughter card port 2
LOM3 - [NIC Integrated 1-3-1] Network daughter card port 3
LOM4 - [NIC Integrated 1-4-1] Network daughter card port 4
7. Press Esc to return to the previous menu.
8. Exit the BIOS menu and reboot the system to allow the change to take effect.
Enable administrative communication
For HA pairs, administrative communication must be enabled on both nodes.
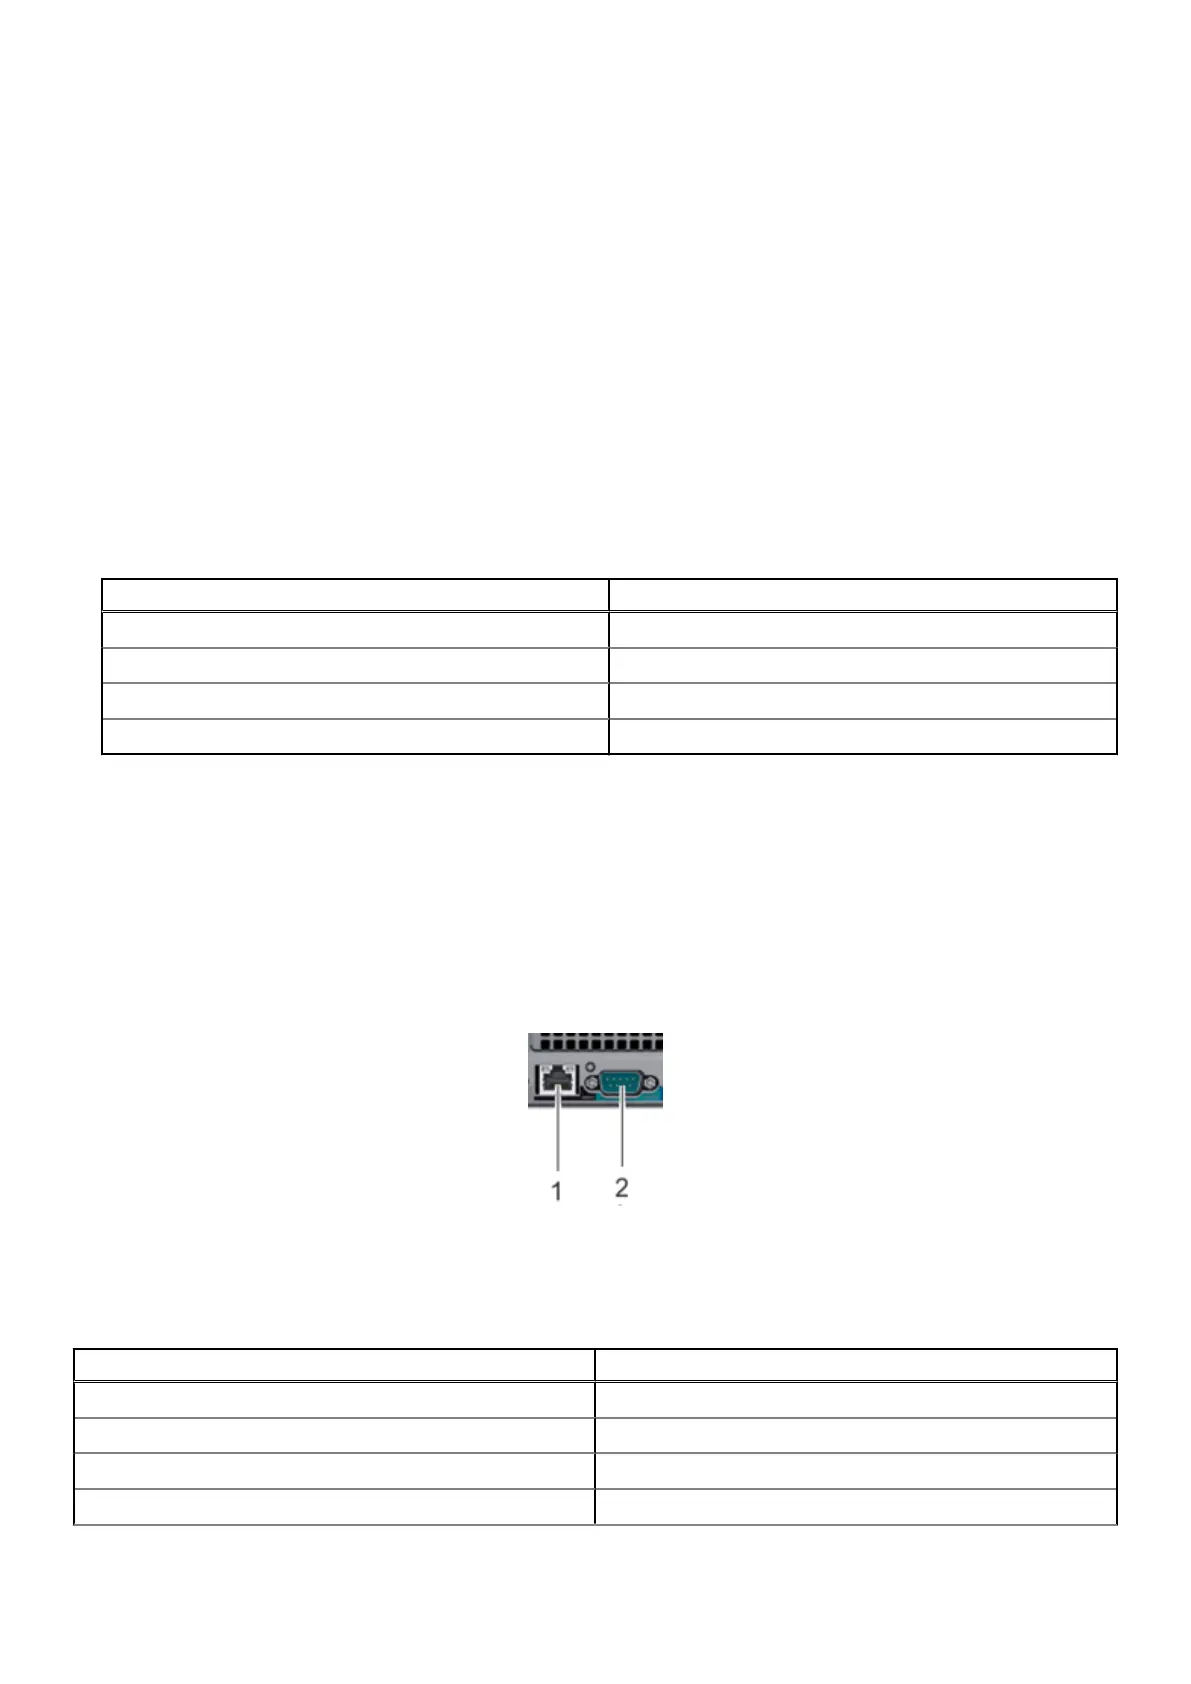
The serial port and dedicated iDRAC9 dedicated management port at the rear of the system are the only supported interfaces
for console access. Do not connect to the USB and iDRAC direct micro-USB port on the front of the system.
Figure 25. Serial and SOL ports
Use the following settings:
Table 9.
Communications settings
Setting Value
Baud rate 115200
Data bits 8
Stop bits 1
Parity None
32 Configure System for Use