2. Follow the procedure listed in Before working inside your system on page 33.
Steps
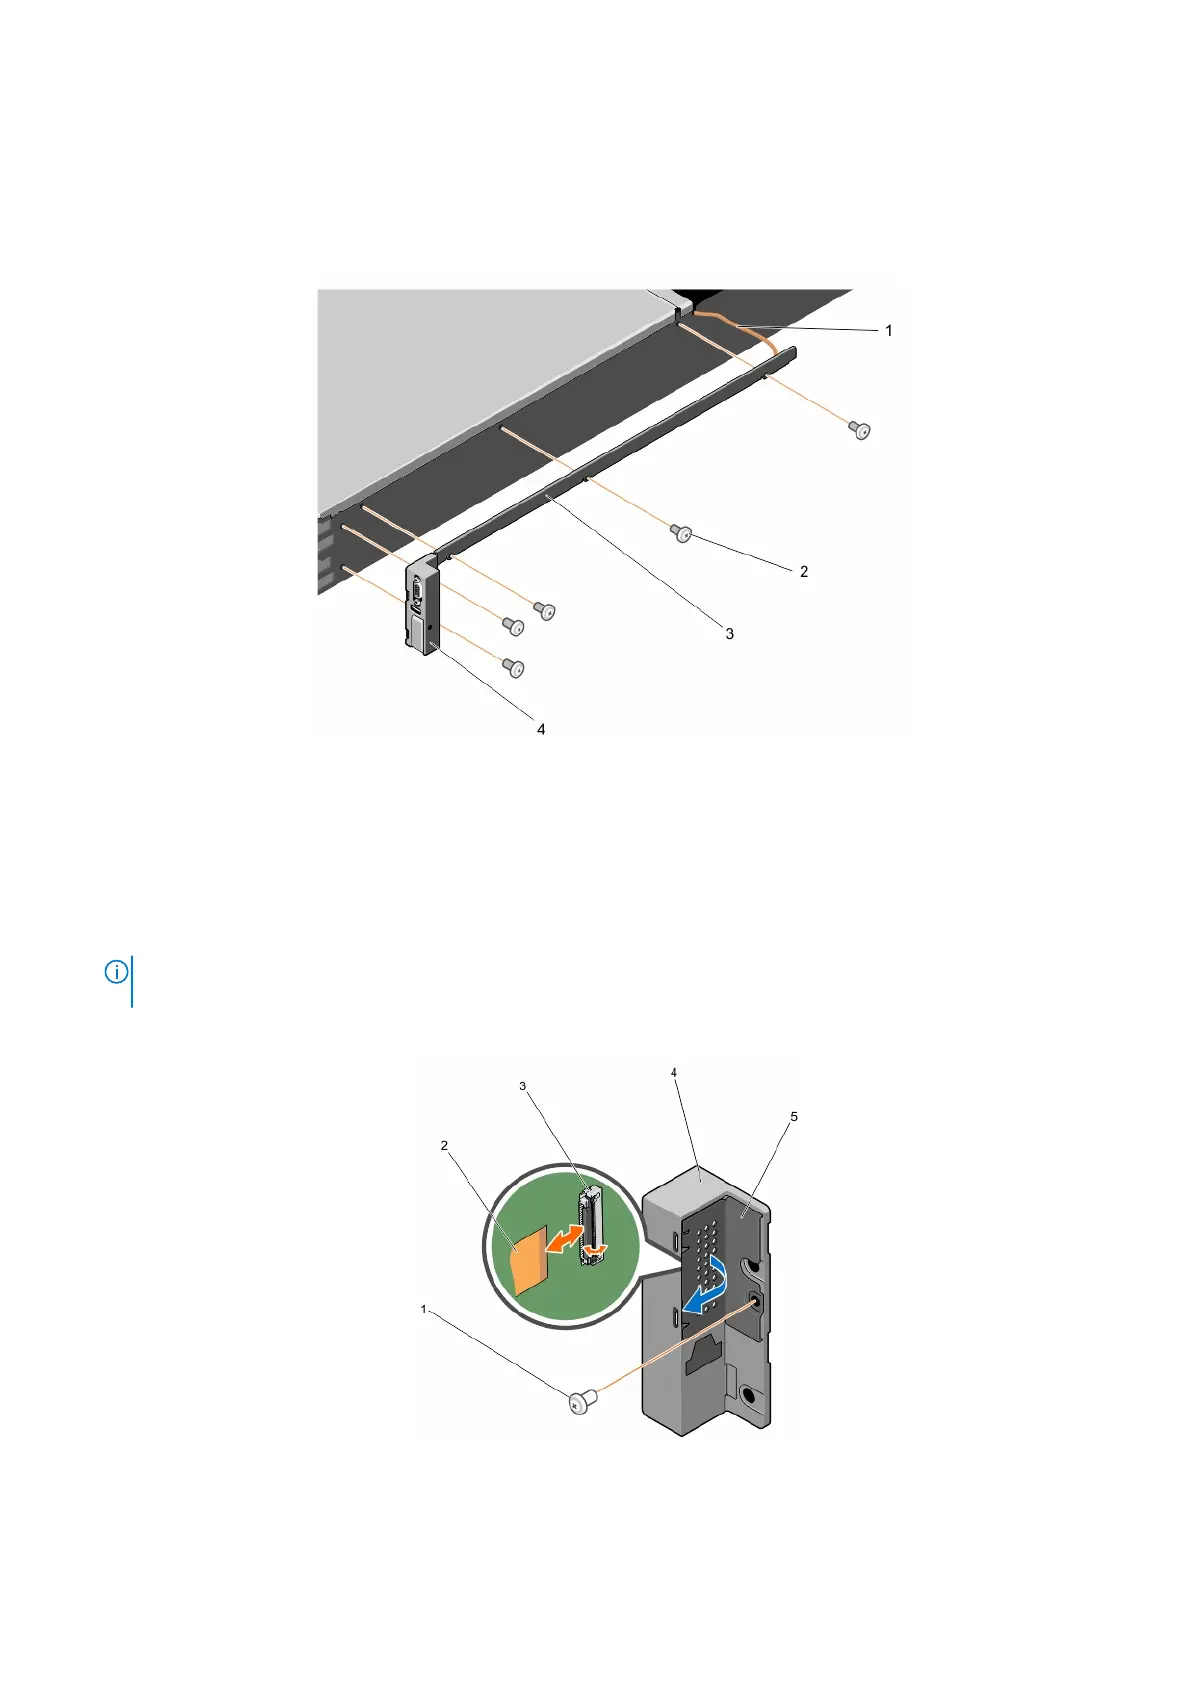
1. Remove the three screws that secure the cable tube to the side of the system and remove the cable tube.
2. Remove the two screws that secure the KVM panel to the system.
Figure 64. Removing and installing the cable tube
1.
KVM panel cable 2. screw (5)
3. cable tube 4. KVM panel
3. Remove the screw that secures the KVM panel cover to the KVM panel.
4. Release the connector latch.
5. Remove the KVM panel cable from the KVM panel.
NOTE:
To prevent damage to the KVM panel cable, exercise utmost care when removing the KVM panel cable from the
KVM panel.
6. Remove the KVM panel.
Figure 65. Removing and installing the KVM panel
1.
screw 2. KVM panel cable
78 Installing and removing PowerEdge FX2/FX2s enclosure components