Removing and Installing Parts 95
CAUTION: A new battery can explode if it is incorrectly installed. Replace the
3-V CR2032 battery only with the same or equivalent type recommended by the
manufacturer. Discard used batteries according to the manufacturer’s
instructions.
1
Record all the screens in the system setup program (see page 103) so that you can
restore the correct settings when your perform step 7.
2 Remove the computer cover (see page 76).
3 Locate the battery socket (see page 79).
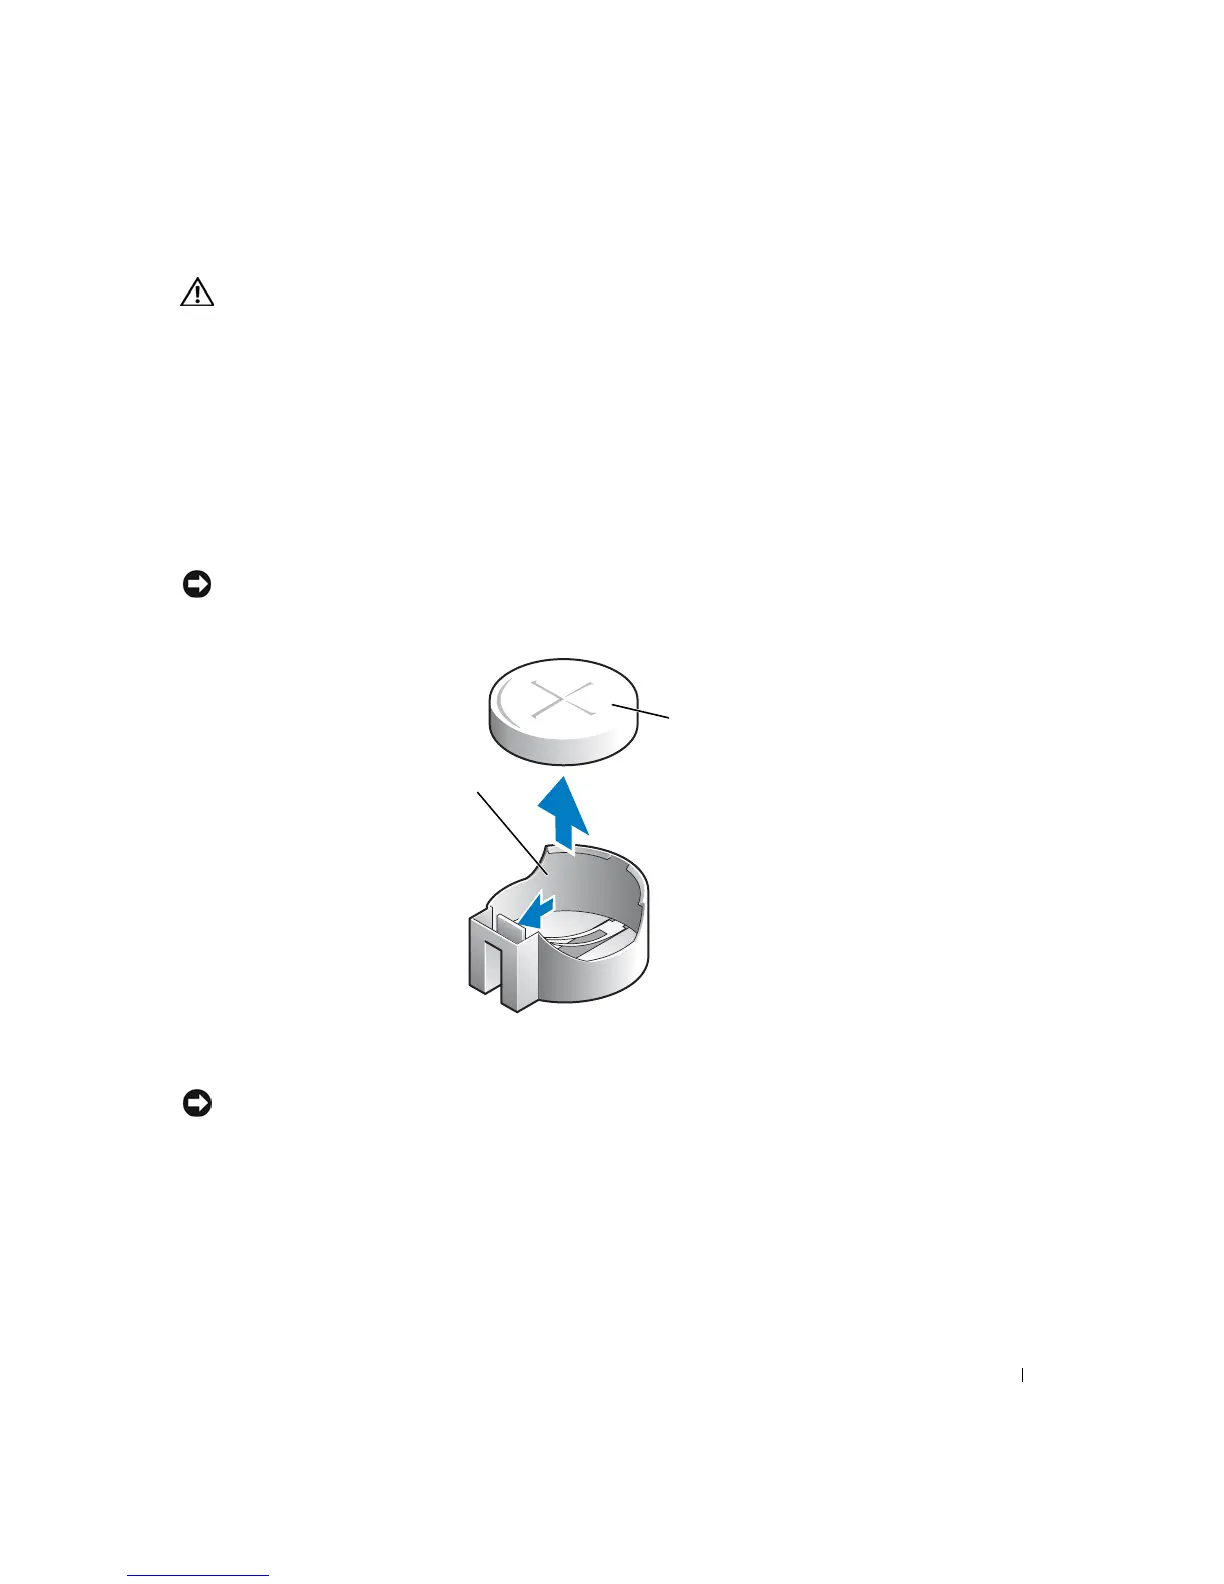
4 Remove the battery by carefully prying it out of its socket with your fingers or with a
blunt, nonconducting object such as a plastic screwdriver.
NOTICE: To avoid damage to the system board while you pry the battery loose, be sure to insert
the plastic screwdriver between the battery and the socket (not the system board).
5
Insert the new battery into the socket with the side labeled "+" facing up and snap the
battery into place.
NOTICE: To connect a network cable, first plug the cable into the network wall jack and then
plug it into the computer.
6
Connect your computer and devices to electrical outlets, and turn them on.
7 Access the system setup program (see page 103) and restore the settings you recorded
in step 1.
8 Properly dispose of the old battery (see page 12).
battery socket
battery