Steps
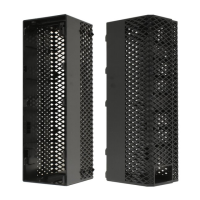
1. To remove the dummy metal bracket, insert a star-head screwdriver in the hole of the bracket, push the bracket to release
the bracket, and then lift the bracket out from the system.
NOTE: Applies if you are upgrading the system that did not have these optional modules.
2. Insert the optional HDMI module into its slot from the inside of your computer.
3. Connect the HDMI module cable to the connector on the system board .
4. Replace the two (M3X3) screws to secure the optional HDMI module to the system.
Next steps
1. Install the side cover.
2. Follow the procedure in after working inside your computer.
System board
Removing the system board
Prerequisites
1. Follow the procedure in before working inside your computer.
NOTE:
Your computer’s Service Tag is stored in the system board. You must enter the Service Tag in the BIOS setup
program after you replace the system board.
Removing and installing Field Replaceable Units (FRUs) 93
 Loading...


