28 │ Setting Up the Monitor
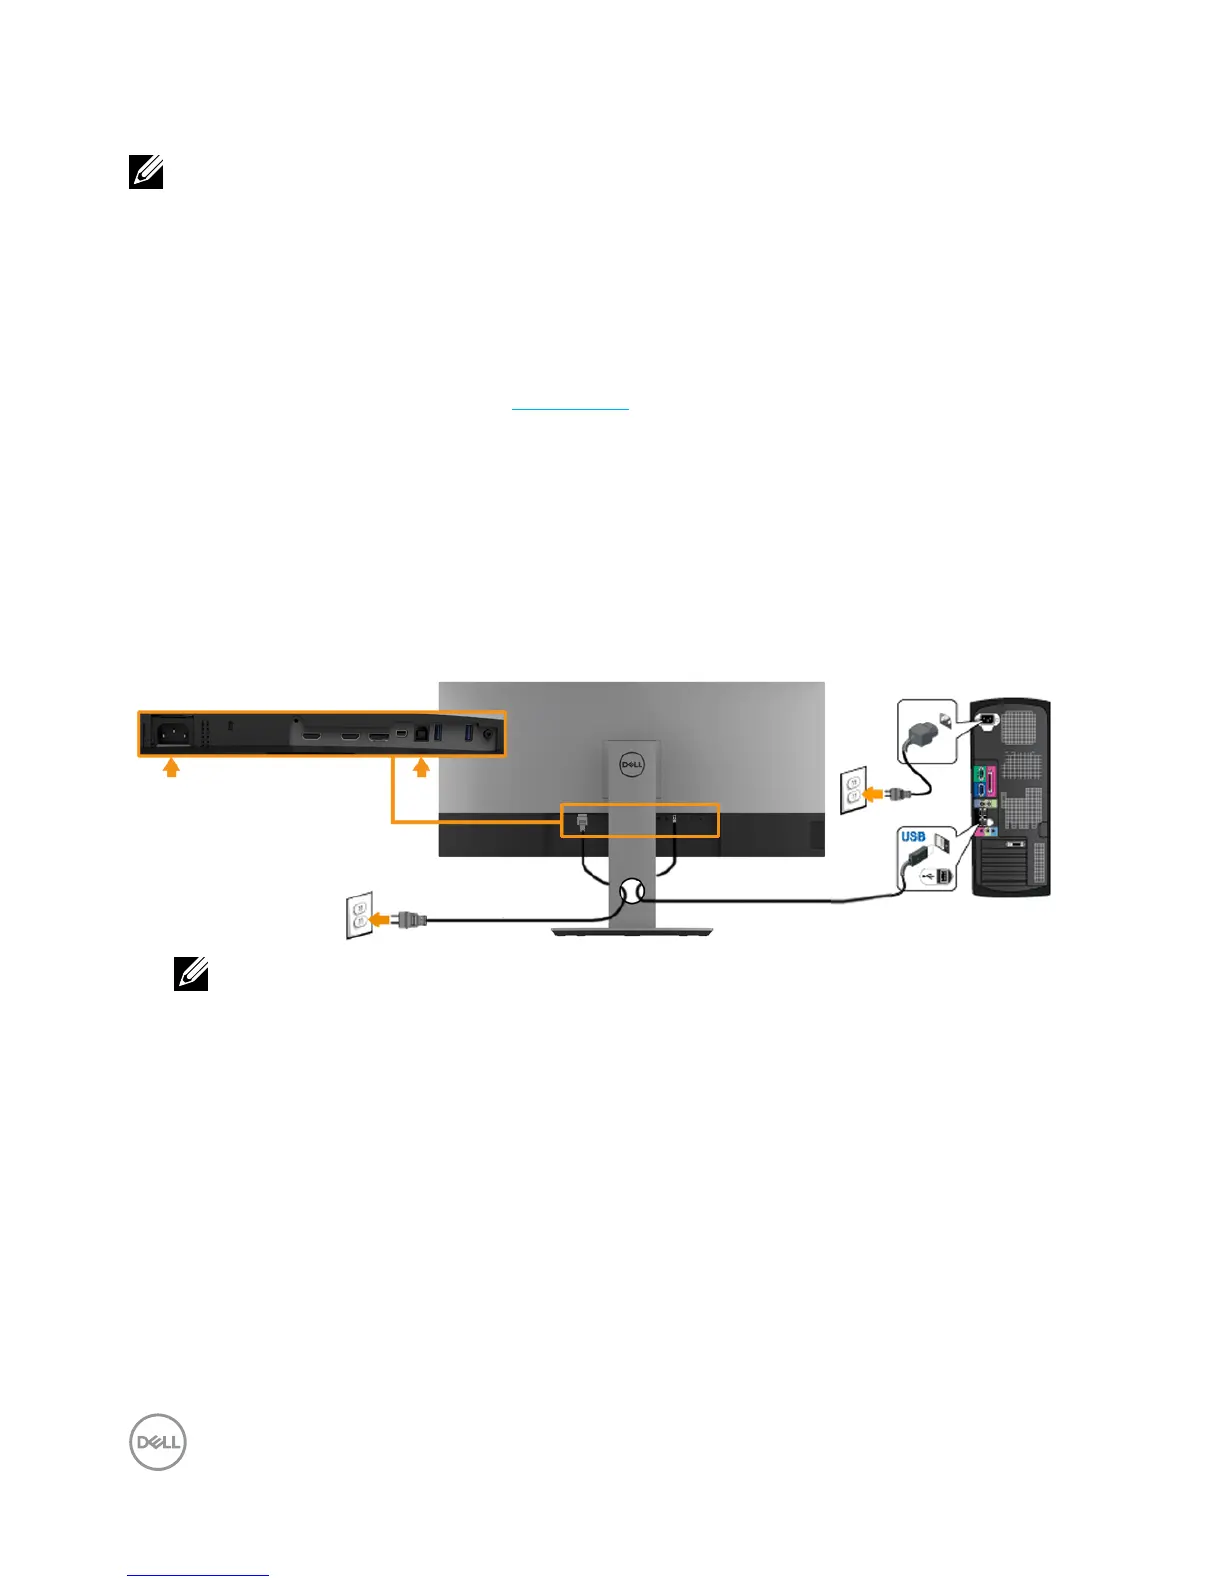
Connecting USB 3.0 cable
NOTE: To prevent data damage or loss, before changing USB upstream
ports, make sure that NO USB storage devices are in use by the computer
connected to the monitor’s USB upstream port.
After you have completed connecting the Mini-DP / Mini-DP / HDMI cable,
follow the procedures below to connect the USB cable to the computer and
complete your monitor setup:
1. Connect the upstream USB 3.0 port (cable supplied) to an appropriate USB
port on your computer. (See Side view for details.)
2. Connect the USB 3.0 peripherals to the downstream USB ports on the
monitor.
3. Plug the power cables for your computer and monitor into a nearby outlet.
4. Turn on the monitor and the computer.
If your monitor displays an image, installation is complete. If it does not display
an image, see Universal Serial Bus (USB) Specific Problems.
5. Use the cable slot on the monitor stand to organize the cables.
NOTE: The graphics are used for the purpose of illustration only.
Appearance on the computer may vary.