2. Remove the:
a. base cover
b. battery
c. fans
d. heatsink assembly
e. WLAN
f. hard drive (optional)
g. keyboard
h. SSD
i. memory modules
NOTE: Your computer’s Service Tag is located under the system badge flap. You must enter the Service Tag in the
BIOS after you replace the system board.
NOTE: Before disconnecting the cables from the system board, note the location of the connectors so that you can
re-connect them correctly after you replace the system board.
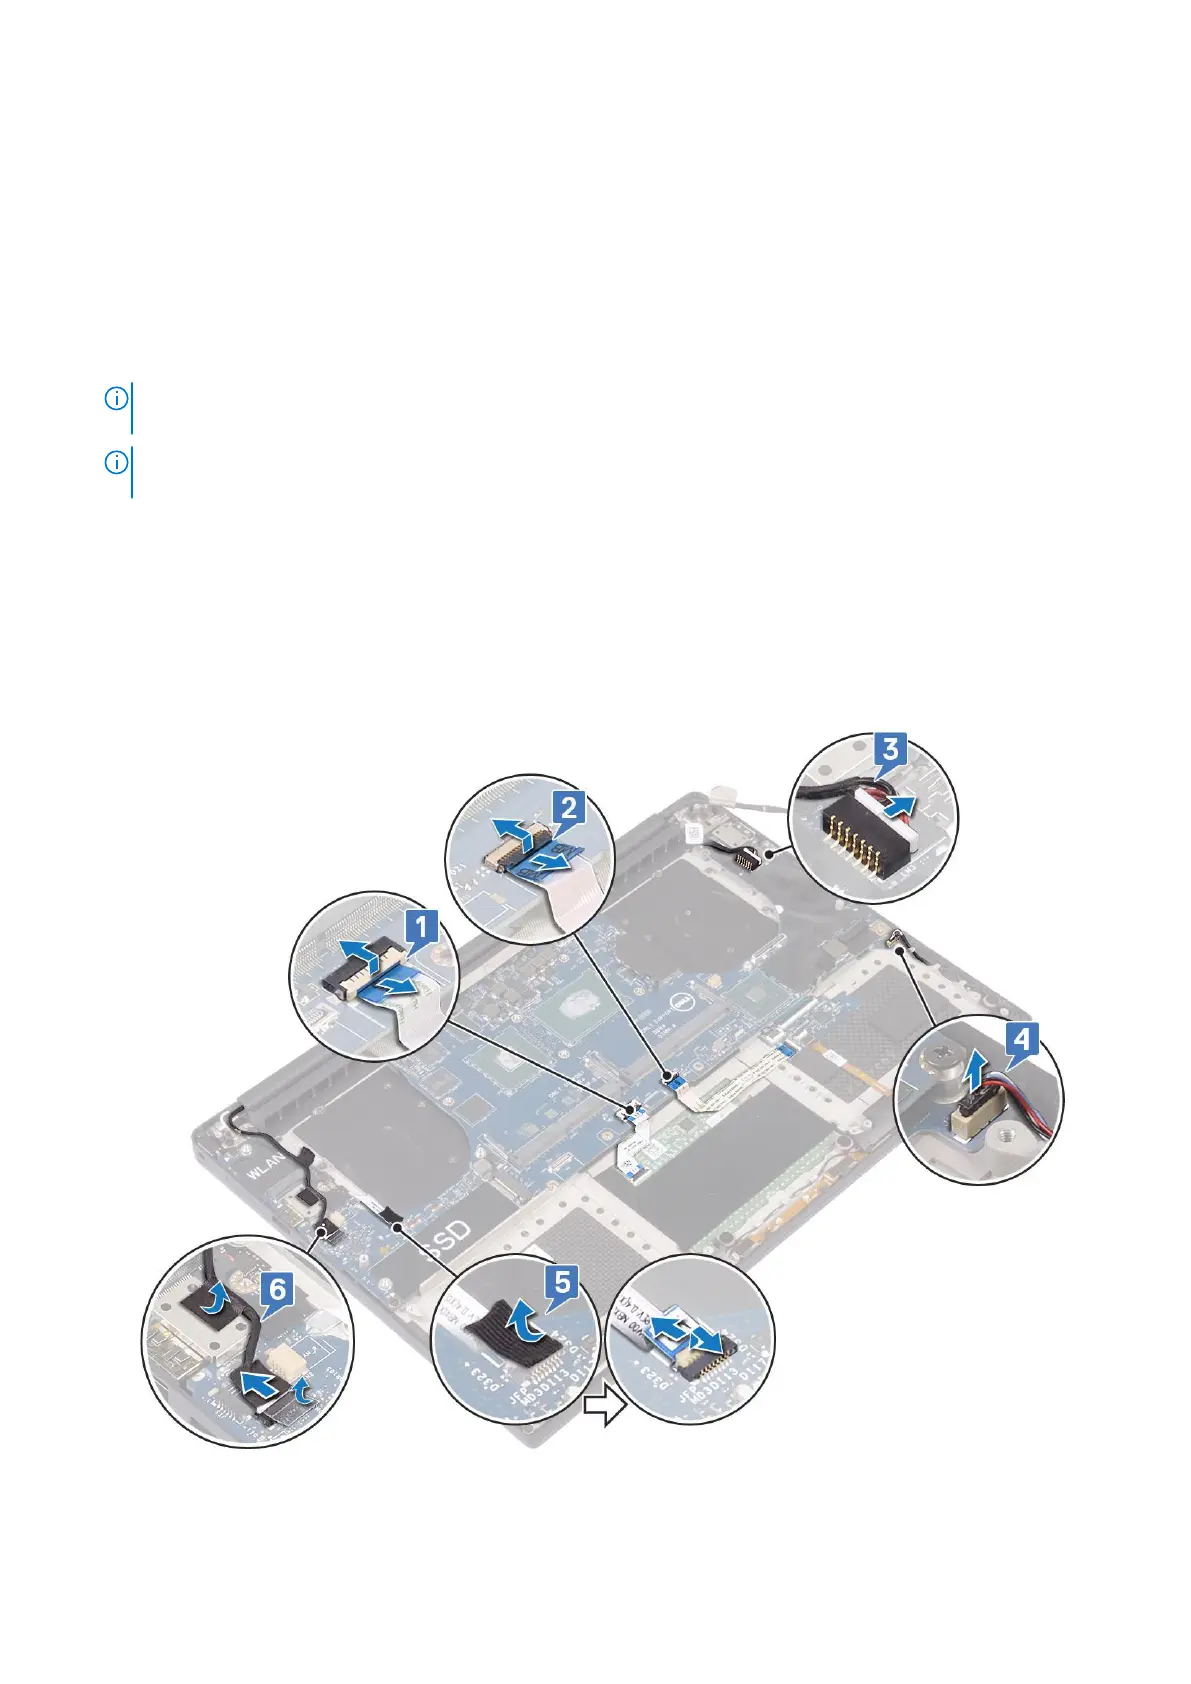
3. To remove the system board:
a. Lift the latch and disconnect the touchpad cable [1].
b. Lift the latch and disconnect the keyboard controller board cable [2].
c. Disconnect the power connector port cable from the system board [3].
d. Disconnect the speaker cable from the connector from the system board [4].
e. Peel the adhesive tape and lift the latch to remove the fingerprint cable [5]
f. Lift the plastic lever and disconnect the display touchscreen cable [6]
g. Peel the adhesive tape to release the touch screen cable.
4. Perform the following steps to remove the system board from the chassis:
a. Remove the M2x4 (4) screws that secure the system board to the computer [1].
32
Disassembly and reassembly