58 Installing System Components
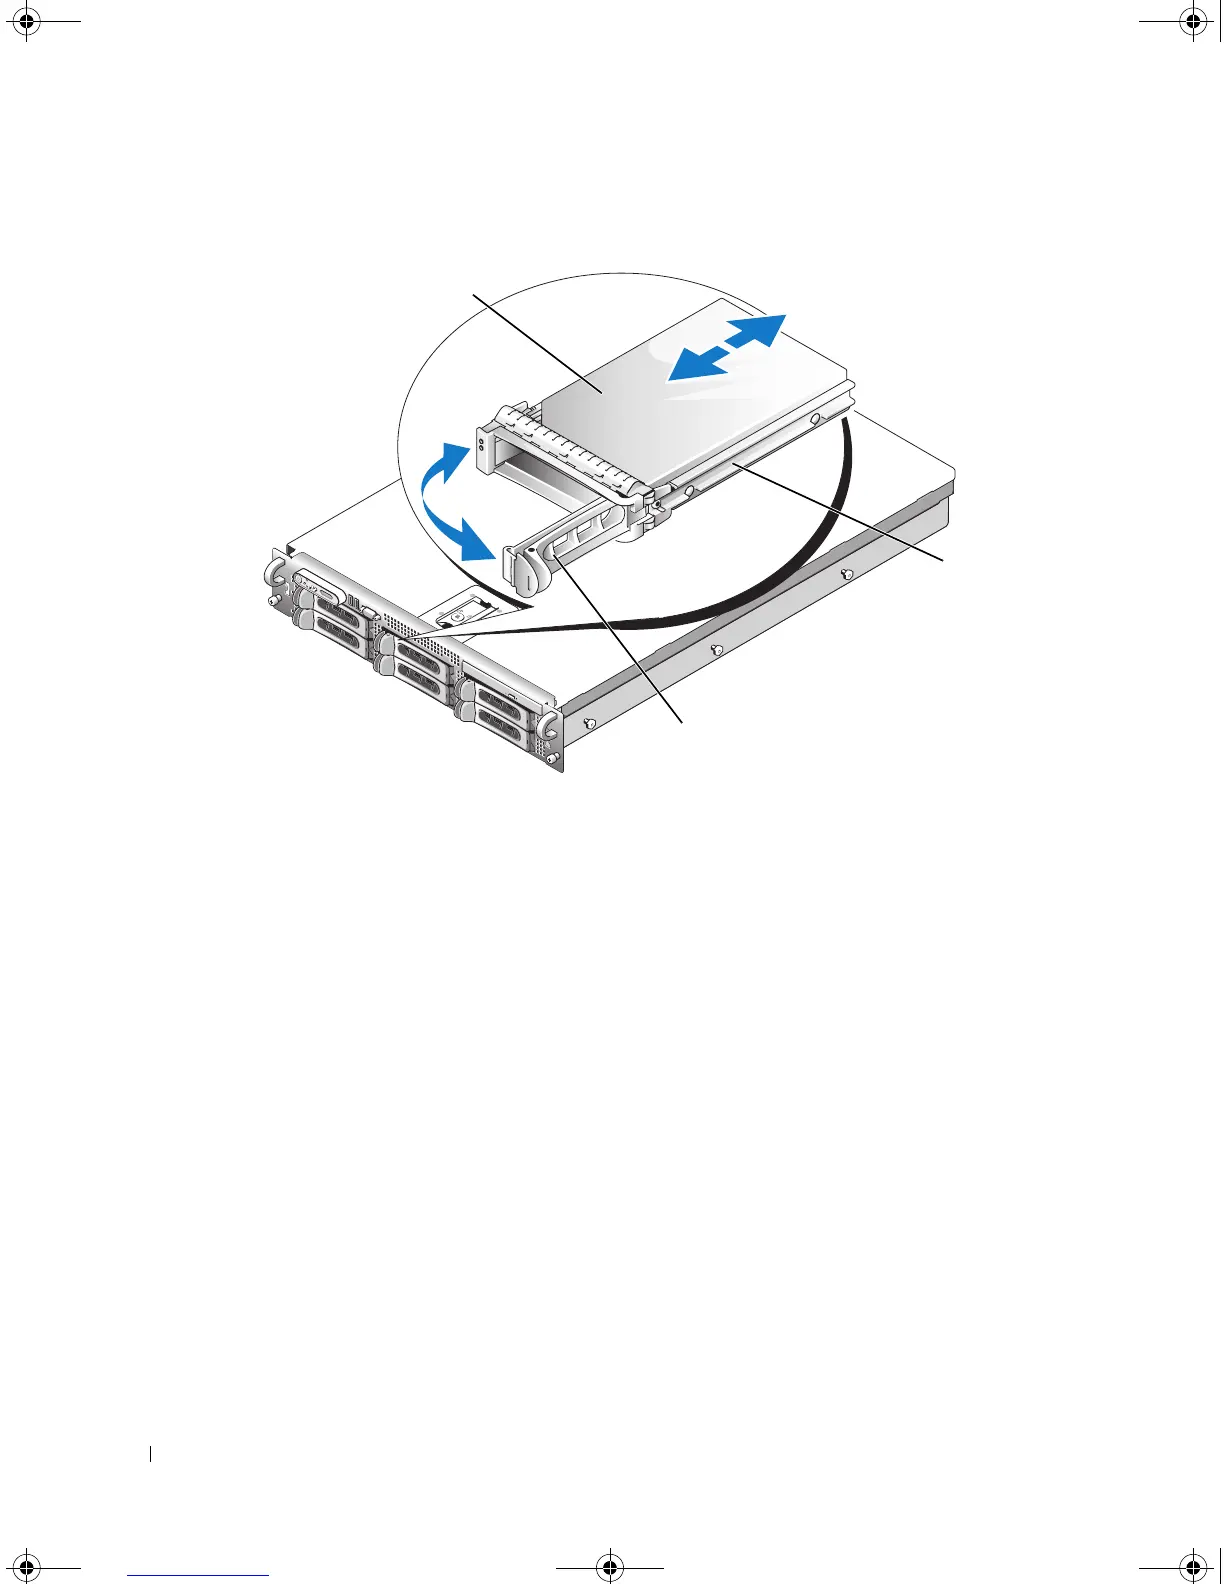
Figure 3-4. Installing a Hot-Plug Hard Drive
b
Insert the hard-drive carrier into the drive bay until the carrier contacts the backplane.
c
Close the handle to lock the drive in place.
4 Replace the front bezel, if it was removed in
step 1.
Replacing a Hard-Drive Carrier
Removing a Hard Drive From a Hard-Drive Carrier
1
If you are removing a SATA hard drive from a SATAu drive carrier, remove the interposer card:
a
Viewing the hard drive carrier from the rear, locate the release lever on the left end of the
interposer card.
b
Push the lever away from the carrier rail to release the left end of the card.
c
Rotate the left end away from the hard drive to release the connector.
d
Pull the right end of the interposer card clear of the slots in the carrier rail.
2
Remove the four screws from the slide rails on the hard-drive carrier and separate the hard drive from
the carrier.
1 hard drive 2 drive carrier 3 drive carrier release handle
3
1
2
Book.book Page 58 Friday, February 3, 2006 11:09 AM