Installing System Components 67
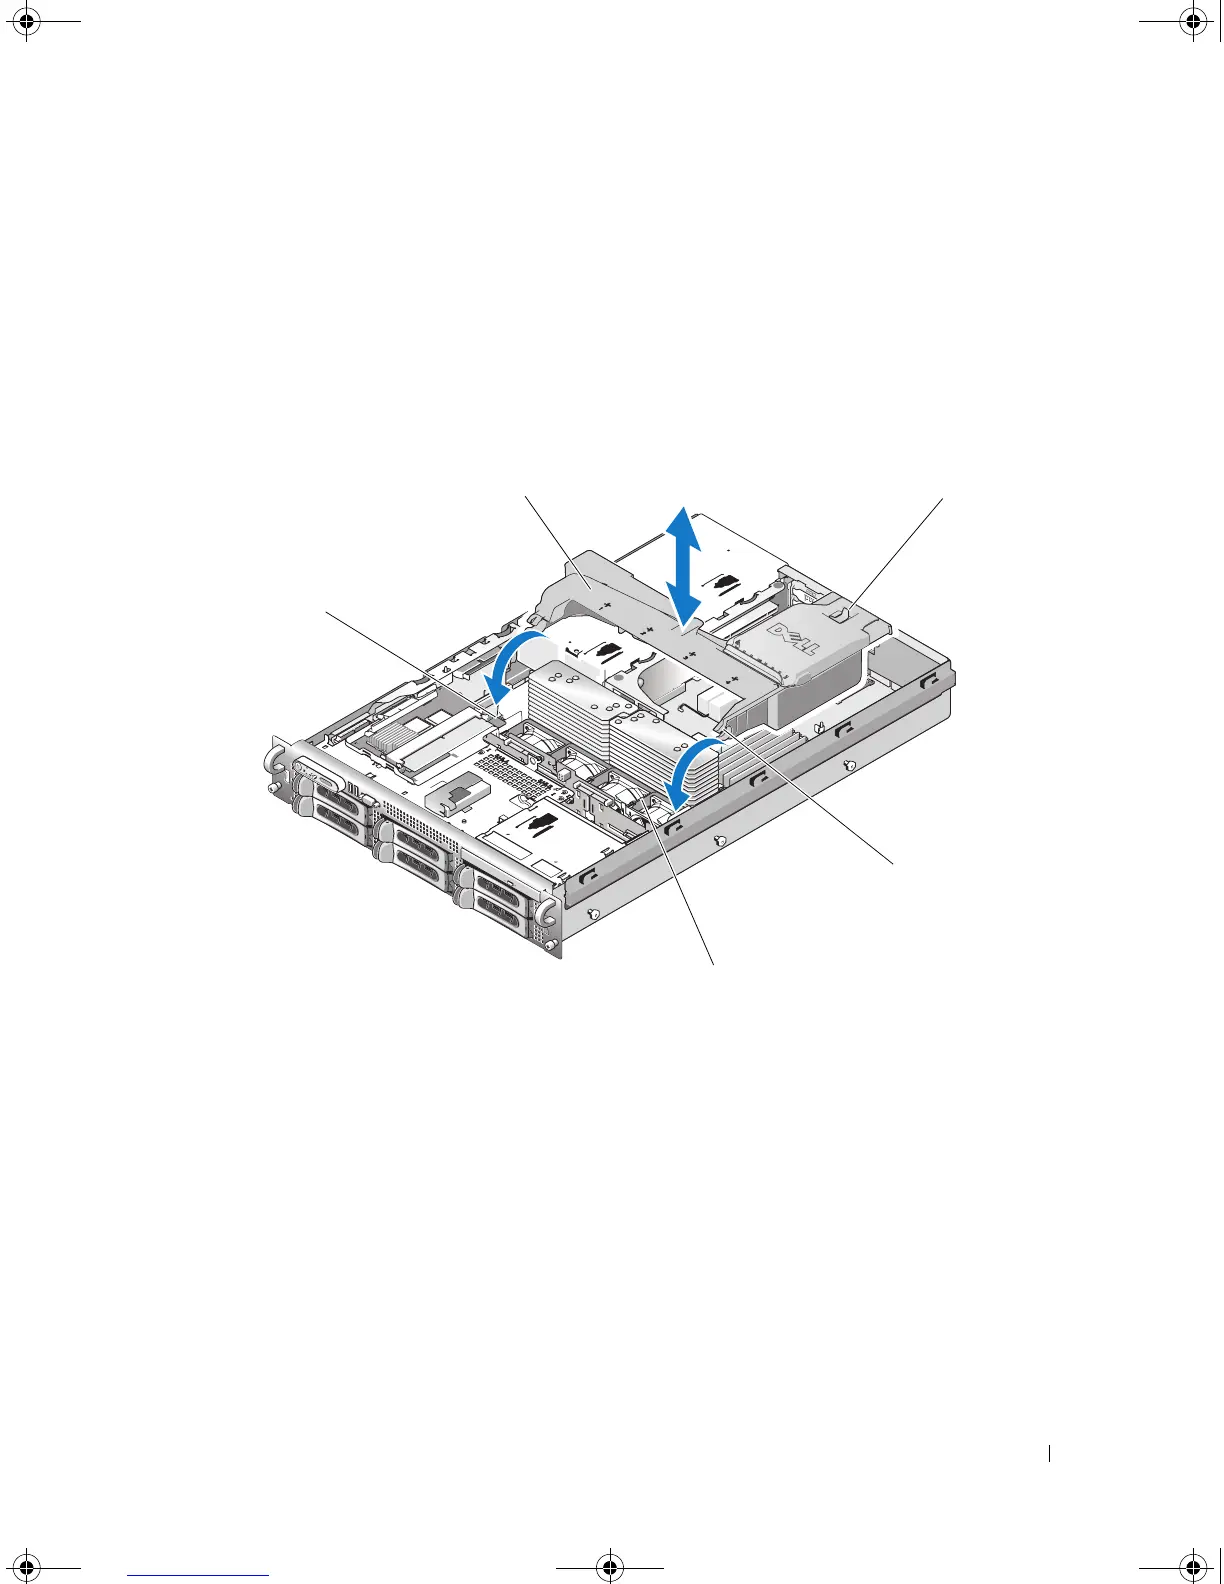
Removing the Cooling Shroud
1
The cooling shroud is secured with a latch at the end of the shroud. Release the latch by pulling it
towards the outside wall of the chassis. See Figure 3-10.
2
Rotate the shroud upward and toward the front of the system on its hinges, and then lift the shroud
out of the system.
Figure 3-10. Removing and Installing the Cooling Shroud
Installing the Cooling Shroud
1
Align the hinges on the shroud pivots located on either end of the fan bracket. See Figure 3-10.
2
Slowly lower the shroud straight down into the system until the fan connector engages and the latches
snap into place.
1 shroud pivots (2) 2 cooling shroud 3 release latch
4 shroud hinges (2) 5 fan bracket
1
3
4
2
5
Book.book Page 67 Friday, February 3, 2006 11:09 AM